

How to Accept Monero for your Services with BTCPayServer [Manual Deployment]

Monero, along with Bitcoin, is a powerful tool for accepting payments for your products and services. Doing so in a sovereign way is incredibly important in order to preserve your freedom from government overreach.
I have been trying to set up Monero support for my BTCPayServer ever since the Monero implementation became available a few years ago, but to no avail. I know that manual deployment is not recommended for production, but I have never been a big fan of Docker. Additionally, I have been running all my crypto nodes outside of Docker for a long time and didn't feel like hacking it to make them work with a dockerized BTCPay.
Reverse engineering the Docker part of BTCPay is relatively simple, and I had this set up for years. However, I always struggled with the wallet aspect. Recently, I came across Seth's tutorial on how to set up Monero with BTCPayServer via Docker, and finally learned how to deal with the missing pieces. Thanks Seth!
Ideally, you will have followed my previous guides, How to Install and Set up a Full Monero Node on Linux and How to Setup a BTC and Lightning Payment Gateway with BTCPayServer on Linux [Manual Install], for the least painful way to set everything up. However, if you pay attention, you can adapt this tutorial to your own setup.
Configure Monero node
First, we need to edit the node's settings to allow unrestricted RPC use. (Un)surprisingly, I had no luck running wallet RPC with restricted-rpc=1. Let's check whether the node is properly set up:
cat ~/.bitmonero/monerod.conf | grep restricted-rpc=1
Comment or delete the line if it exists, using your favorite text editor. I use Vim.
vim ~/.bitmonero/monerod.conf
Please check the path for curl that is needed to notify BTCPayServer of new blocks and transactions, and save it for later use:
which curl
Open monerod.service:
sudo vim /lib/systemd/system/monerod.service
Edit ExecStart so that it looks like the following:
ExecStart=/usr/local/bin/monerod --non-interactive --confirm-external-bind \
    --config-file /home/satoshi/.bitmonero/monerod.conf --detach \
    --pidfile /home/satoshi/.bitmonero/monerod.pid --prune-blockchain \
    --block-notify="/usr/bin/curl -X GET http://127.0.0.1:23001/monerolikedaemoncallback/block?cryptoCode=xmr&hash=%s"
Change /home/satoshi and /usr/bin/curl to match your environment.
Flags --prune-blockchain and --confirm-external-bind are optional depending on your setup.
Reload systemd after making changes to systemd services:
sudo systemctl daemon-reload
Configure BTCPayServer to Support Monero
Before you can run Monero on BTCPay, you need to first build it with the altcoin support.
Go to the BTCPay code's directory:
cd ~/source/btcpayserverand enable altcoins:
dotnet publish --configuration Altcoins-ReleaseInstead of running BTCPay via ./run.sh, you will now run it with the following command:
dotnet run --no-launch-profile --no-build -c Altcoins-Release --project "BTCPayServer/BTCPayServer.csproj" -- $@Similarly, in order to run it with altcoin support via Systemd, you need to add the above command to ExecStart in /lib/systemd/system/btcpayserver.service:
ExecStart=dotnet run --no-launch-profile --no-build -c Altcoins-Release --project "BTCPayServer/BTCPayServer.csproj" -- $@Next, create a folder for your Monero wallets if it does not already exist:
mkdir -p ~/.bitmonero/wallets
Edit BTCPay config:
vim ~/.btcpayserver/Main/settings.config
and make sure it contains the following:
chains=btc,xmr
...
XMR_daemon_uri=http://0.0.0.0:18081
XMR_wallet_daemon_uri=http://127.0.0.1:18082
XMR_wallet_daemon_walletdir=~/.bitmonero/wallets
# Only use username and password if node's RPC is password protected
XMR_daemon_username=<monero node RPC username>
XMR_daemon_password=<monero node RPC password>
Edit the values according to your setup, especially the XMR_daemon_uri and XMR_wallet_daemon_walletdir. XMR_daemon_username and XMR_daemon_password are optional. Only use them when the node's RPC is password protected.
Restart the BTCPayServer service:
sudo service btcpayserver restart
Create and setup Monero Wallet
In the following couple of steps, we will create a Monero view-only wallet for extra security and connect it with BTCPayServer. BTCPay will not have spending permissions for the wallet. You will only be able to spend from the wallet on your local computer.
Create a view-only Monero Wallet with Feather
This is where Seth's guide helped me to understand how Monero wallet connects with BTCPayServer. Thanks again, Seth!
Before you start, download the Feather wallet for your desktop.
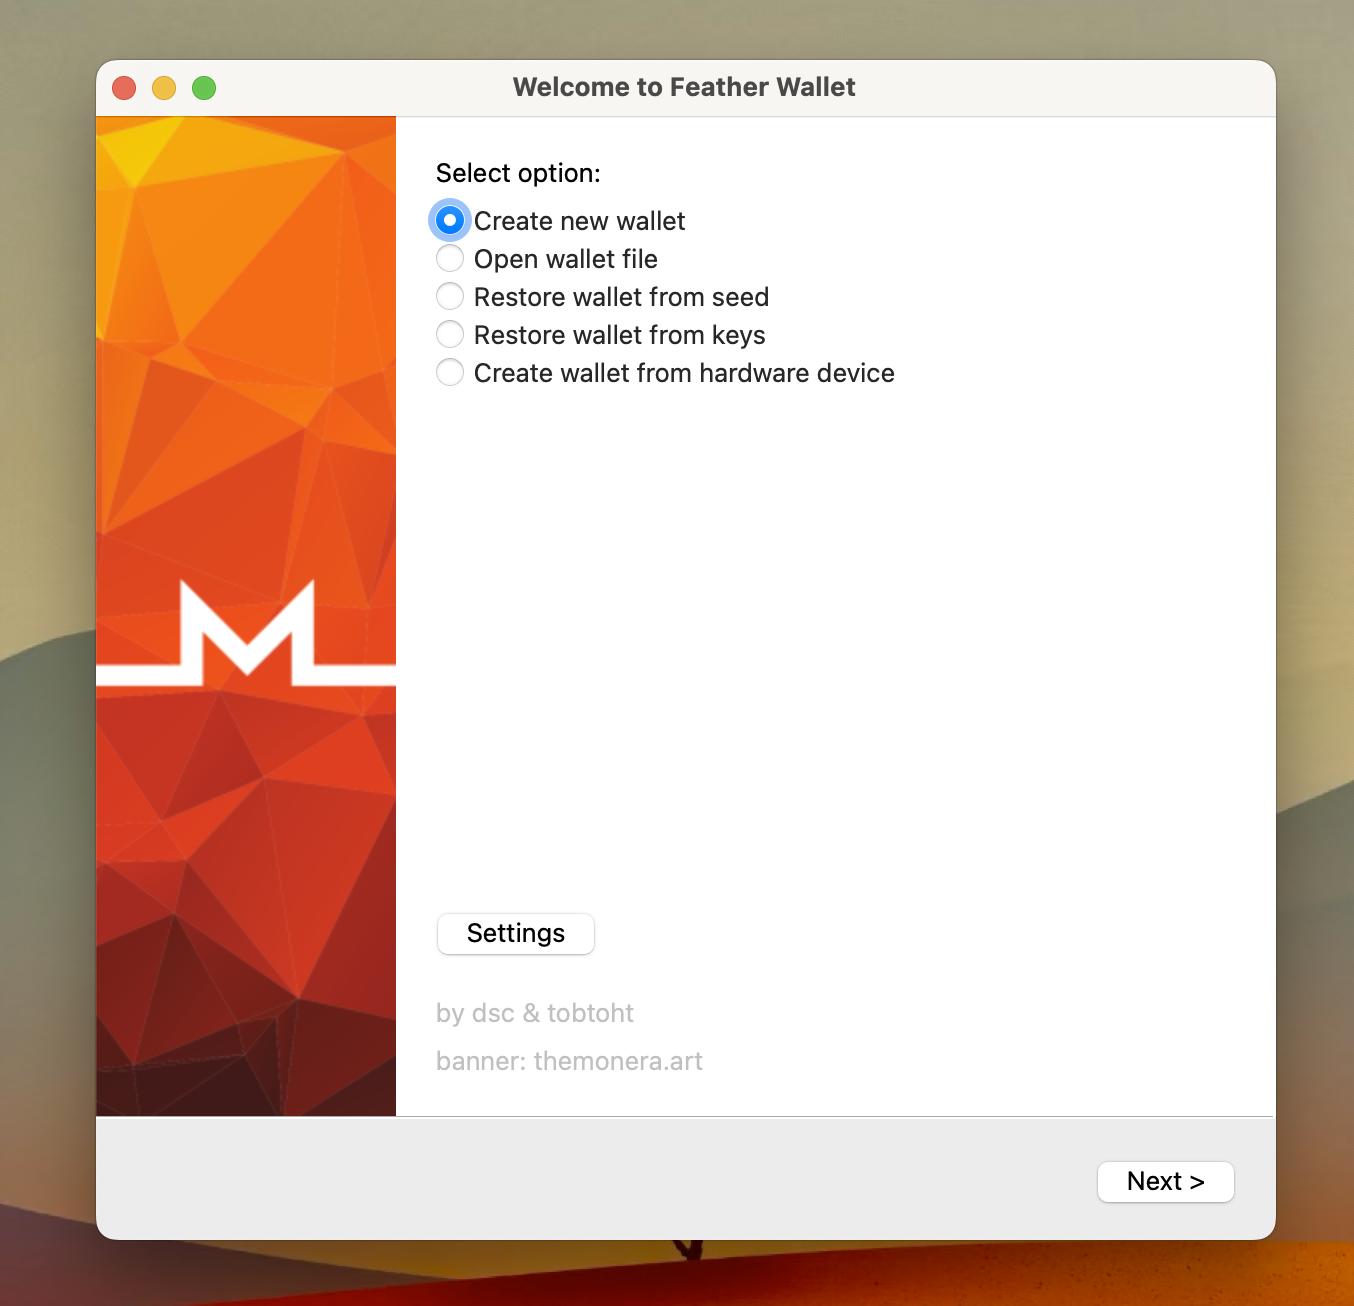
#1 Create a new wallet.
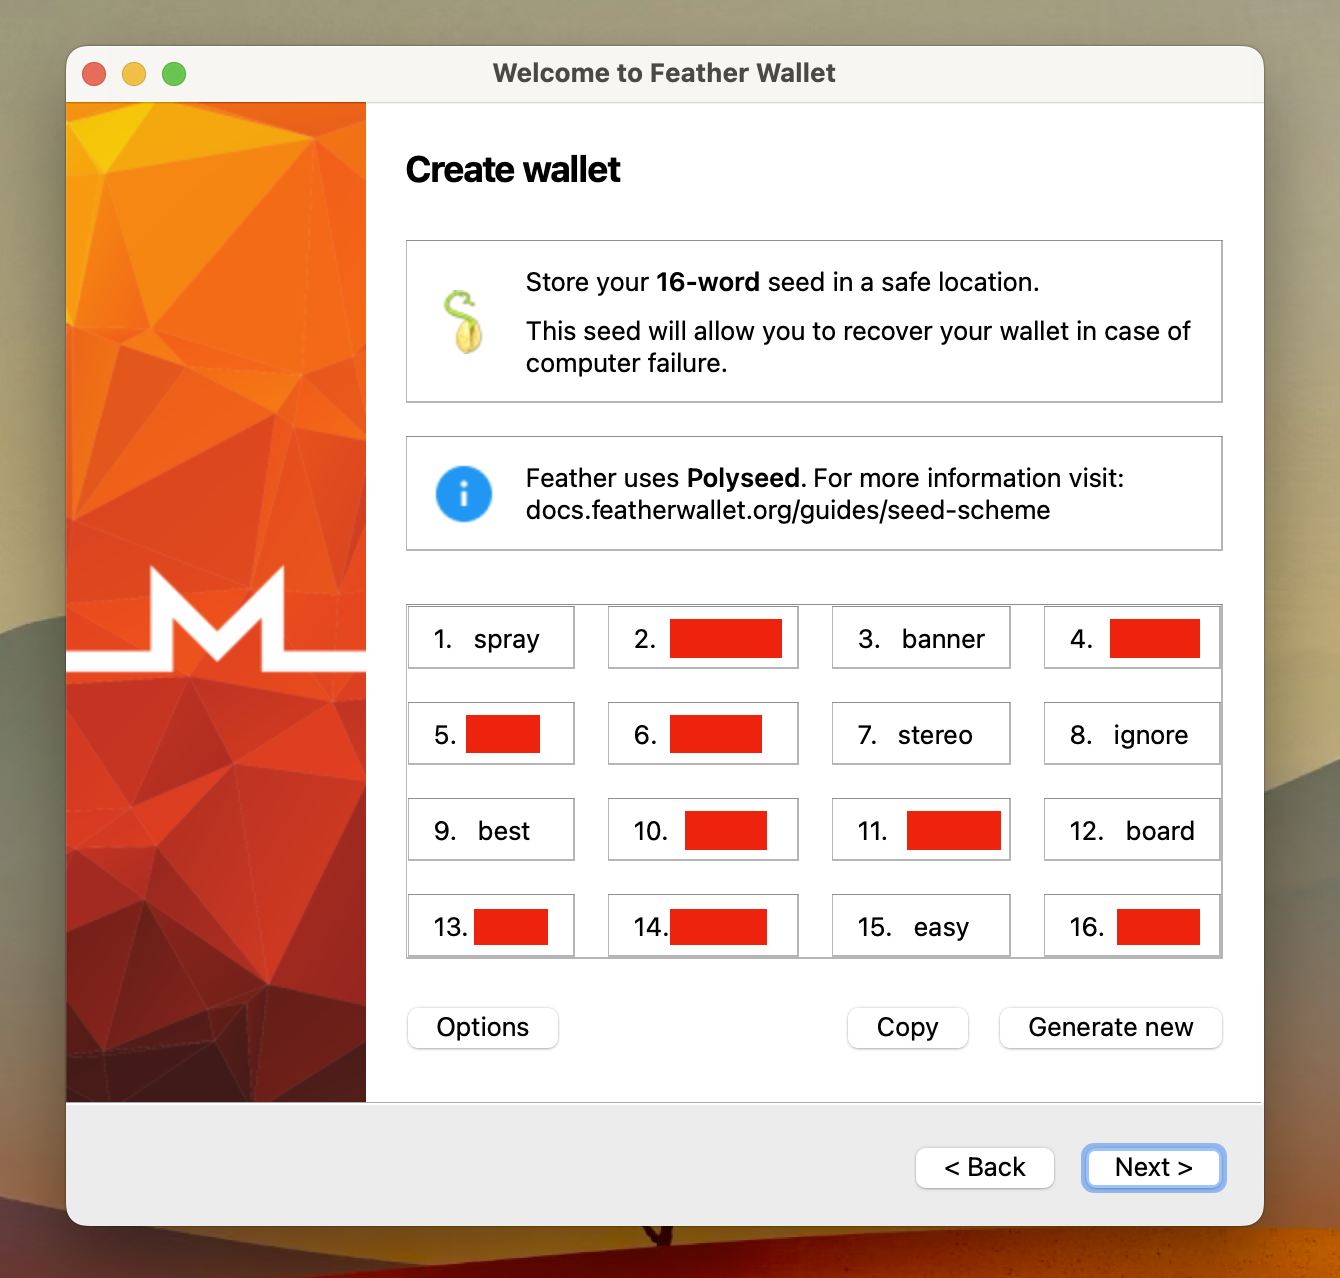
#2 Please write down the seed on a piece of paper and store it somewhere safe.
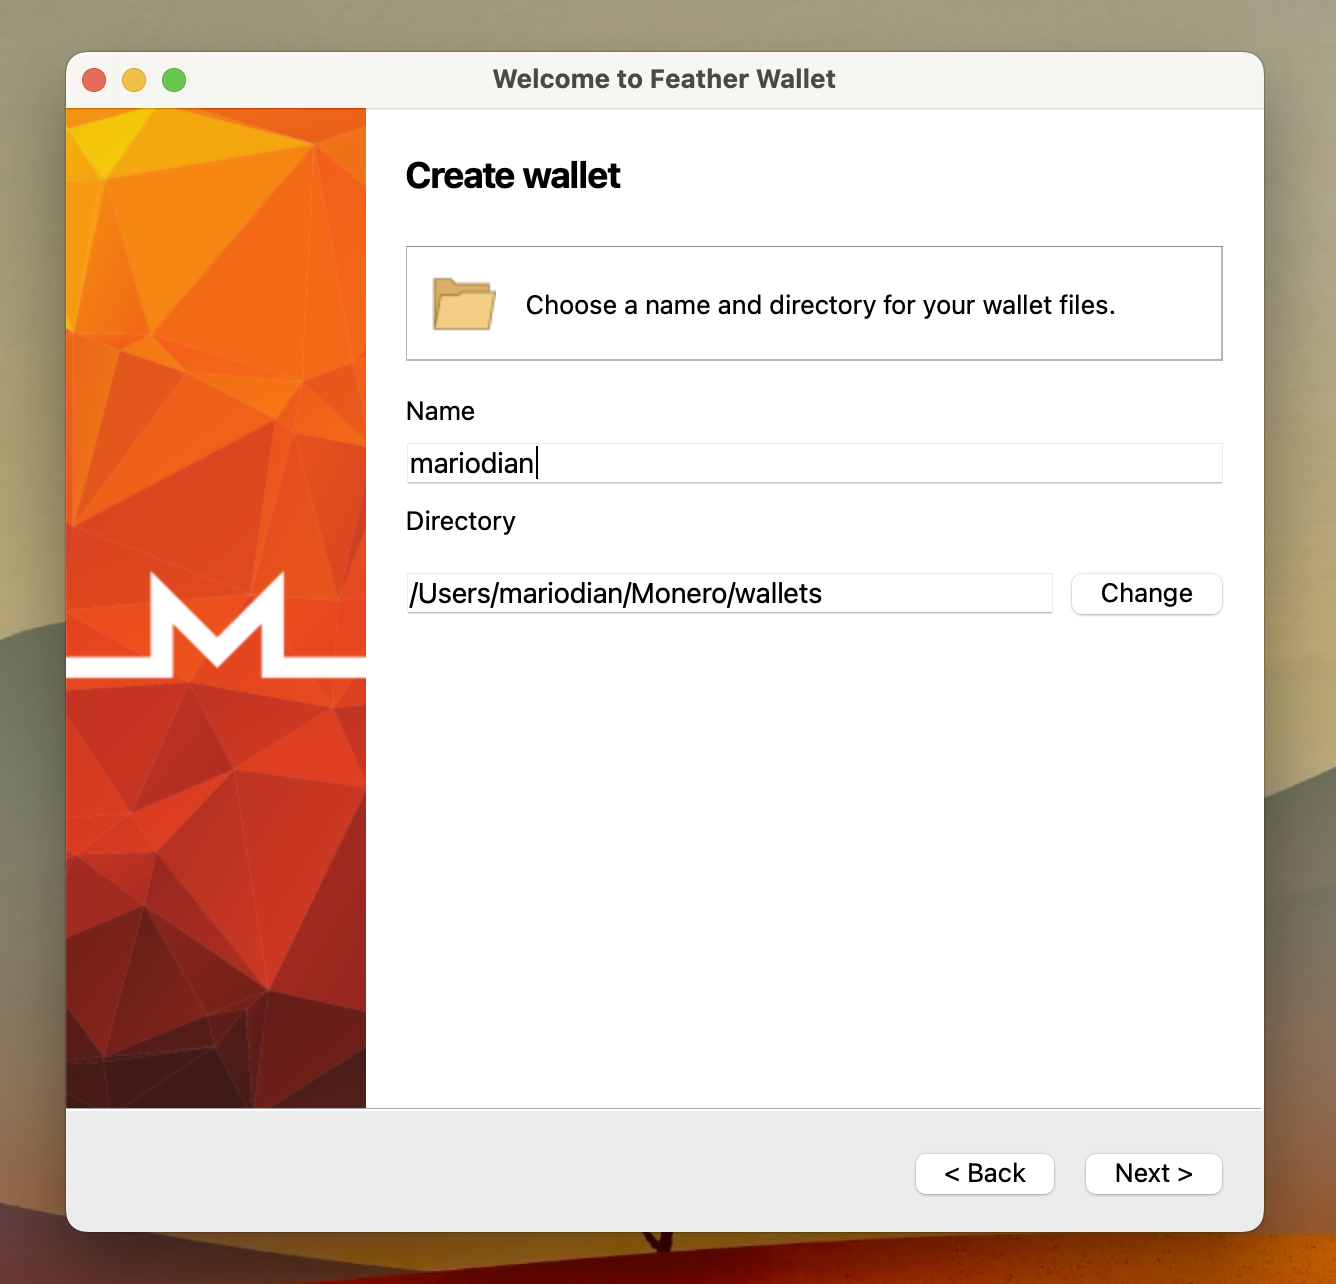
#3 Choose a name for your wallet.
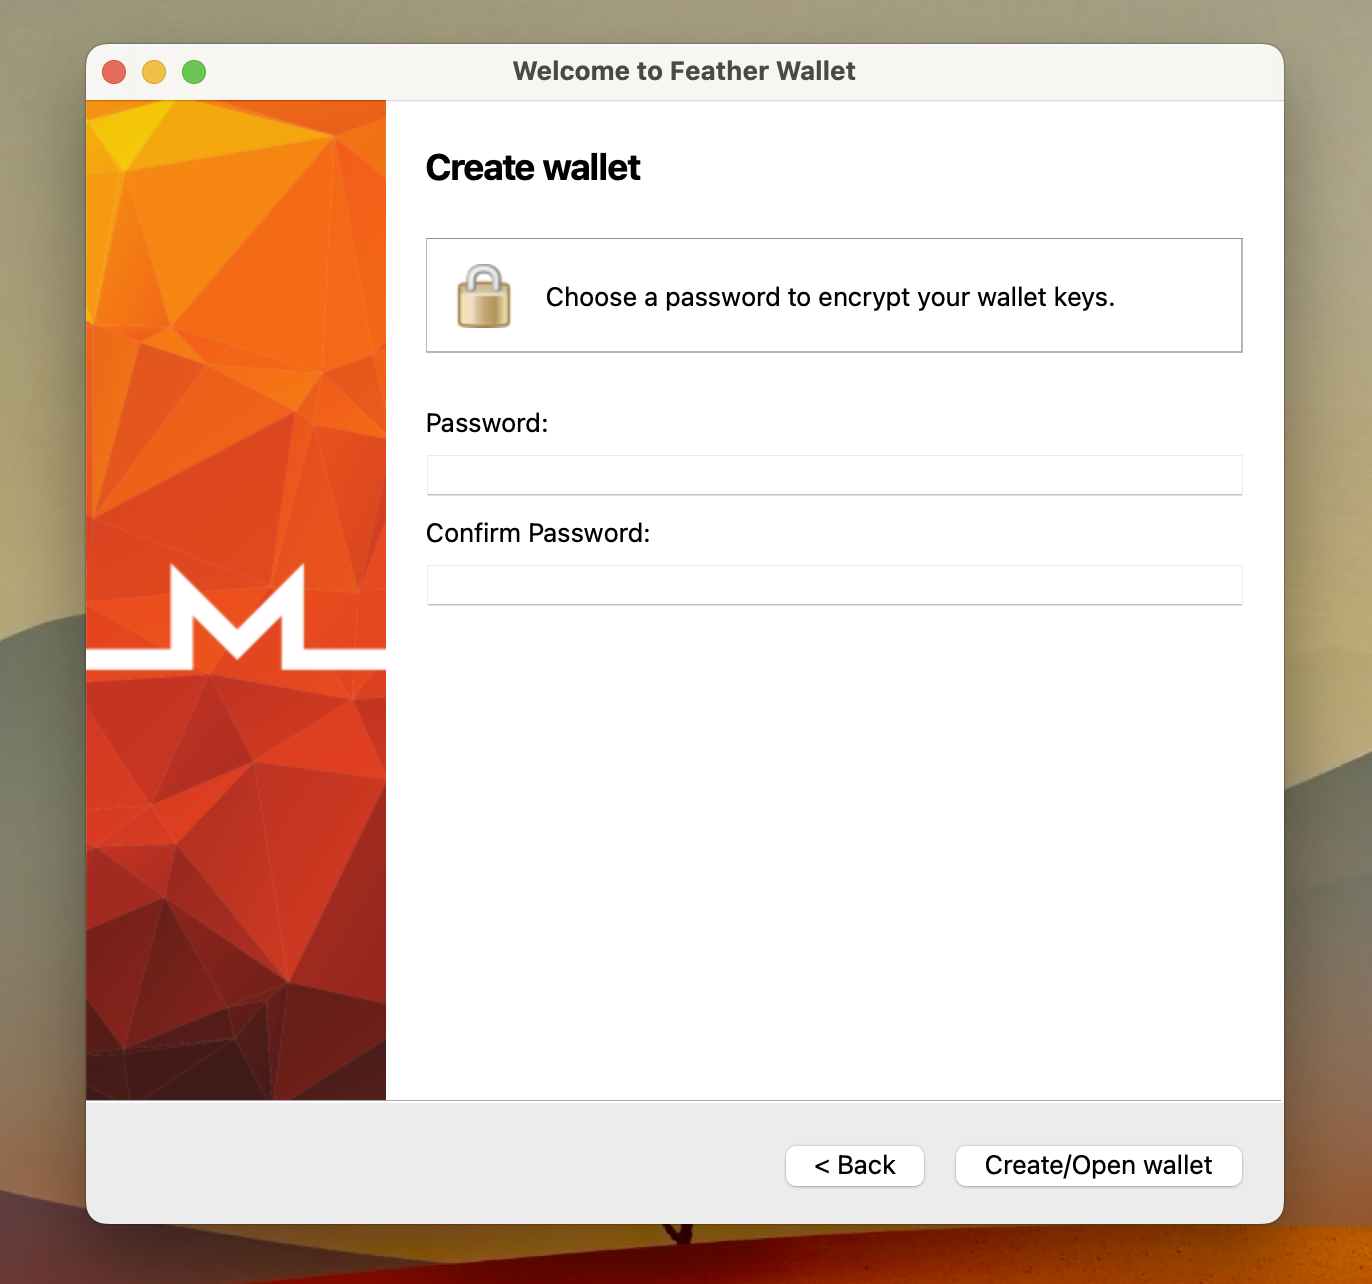
#4 Set up a password for your wallet.
Note: This is a password for the main wallet that you will NOT be using with BTCPayServer.
#5 Connect to your own Monero node. This step is optional, but since you're already running it, why not use it? Click Add custom node(s) and enter your node details.

#6 To create a view-only wallet, follow these steps:
- Click on Wallet in the menu
- Select View-Only from the drop-down options.
- Choose Create view-only wallet from the available choices.

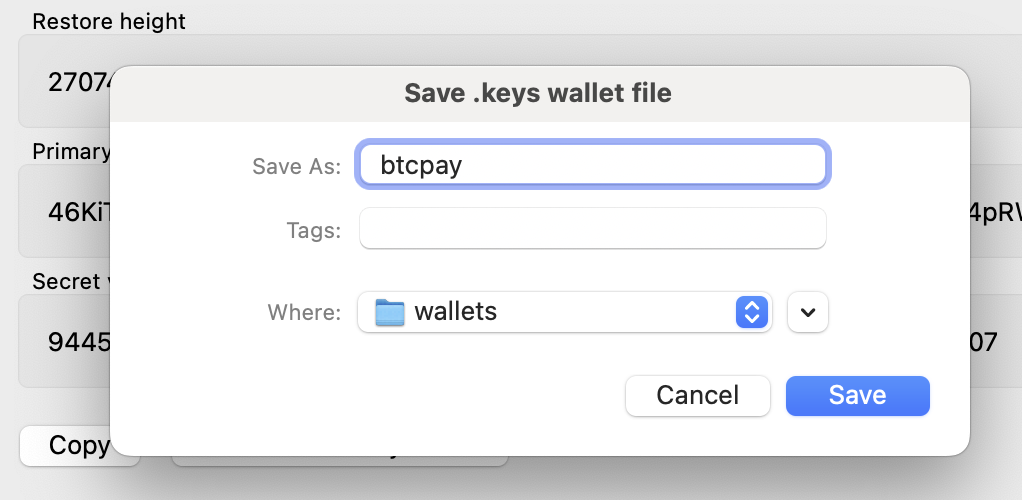
#7 Name the view-only wallet and click Save.
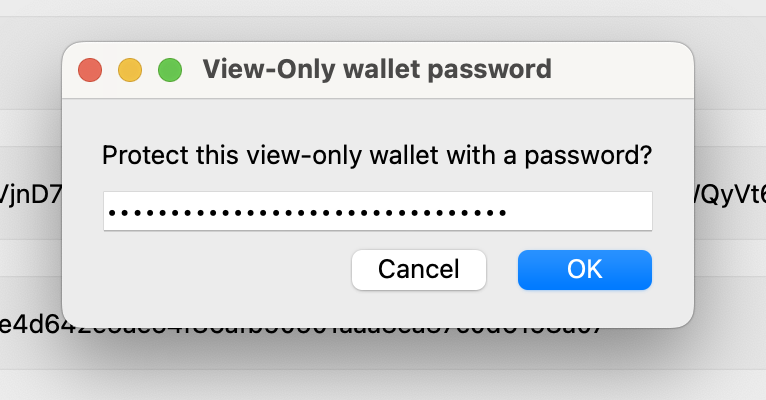
#8 Set a strong password for the wallet. This is the password that will be used with BTCPayServer.
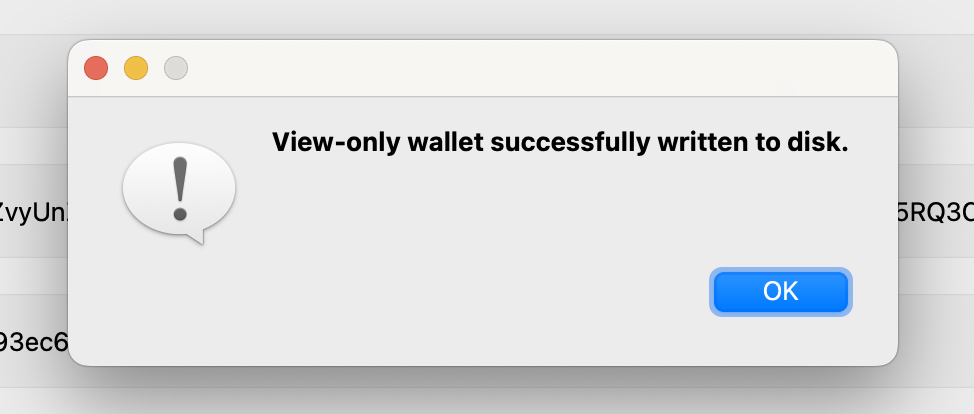
#9 Wallet has been created successfully!
Upload Monero Wallet to BTCPayServer
Go to your BTCPayServer Admin, and you will see Monero under the existing store's Settings. If you have not created a store yet, please follow the official documentation.
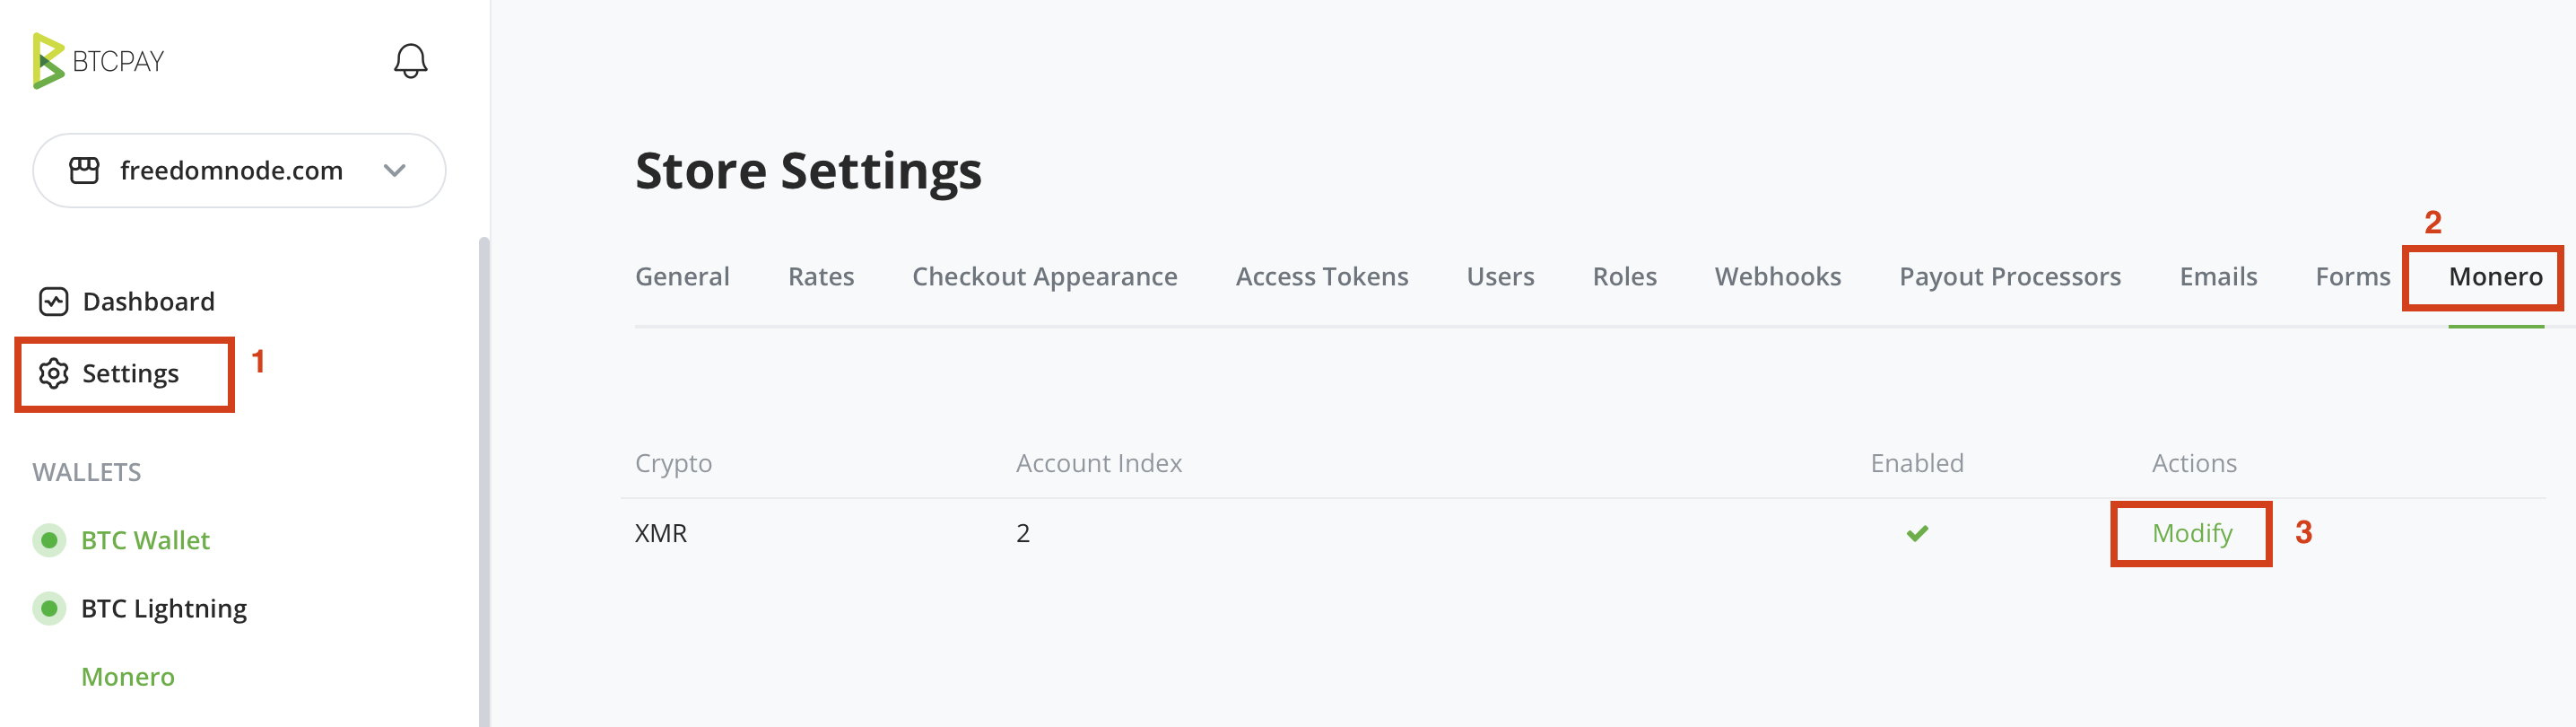
Click Modify , select both the View-Only Wallet File and WalletKeysFile that you created earlier, type in the wallet's password and click Upload.
Please check if the wallet has been uploaded correctly. You should see the password, wallet, and wallet.keys files:
$ ls -l
total 3720
-rw-rw-rw- 1 ubuntu ubuntu      32 Aug 20 10:44 password
-rw------- 1 ubuntu ubuntu 3794055 Aug 20 11:38 wallet
-rw-rw-rw- 1 ubuntu ubuntu    1657 Aug 20 10:44 wallet.keys
Configure Monero Wallet RPC
Check if you already have monero-wallet-rpc installed:
which monero-wallet-rpc
If not, either copy the binary from when you last built the Monero node:
sudo cp ~/source/build/release/bin/monero-wallet-rpc /usr/local/bin/
or use built binaries from the Monero project. Please follow these steps:
- Go to the releases page
- Copy the correct link for your operating system and the desired node version (in this case the latest 0.18.2.2) from the Official Download Links section.
- Paste it in the command below.
- Unpack the archive.
- Copy the binary to your system.
cd /tmp
wget https://downloads.getmonero.org/cli/monero-linux-x64-v0.18.2.2.tar.bz2
tar -xvf monero-linux-x64-v0.18.2.2.tar.bz2
sudo cp monero-wallet-rpc /usr/local/bin/
Test to see whether the wallet RPC is running correctly:
/usr/local/bin/monero-wallet-rpc --rpc-bind-ip=127.0.0.1 --disable-rpc-login \
    --rpc-bind-port=18082 --non-interactive --trusted-daemon \
	--daemon-address=0.0.0.0:18081 --daemon-login <monero node RPC username>:<monero node RPC password> \
	--wallet-file=/home/satoshi/.bitmonero/wallets/wallet \
    --password-file=/home/satoshi/.bitmonero/wallets/password \
	--tx-notify="/usr/bin/curl -X GET http://127.0.0.1:23001/monerolikedaemoncallback/tx?cryptoCode=xmr&hash=%s"
Again, ensure that you change /home/satoshi and /usr/bin/curl according to the environment of your system. You should see a similar output:
This is the RPC monero wallet. It needs to connect to a monero
daemon to work correctly.

Monero 'Fluorine Fermi' (v0.18.2.2-release)
Logging to /home/satoshi/monero-wallet-rpc.log
2023-08-22 03:53:27.790	W Loading wallet...
2023-08-22 03:53:29.109	W Loaded wallet keys file, with public address: 46KiTRAhbm4DEQZvyUnZkVjnD7e1Jpp9nJa5Fb96kHePZrPmE51EeusiNYwc4pRWedWQyVt6J5RQ3CPuxL96LoRN4NBMtiR
2023-08-22 03:53:30.431	I Binding on 127.0.0.1 (IPv4):18082
2023-08-22 03:53:32.689	W Starting wallet RPC server
Hit ctrl + q to quit the app.
Please download the systemd service file that I created for this tutorial:
cd /lib/systemd/system
sudo wget https://gist.githubusercontent.com/mariodian/cc2e986aed36d7c1ebc5a0e1558049c7/raw/d29ff91f7e818aff62fd2f5ce310afb4c8061d79/monero-wallet-rpc.service
sudo chmod 644 monero-wallet-rpc.service
You may need to change the paths, user, and group to match your system. Once everything is correctly set up, enable and start the service:
sudo systemctl enable monero-wallet-rpc
sudo service monero-wallet-rpc start
Check to see if it runs correctly:
sudo service monero-wallet-rpc status
Test the Wallet Settings in BTCPayServer
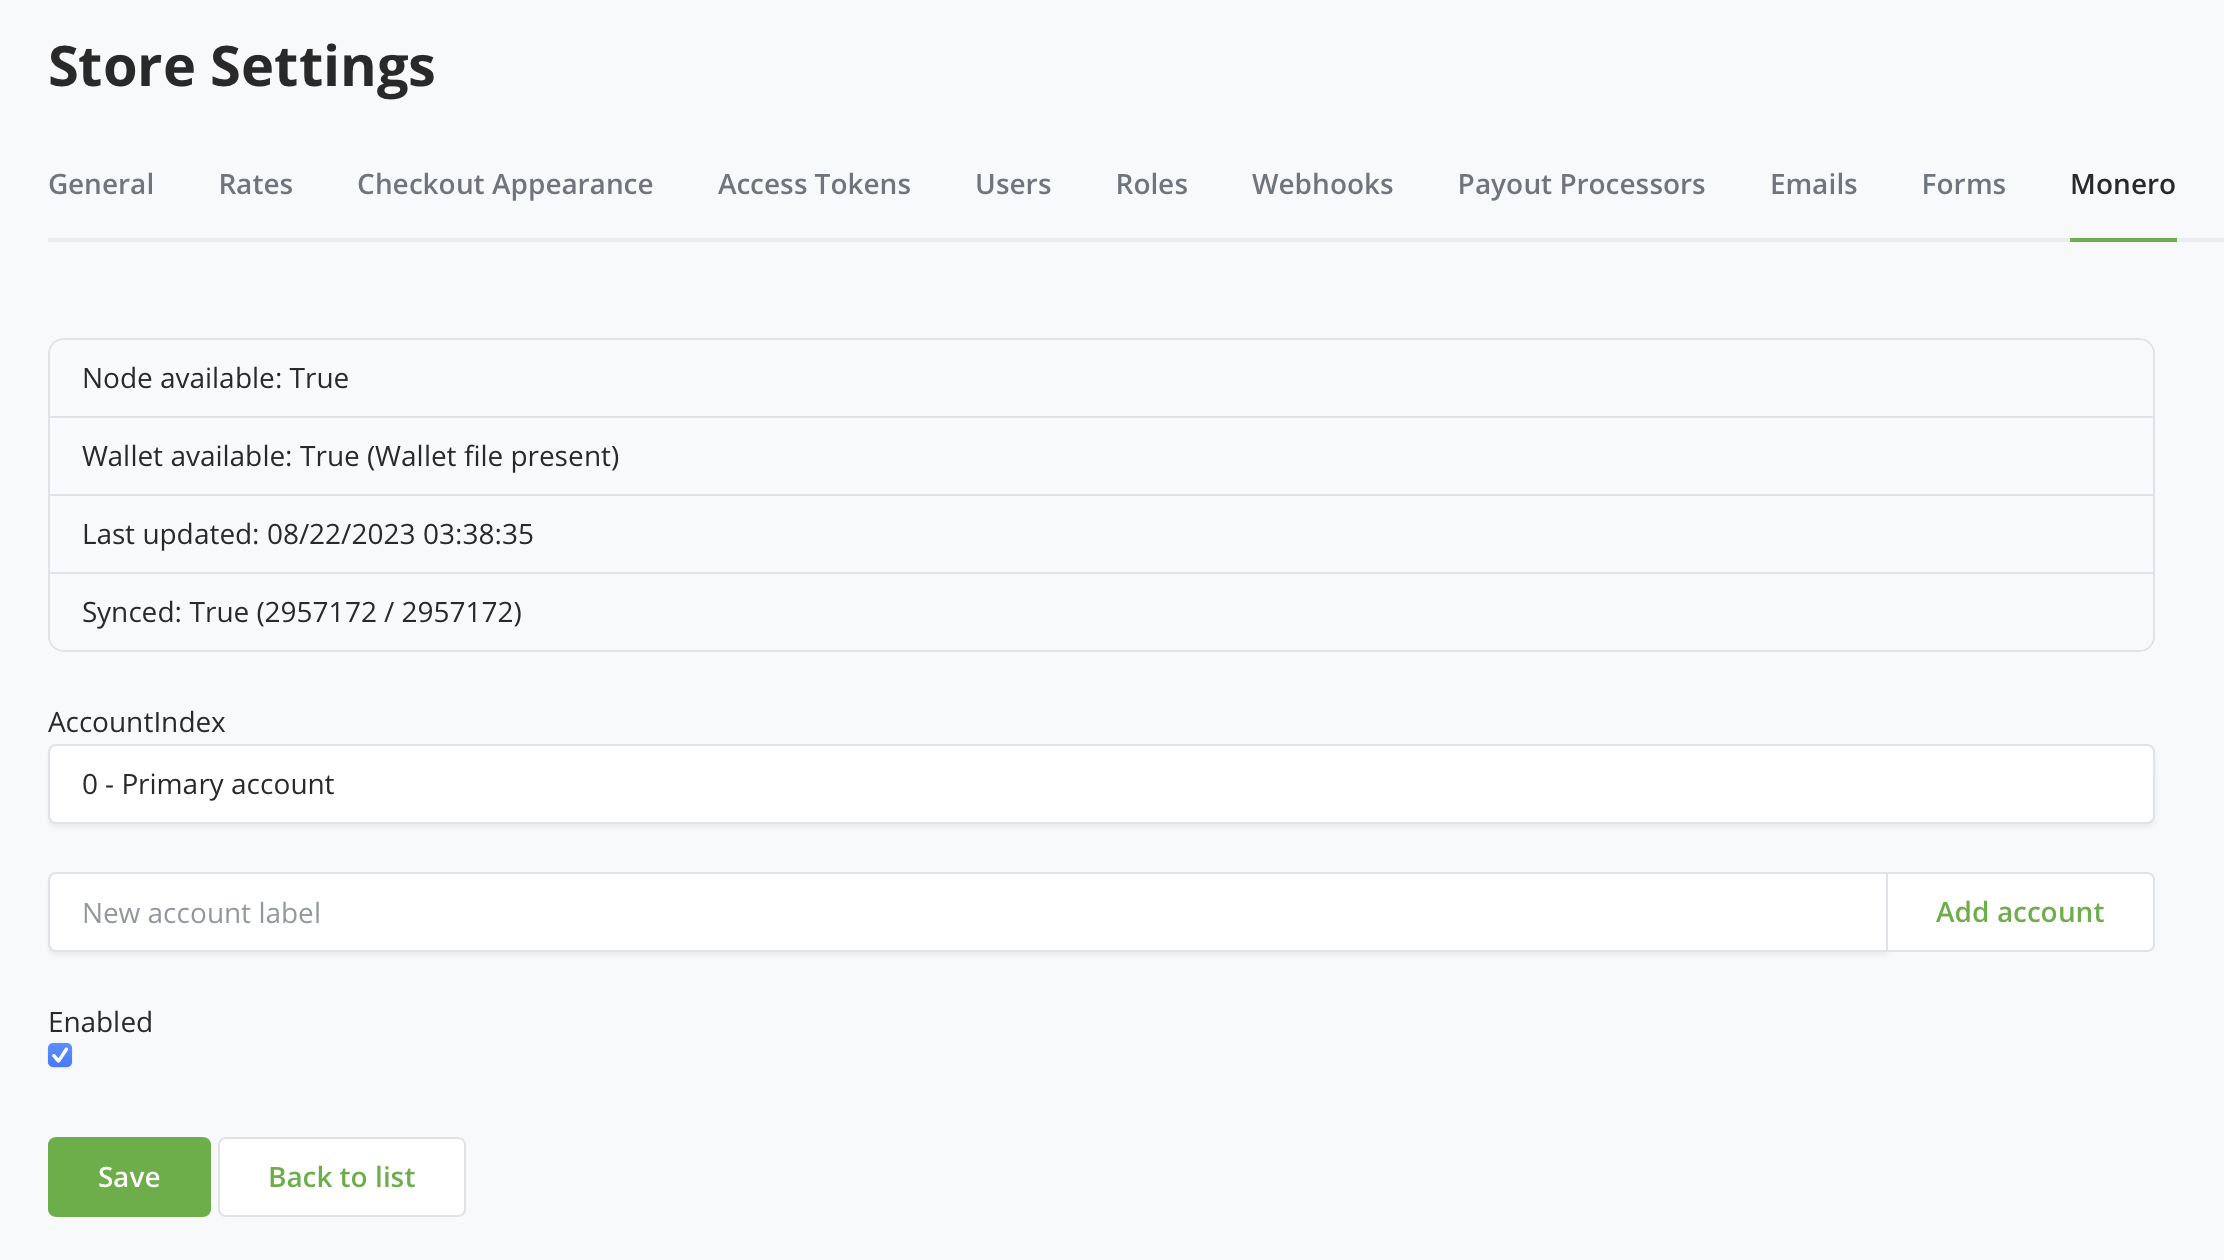
To proceed, go back to BTCPayServer Admin, then navigate to Settings, followed by Monero, and click on Modify. Ensure that Node, Wallet, and Synced are all set to "True".
Now, if you haven't already, create a Point of Sale App from the sidebar on the right. After creating it, open the app and check if the checkout page displays payment details under the Monero tab.
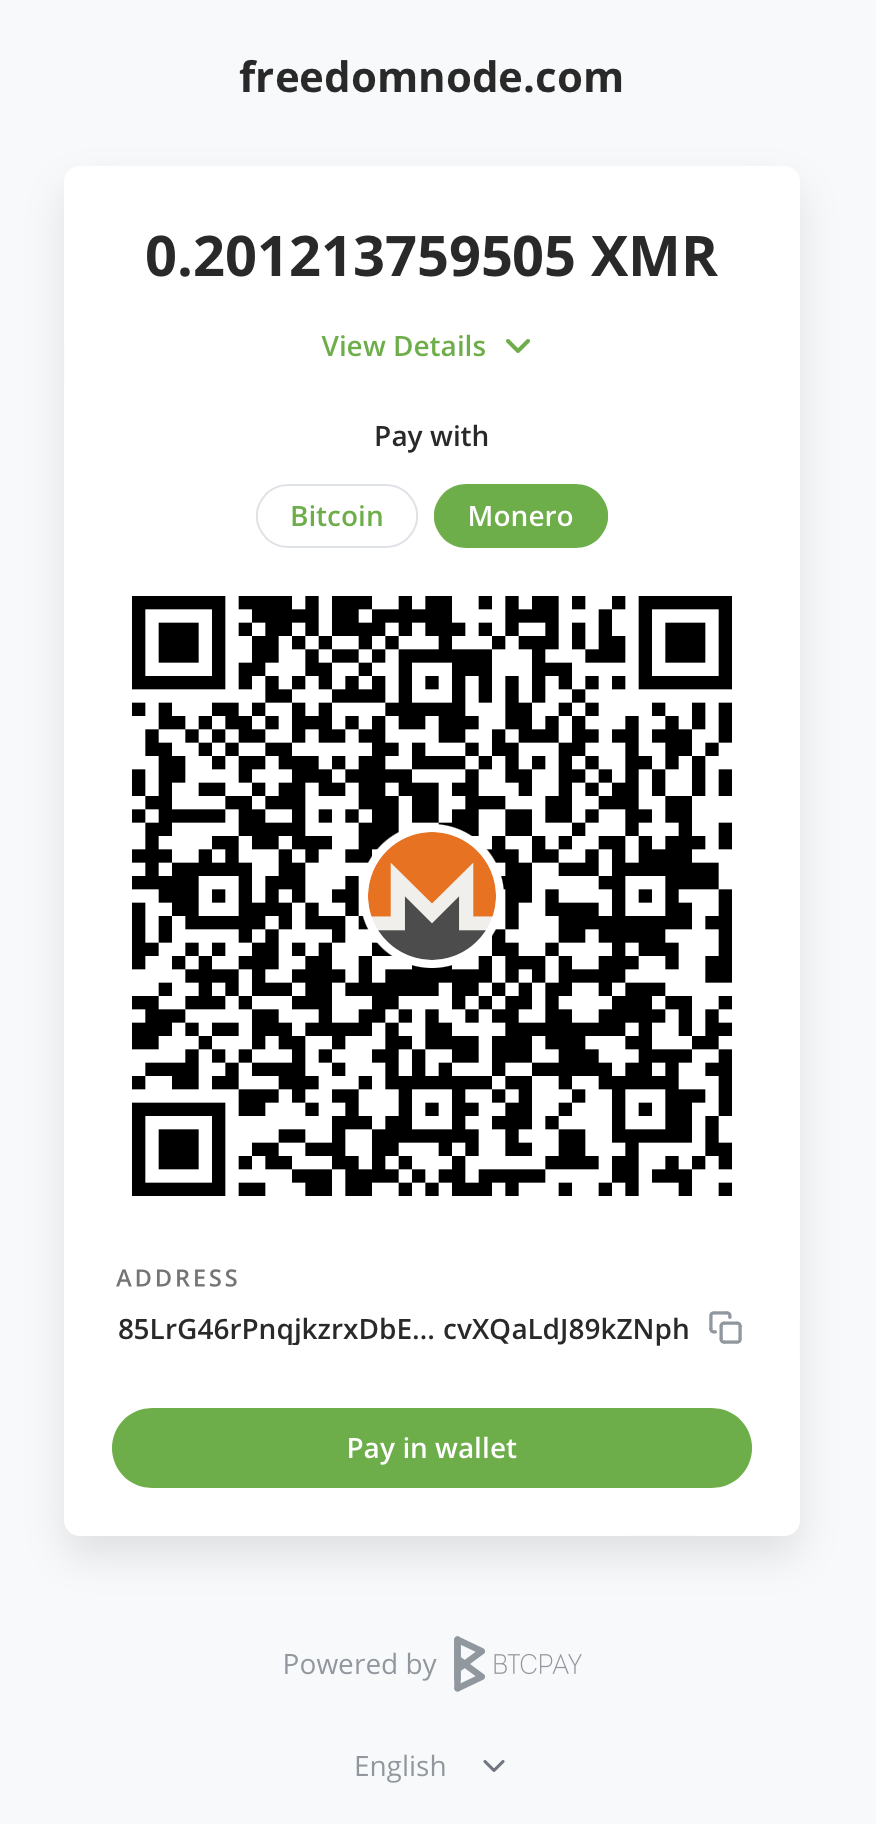
If it does, congratulations! You can now accept Monero for your products and services!
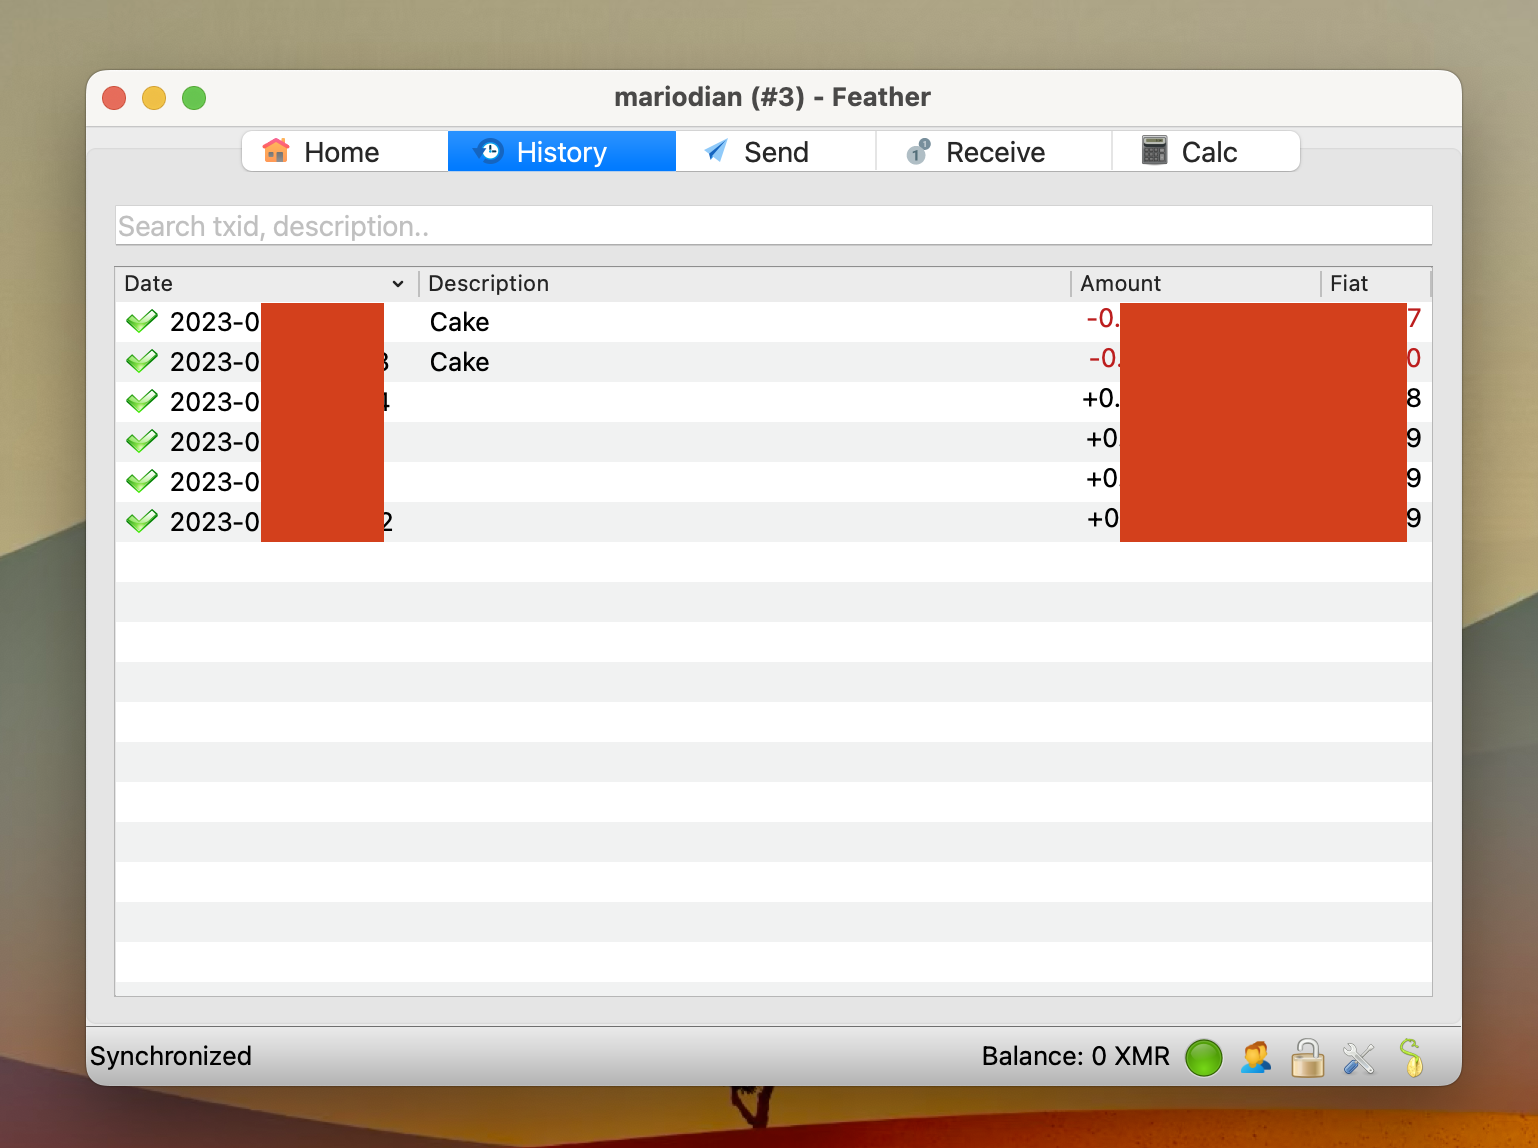
To ensure that you can receive funds to that wallet, you can send a test amount and see if it shows up in Feather. Open either the main wallet you created first or the view-only wallet, and you should be able to see the test transaction.
The BTCPay devs do not recommend setting up anything manually for production. However, if you are like me and prefer to have complete control, installing BTCPay manually is a great way to learn how things work under the hood. It also provides a better idea of how to fix things when they inevitably break.
I hope this guide was easy to follow and you found it helpful and learned something new today.
Thanks to the BTCPay team, Seth and everyone who participated on Monero's implementation for BTCPayServer!