How to Install and Set up Full Monero Node on Linux

With the rise of cryptocurrencies, financial privacy has become a hot topic.
Monero is currently the best in the field, thanks to its fairly large anonymity set, mandatory privacy for all transactions, ring signatures, Ring CT, stealth addresses, and the future Kovri anonymization network.
Although Monero developers have mitigated most, if not all, privacy risks associated with connecting your wallet to a third-party node, it is recommended to run your own full node for peace of mind.
In this article, I will go through the steps to install and set up Monero on Linux, specifically the latest Ubuntu 18.04 Bionic.
However, the steps should be the same for any Debian-based distribution using systemd and fairly similar for other distros, with the exception of the package manager (apt).
Sorry, no Mac or Windows.
#1 Update the operating system
First, update the system packages:
sudo apt update && sudo apt-get upgrade#2 Install dependencies
Make sure you have git installed. If not, do it now:
sudo apt install gitInstall the rest of dependencies:
sudo apt install build-essential cmake pkg-config libboost-all-dev libssl-dev libzmq3-dev libunbound-dev libsodium-dev libunwind8-dev liblzma-dev libreadline6-dev libldns-dev libexpat1-dev doxygen graphviz libpgm-dev qttools5-dev-tools libhidapi-dev libusb-1.0-0-dev libprotobuf-dev protobuf-compiler libudev-devUnfortunately, libgtest-dev doesn't currently come as binary on Ubuntu, so you'll have to compile it yourself:
cd /usr/src/gtest
sudo cmake .
sudo make -j2
sudo mv libg* /usr/lib/
#3 Download and build Monero
Create source directory if you haven't already:
mkdir ~/source
cd ~/source
Clone the repository and its submodules:
git clone --recursive https://github.com/monero-project/monero
cd monero
make -j2 release # -j4 for 4 threads etc
It may take a while to compile depending on your machine.
When finished, copy all the binaries to /usr/local/bin:
sudo cp ./build/release/bin/* /usr/local/bin/#4 Set up the service
I have written a systemd service that automatically starts the node after a reboot or when it crashes.
cd /lib/systemd/system
sudo wget https://gist.githubusercontent.com/mariodian/b8bb62de8f5aa5466cccb17f280f439e/raw/db0a98573e0a8cc871781d8d43f03437ca159e22/monerod.service
sudo chmod 644 monerod.service
Please ensure that you edit the file to suit your specific environment. If you are using a robust hardware setup, you might consider increasing the block-sync-size to a higher number, or you can choose to omit it entirely and allow the daemon to determine the appropriate value automatically.
As a result of the April fork, my node was unable to maintain synchronization with the current chain height. Consequently, I had to configure it manually.
Proceed by generating a configuration file:
mkdir ~/.bitmonero
cd ~/.bitmonero
touch monerod.conf
and add the following lines:
echo "data-dir=/home/satoshi/.bitmonero" >> monerod.conf
echo "log-file=/home/satoshi/.bitmonero/monero.log" >> monerod.conf
echo "log-level=0" >> monerod.conf
To be able to connect your wallet from another machine, please add the following:
echo "rpc-bind-ip=0.0.0.0" >> monerod.conf
echo "rpc-bind-port=18081" >> monerod.conf
echo "rpc-login=veryLongAndRandomUsername:veryLongAndRandomPassword" >> monerod.conf
Don't forget to change rpc-login to your own one.
#5 Run the service
Enable the systemd config and start the daemon:
sudo systemctl enable monerod
sudo service monerod start
You can check the progress with:
tail -f monero.logor using a simpler output:
monerod --config-file /home/satoshi/.bitmonero/monerod.conf statusThe synchronization may take from a few hours to a few days depending on your hardware.
Please be patient.
#6 Allow incoming connections (optional)
You can enable two types of incoming connections on your node: P2P and RPC.
The P2P connection allows other nodes to download the chain from you. The RPC connection enables a wallet to connect to your node and retrieve information about its balance, transactions, etc.
To establish the P2P connection, execute the following command:
sudo iptables -I INPUT -p tcp --dport 18080 -j ACCEPTFor the RPC:
sudo iptables -I INPUT -p tcp --dport 18081 -j ACCEPTSave the rules permanently:
sudo iptables-saveIf you are behind a router, you will need to forward the ports to your machine. Please refer to the manual of your router.
#7 Connect to the node with your wallet
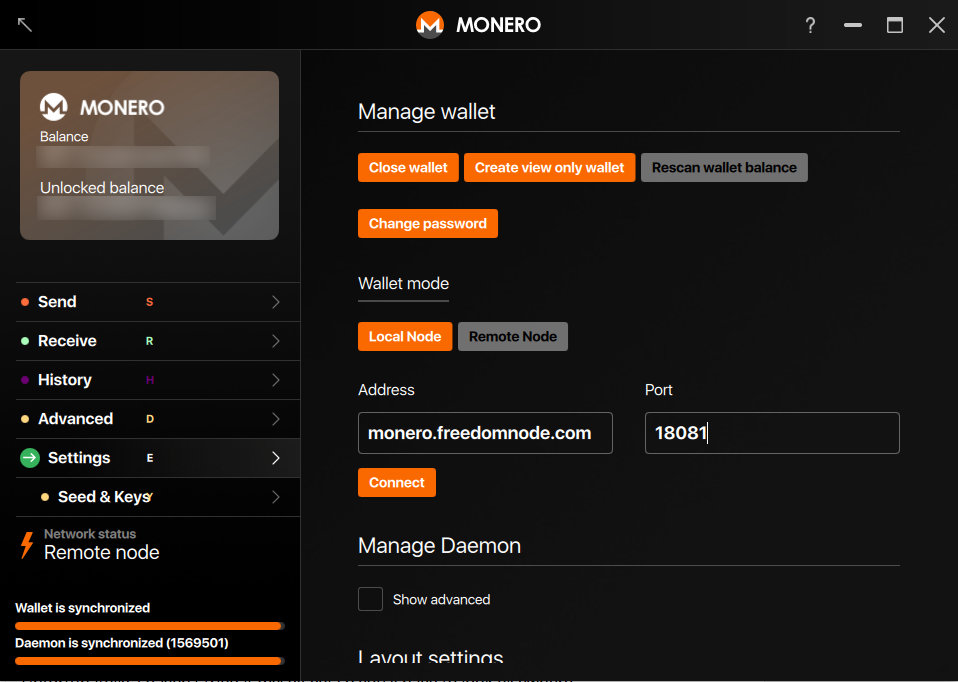
Now, test your connection from your wallet. If you are using the GUI wallet, go to Settings and fill in the Address and Port fields.
Next, under Manage Daemon, click on Show Advanced and enter the RPC login that you set earlier in the ~/.bitmonero/monerod.conf file.
If you are using the command line wallet, you can start it by using the following command:
monero-wallet-cli --wallet-file /path/to/your/wallet --trusted-daemon --daemon-address ip.of.your.node:18081 --daemon-login veryLongAndRandomUsername:veryLongAndRandomPasswordPersonally, I prefer the command line wallet because it is cleaner, and most of the time, all you really need are just three or four commands.
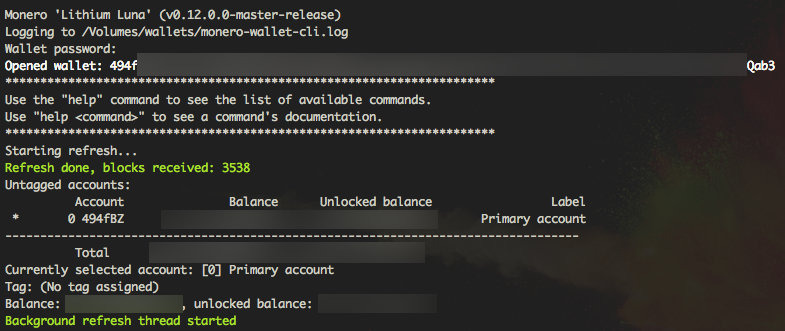
The ones that you will likely use the most are:
show_transfersto view the list of all transactionsintegrated_addressto get a receiving address containing a payment IDbalanceto view locked and unlocked balancetransfer <address> <amount>to make a payment
Type help to access the list of all commands.
As you can tell, setting up a Monero full node from source is fairly easy if you have a basic knowledge of the Linux command line.

Optionally, to make your node more secure and anonymous, you may want to run it behind torify or torsocks (essentially the same). Unfortunately, I haven't done it myself yet, so you'll have to look elsewhere.
All in all, I hope you found the tutorial enjoyable.


