

How to Setup a Secure MultiSig Wallet on iPhone with Coldcard, Tapsigner, and Nunchuk
Recently, I got my first Coldcard (I know I'm late to the party) and bunch of other products from Coinkite because they have finally solved my biggest issue.
Since the very beginning, I have been using Trezor devices, and one thing that has consistently proven frustrating is the absence of iPhone compatibility. Running a hardware wallet with an iPhone has been nearly impossible due to the Lightning port (Apple's proprietary port, not the Bitcoin payment network).
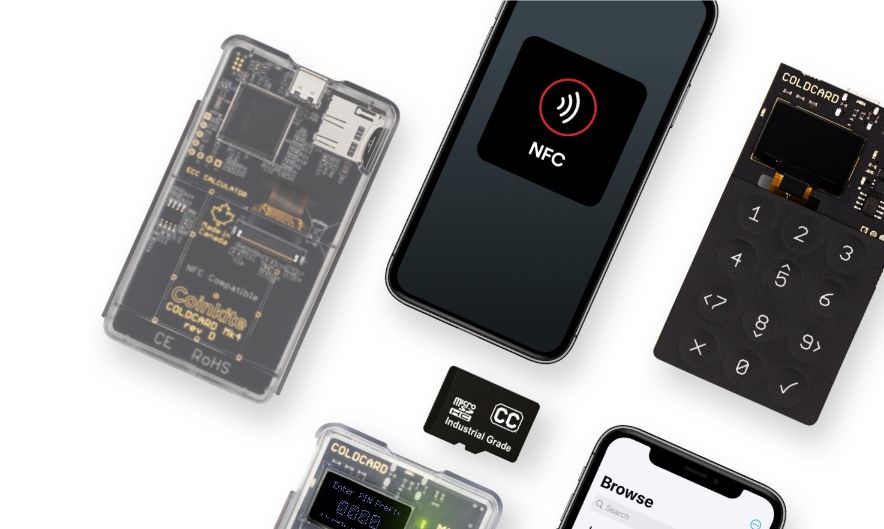
However, Coinkite managed to circumvent this problem with their latest Coldcard MK4 by incorporating NFC support.
Although there are valid security concerns regarding the NFC technology, it is highly unlikely to steal bitcoin from your back pocket through Coldcard's NFC.
Coldcard features not just one, but two secure elements from separate vendors to store the private keys which never leave the device. Additionally, the device is protected by a PIN. Furthermore, due to the requirement of stable placement of an iPhone over Coldcard's NFC chip for a period of time, it is unlikely for your bitcoin to be stolen from your back pocket while you're on the move, even if an attacker gains access to the PIN.
In this tutorial, we will take a look at how to set up and use a 2-of-3 multisignature wallet in Nunchuk with Coldcard and Tapsigner on an iPhone. I'm positive that the steps should be similar, if not the same, for Android as well. Please let me know in the comments below!
It is likely that you could set up a multisig wallet with Coldcard and Tapsigner on a computer, but in order to do so, you will need one of these NFC readers and the Coinkite Tap Protocol. However, I will explore this option some other time.
Prerequisites
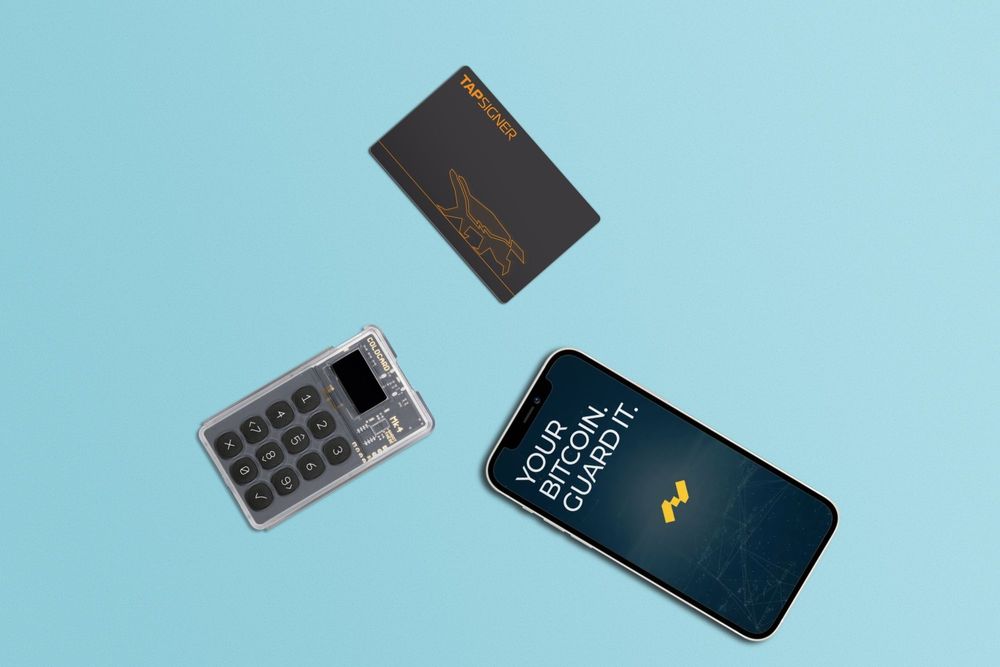
To set up a 2-of-3 multisignature wallet, you will need the following:
- Nunchuk
- Coldcard MK4
- Tapsigner
Nunchuk
Install Nunchuk on your phone.
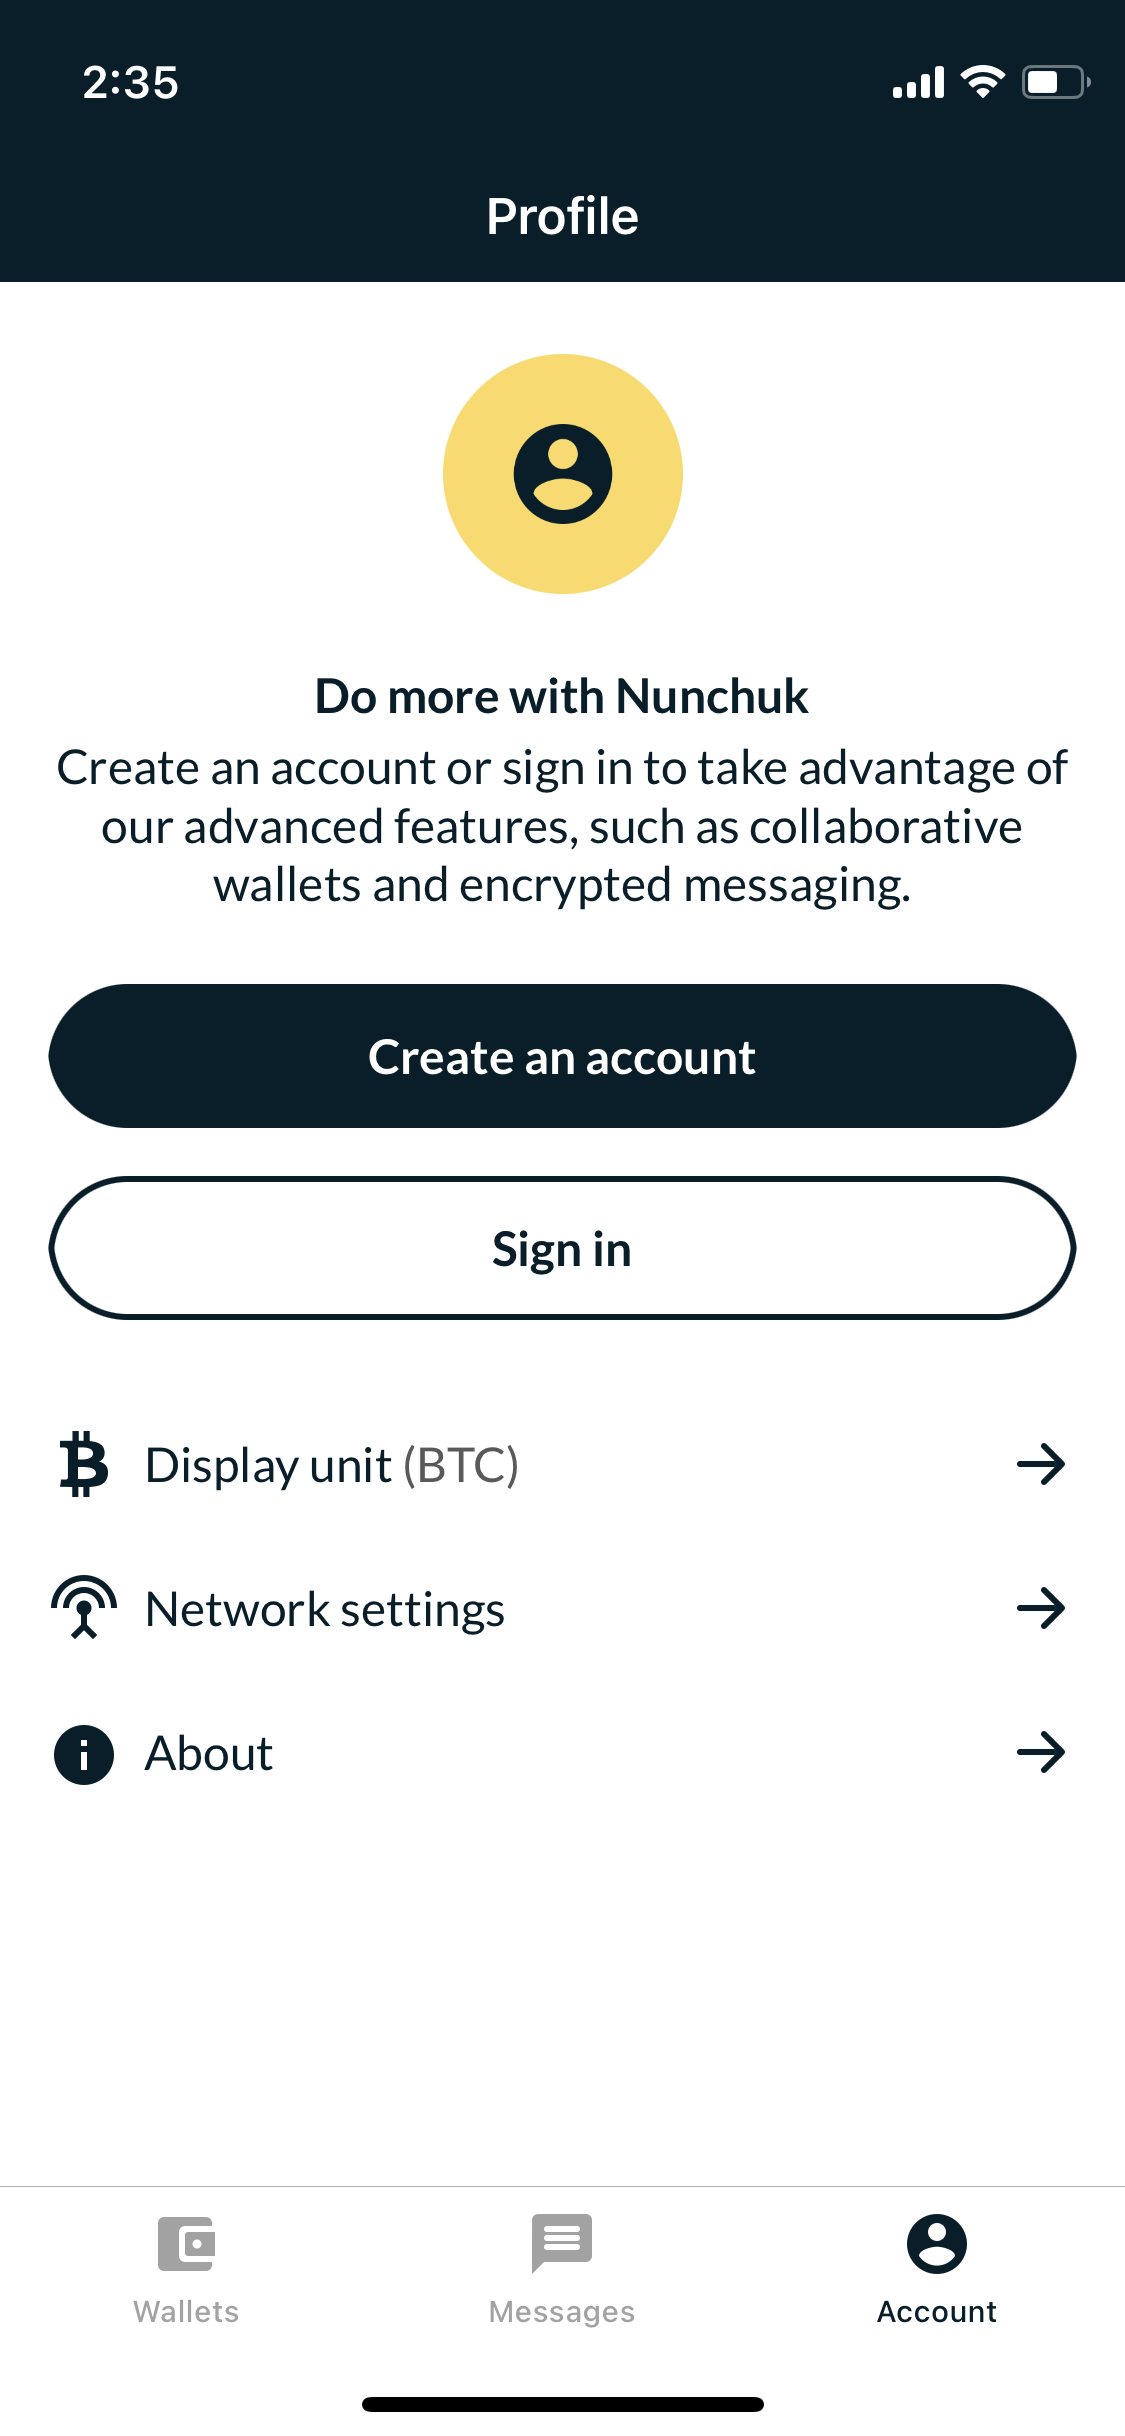
If you need to use their advanced features, such as collaborative wallets, you can sign up anonymously with ProtonMail (preferably using Tor). If you are unfamiliar with collaborative wallets or their functions, you can safely skip this step.
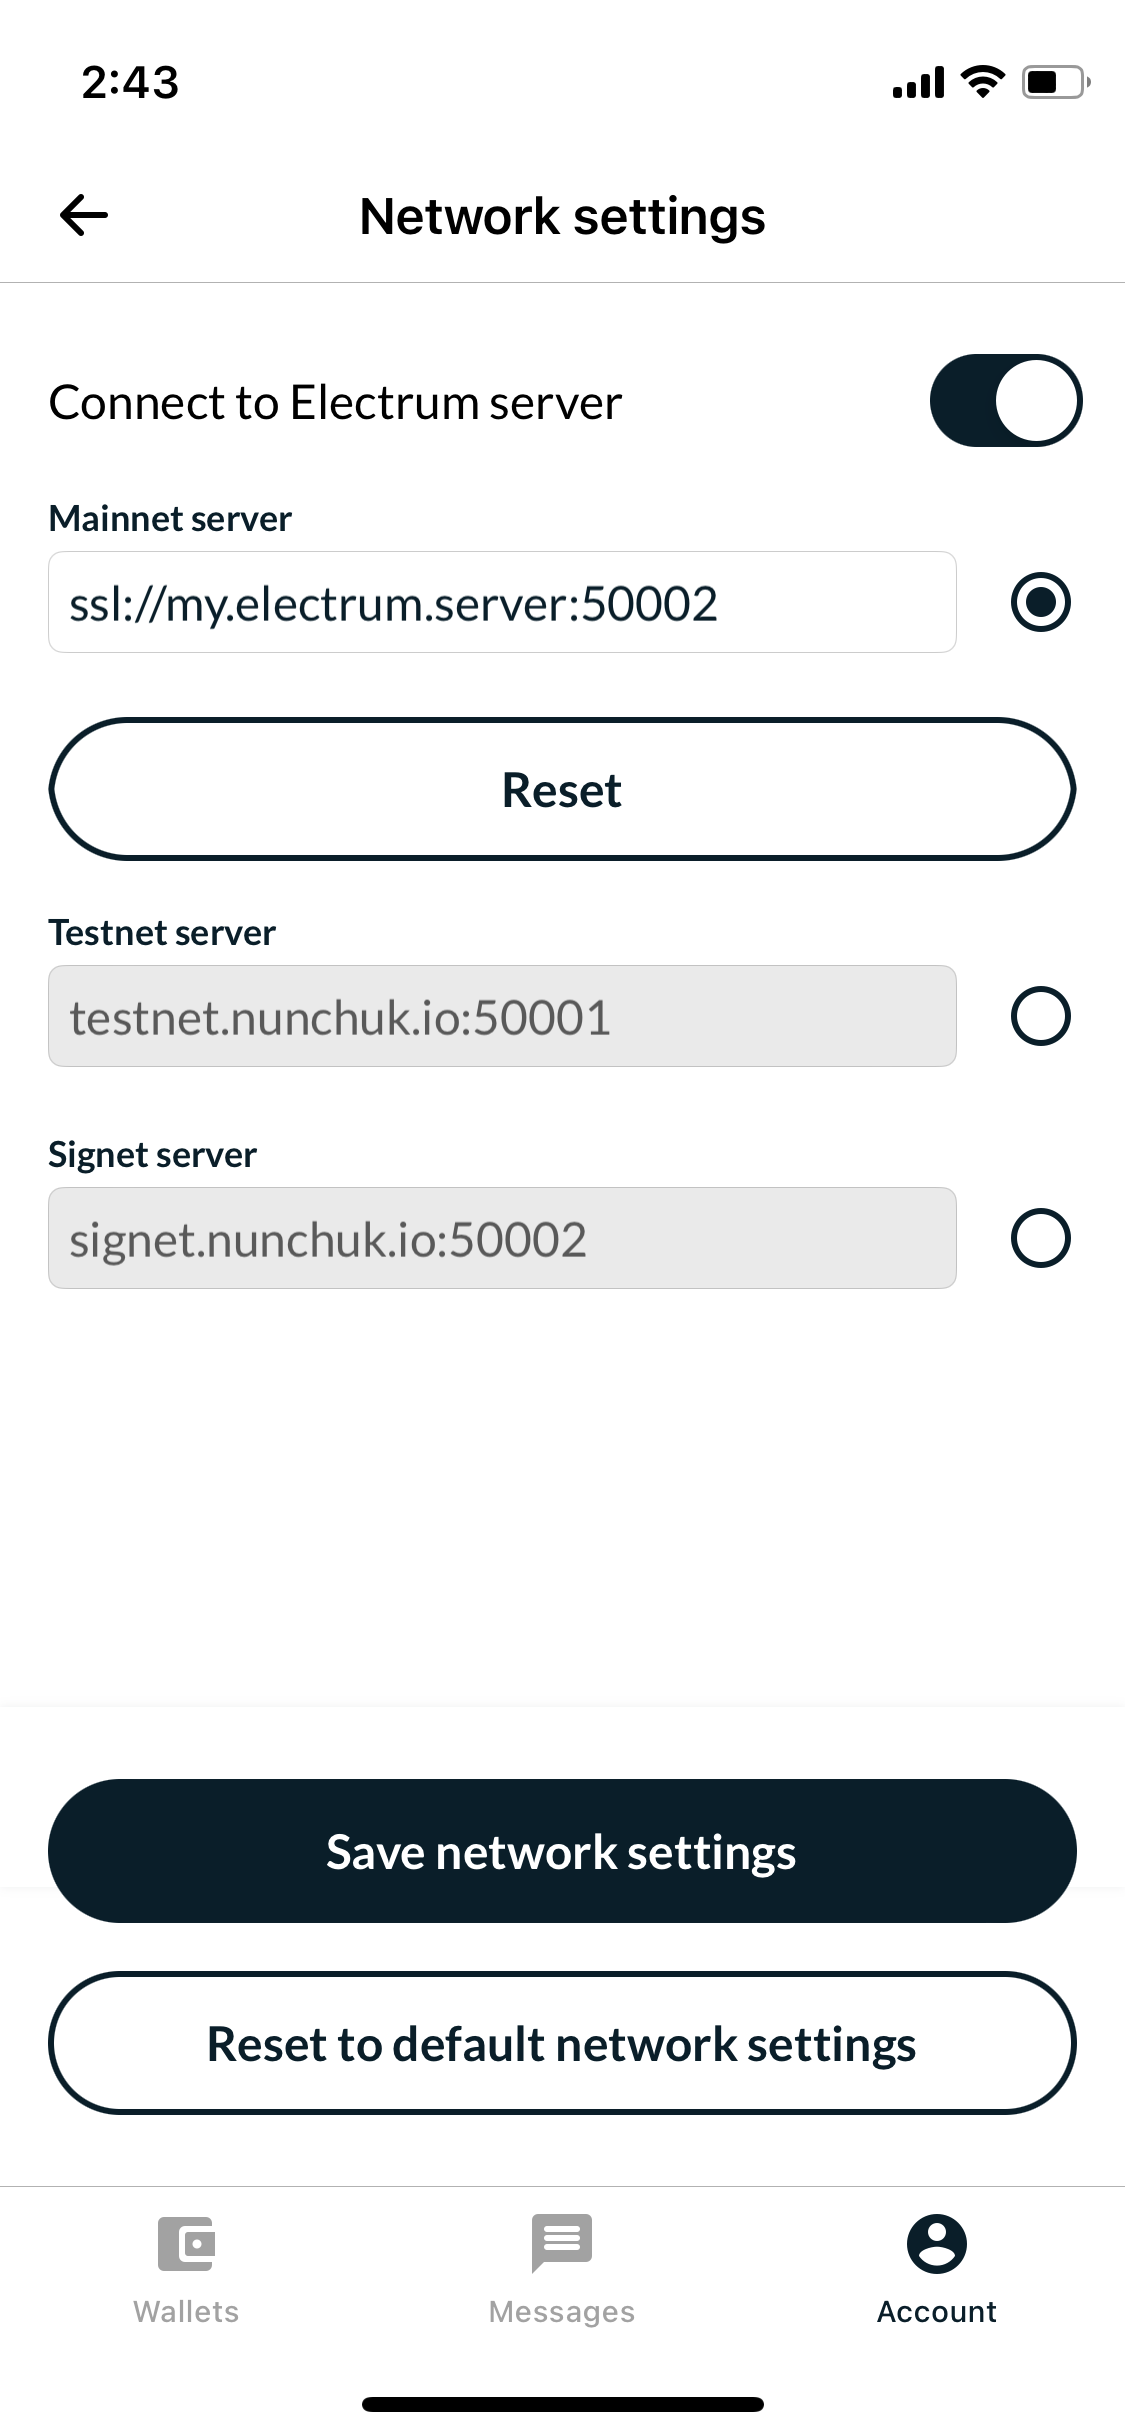
To enhance your Bitcoin privacy, I recommend connecting the Nunchuk to your own Electrum server.

To point Nunchuk to an Electrum server, go to Account -> Network Settings and fill in the Mainnet server field. If your server runs over SSL, you need to prefix the address with ssl:// like so:
ssl://my.electrum.server:50002
After setting up the server, you will need to restart Nunchuk for the changes to take effect.
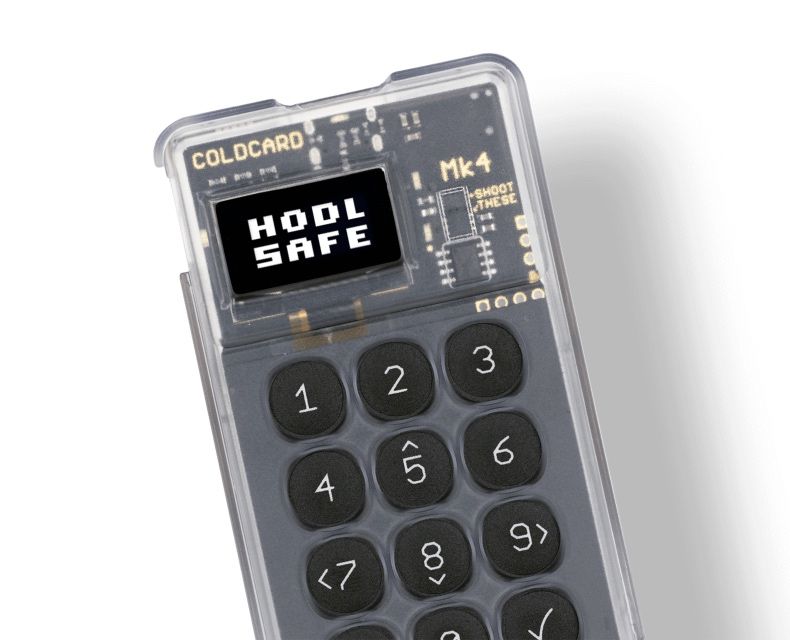
Coldcard MK4
Please take a moment to review the quick guide on how to set up Coldcard if you haven't already done so. You can skip the final step, Connecting and transacting with Sparrow Wallet, as we utilize Nunchuk as our wallet instead.
I presume you are not entirely unfamiliar with Bitcoin, but if you are, please refer to this guide instead.
Last but not least, don't forget to enable NFC in Settings -> Hardware On/Off -> NFC Sharing -> Enable NFC.
Once you have finished setting up Coldcard, you can proceed to the next step.
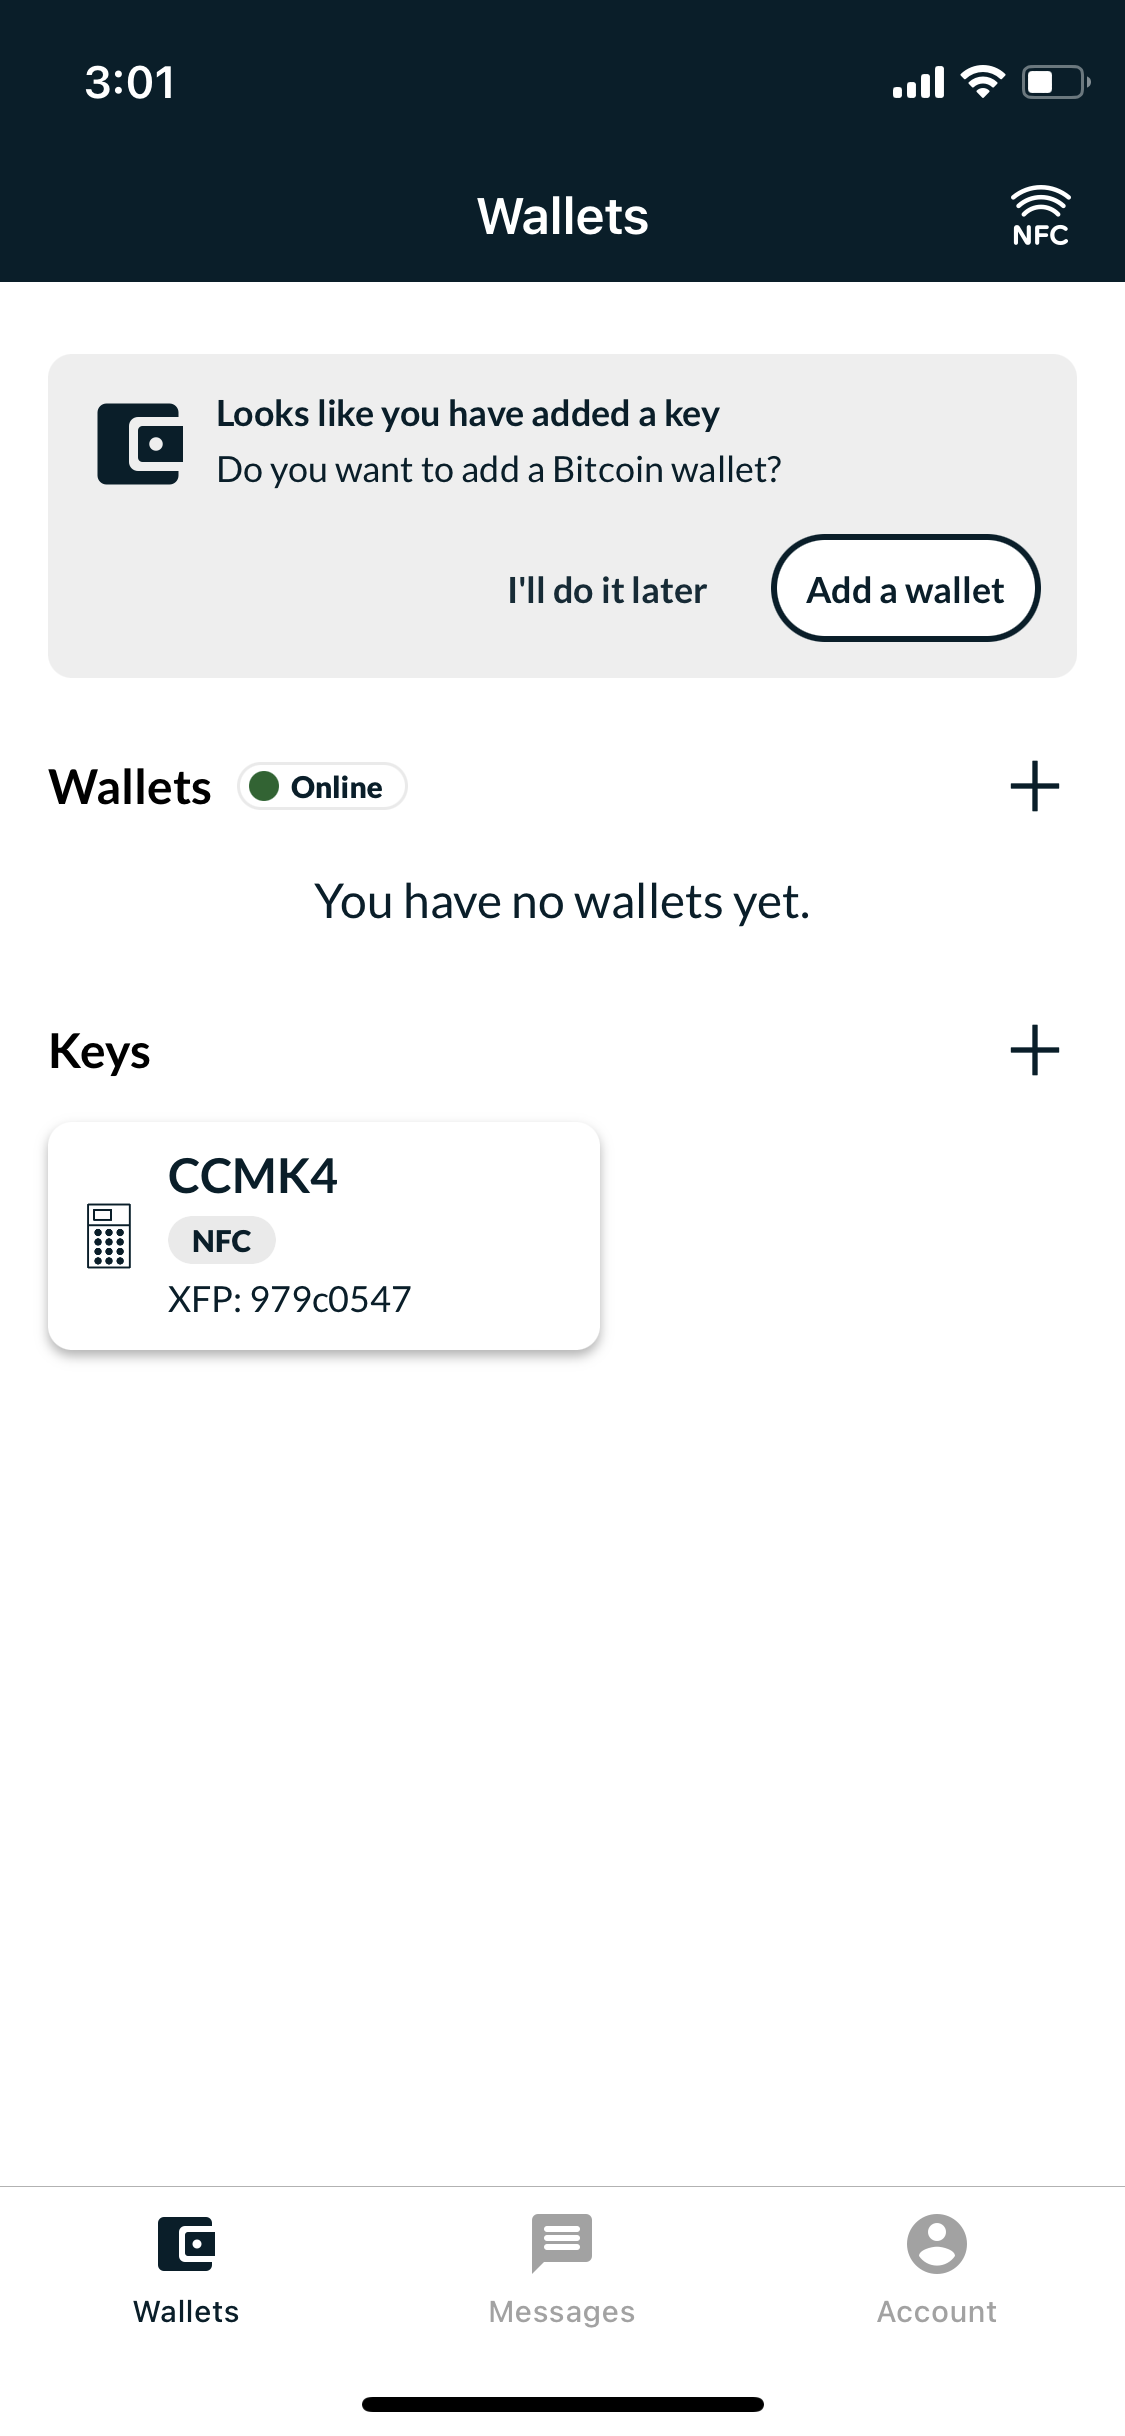
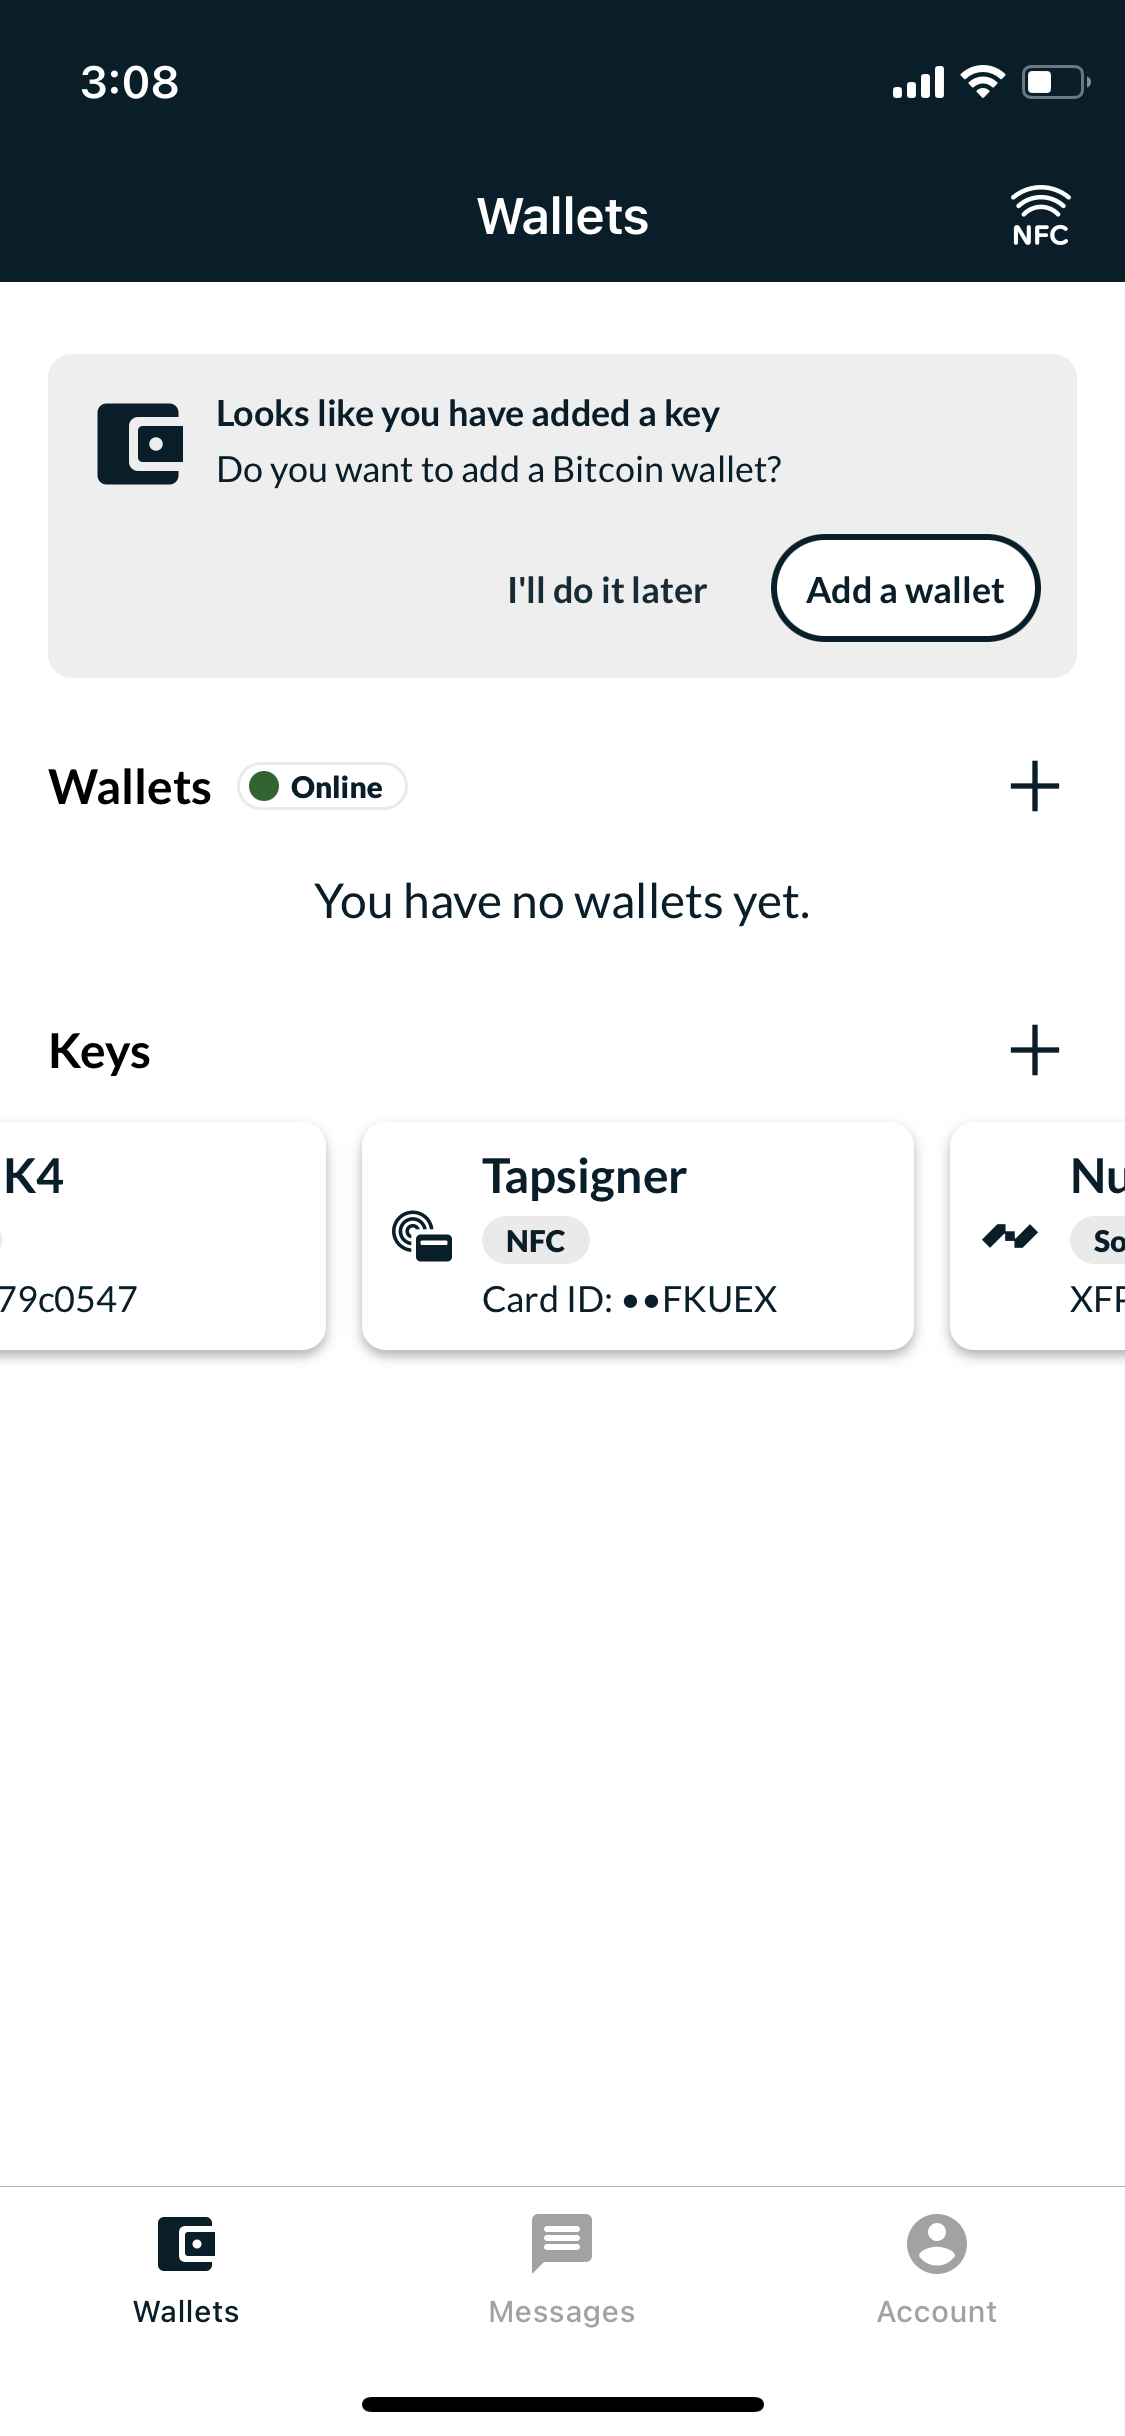
Add keys to Nunchuk
In order to set up a 2-of-3 multisignature configuration, we need to include three keys, two of which are required to sign a transaction.
To achieve this, we will incorporate keys from both Coldcard and Tapsigner. The third key will be generated directly in Nunchuk. Note that it is also possible to restore any existing wallet, such as Green or Bluewallet, to Nunchuk.
#1 Add Coldcard key
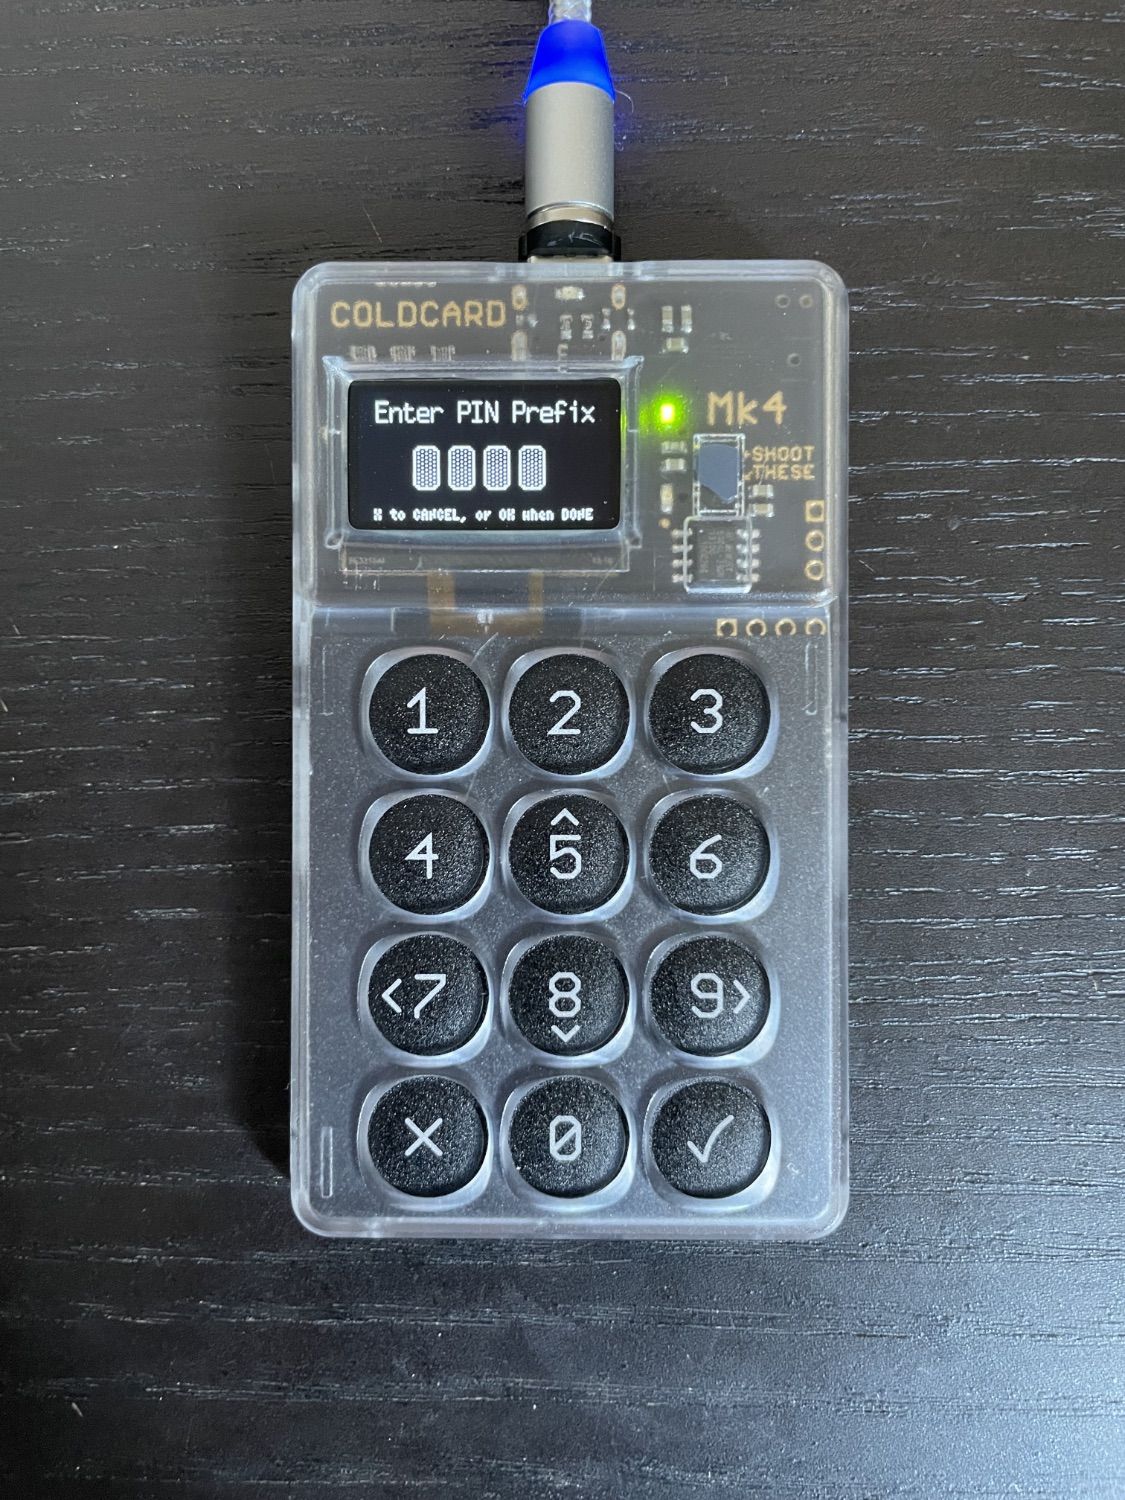
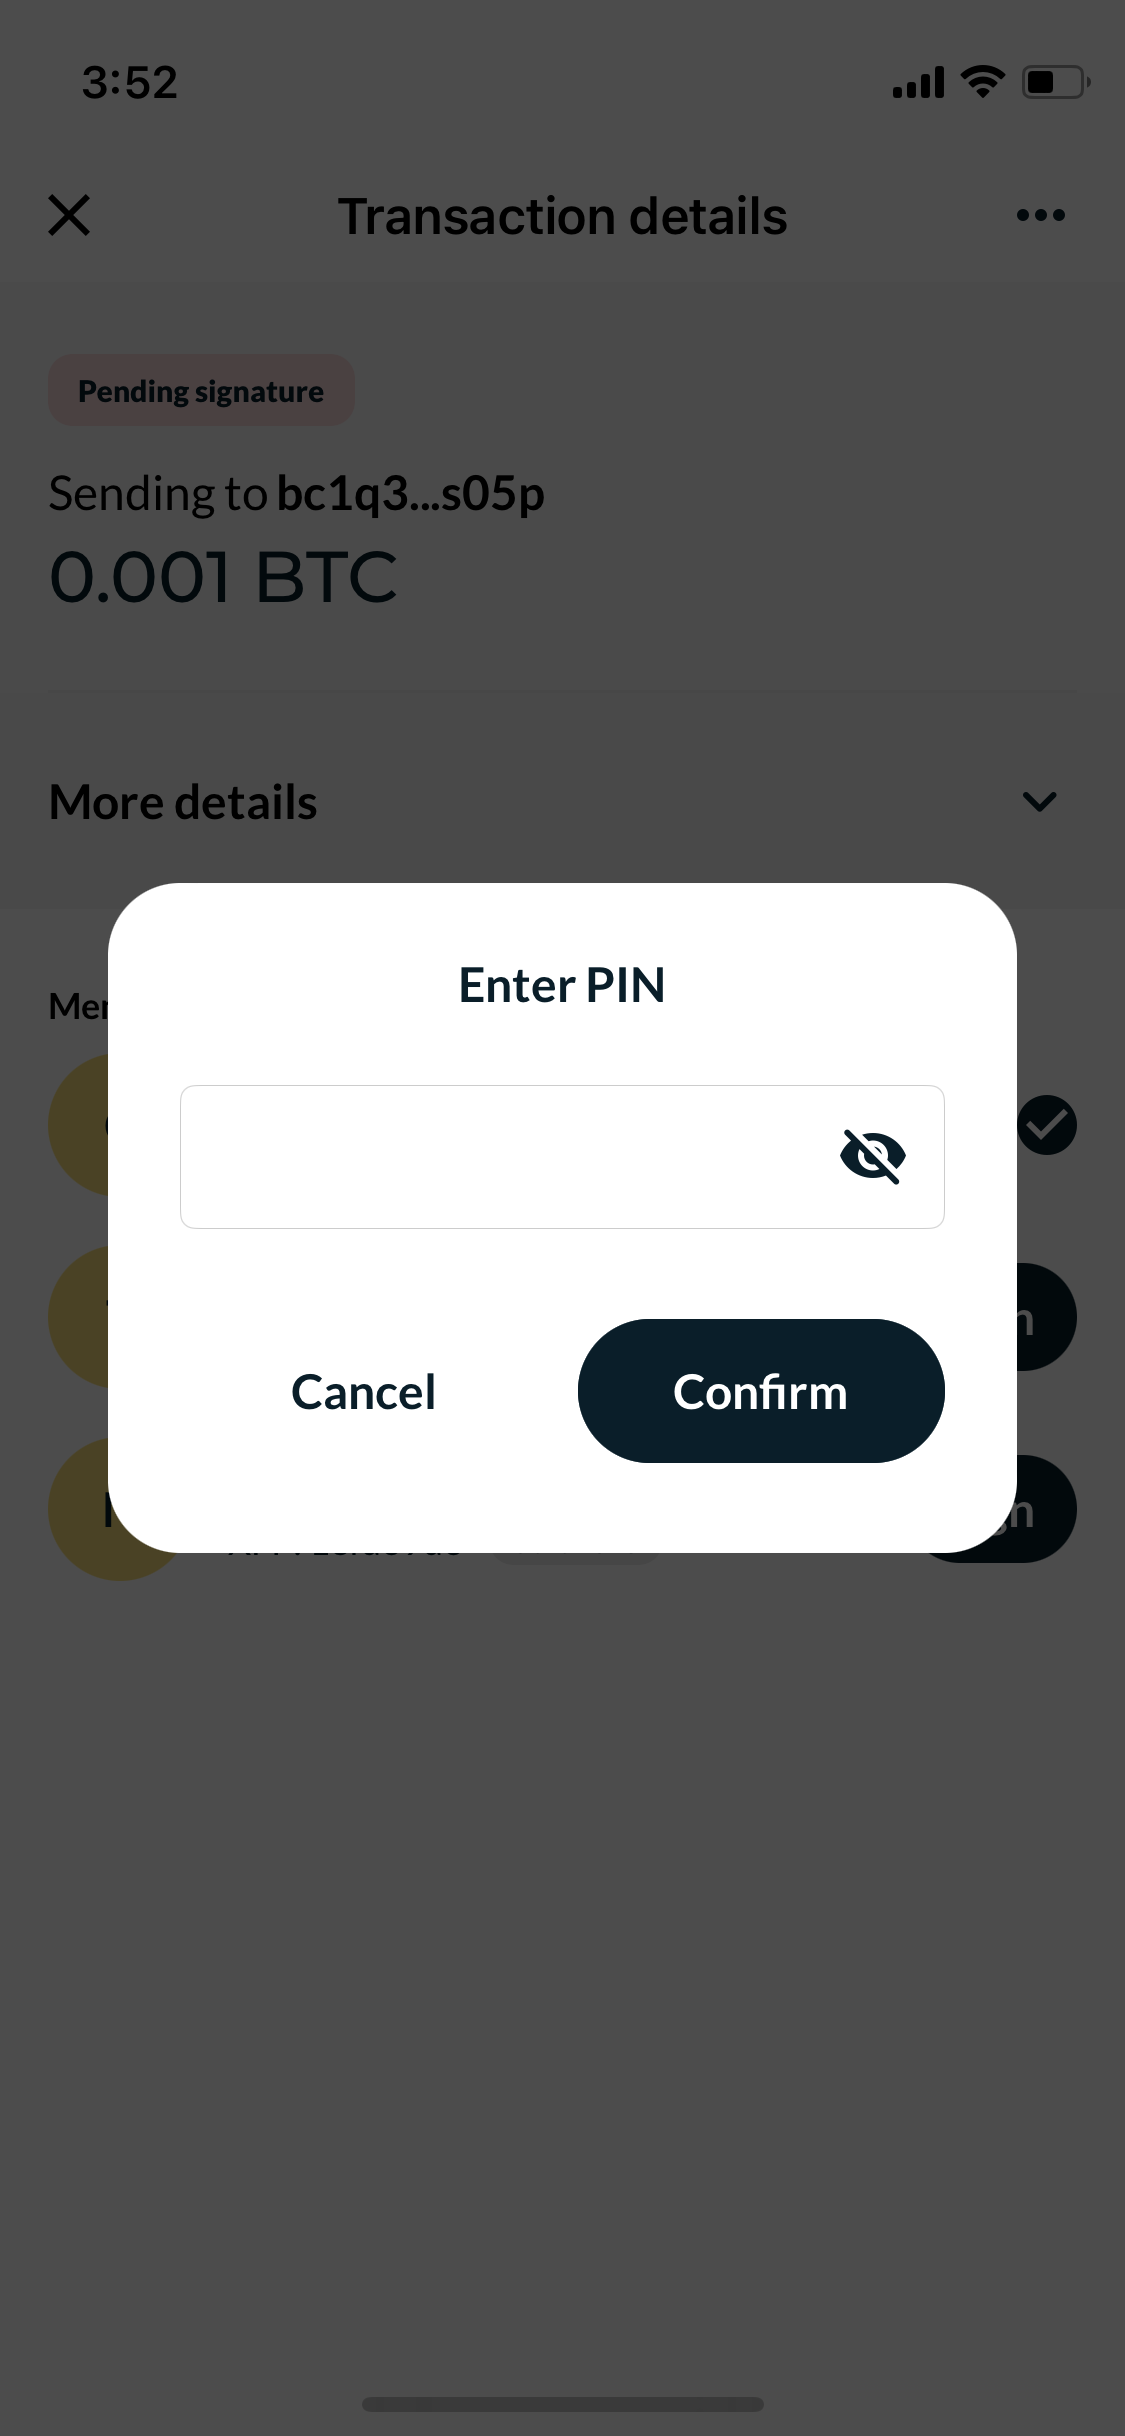
To sign in to your Coldcard, connect it to power and enter the PIN prefix.
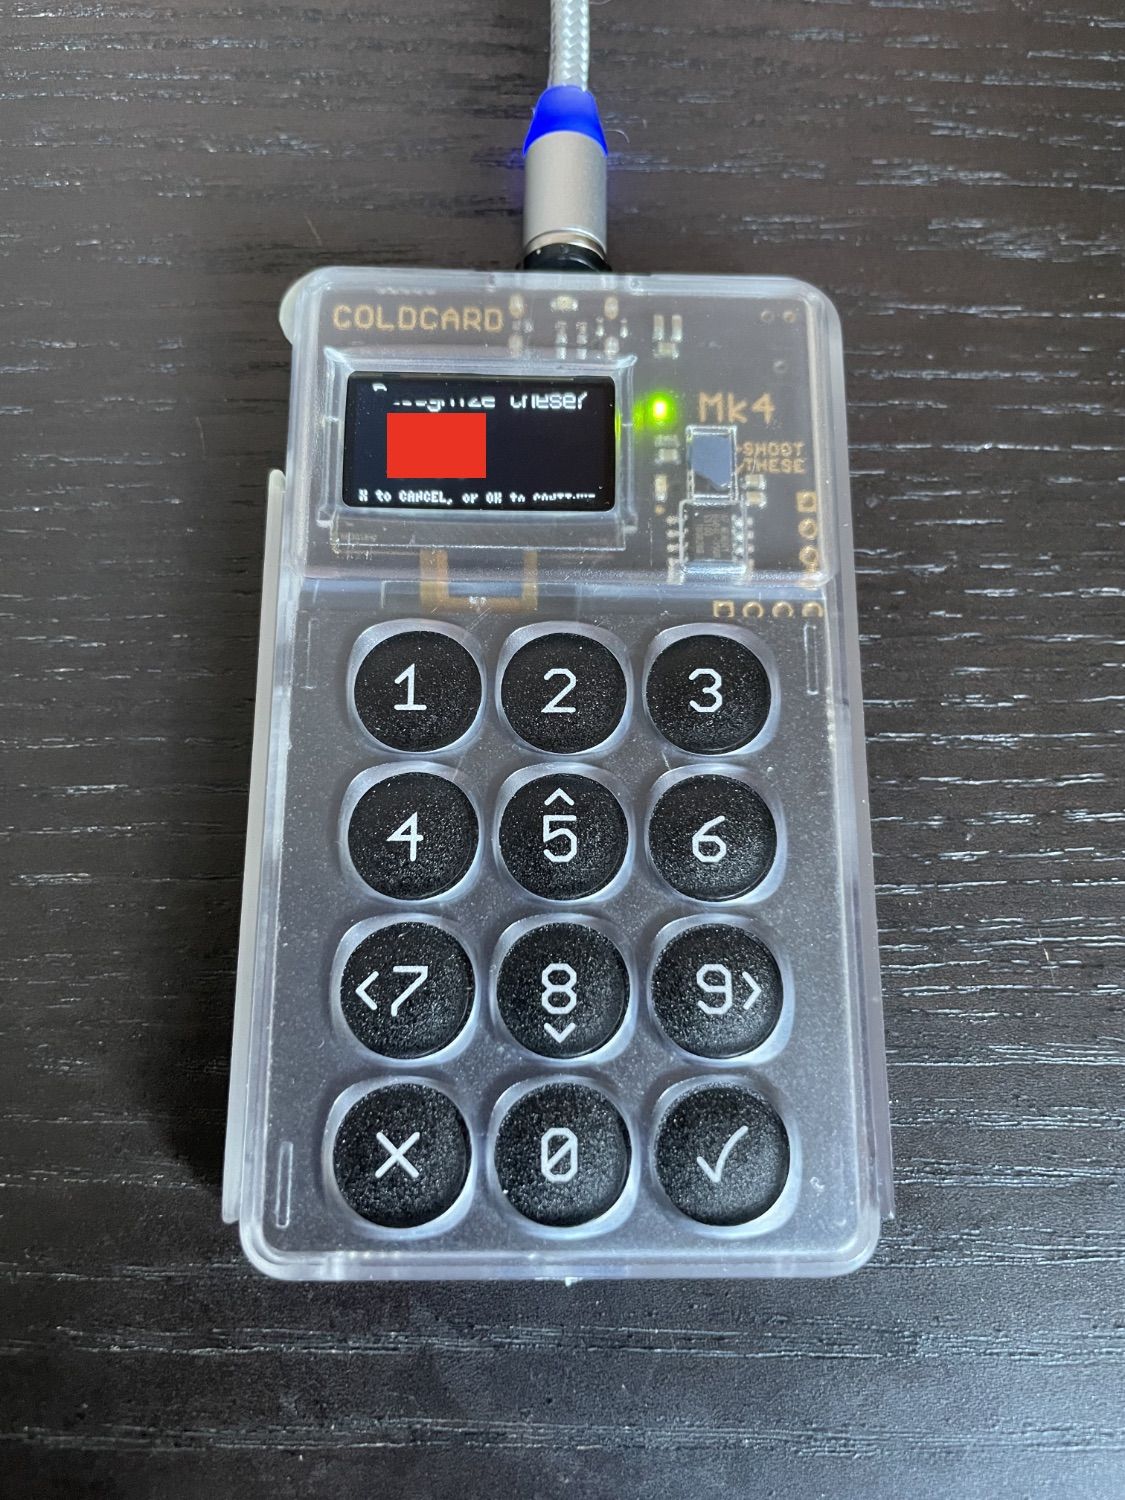
Enter the remaining part of the PIN as long as you recognize the anti-phishing words. If the words are unfamiliar, it is likely that the PIN prefix you used is incorrect, and you will need to try again.

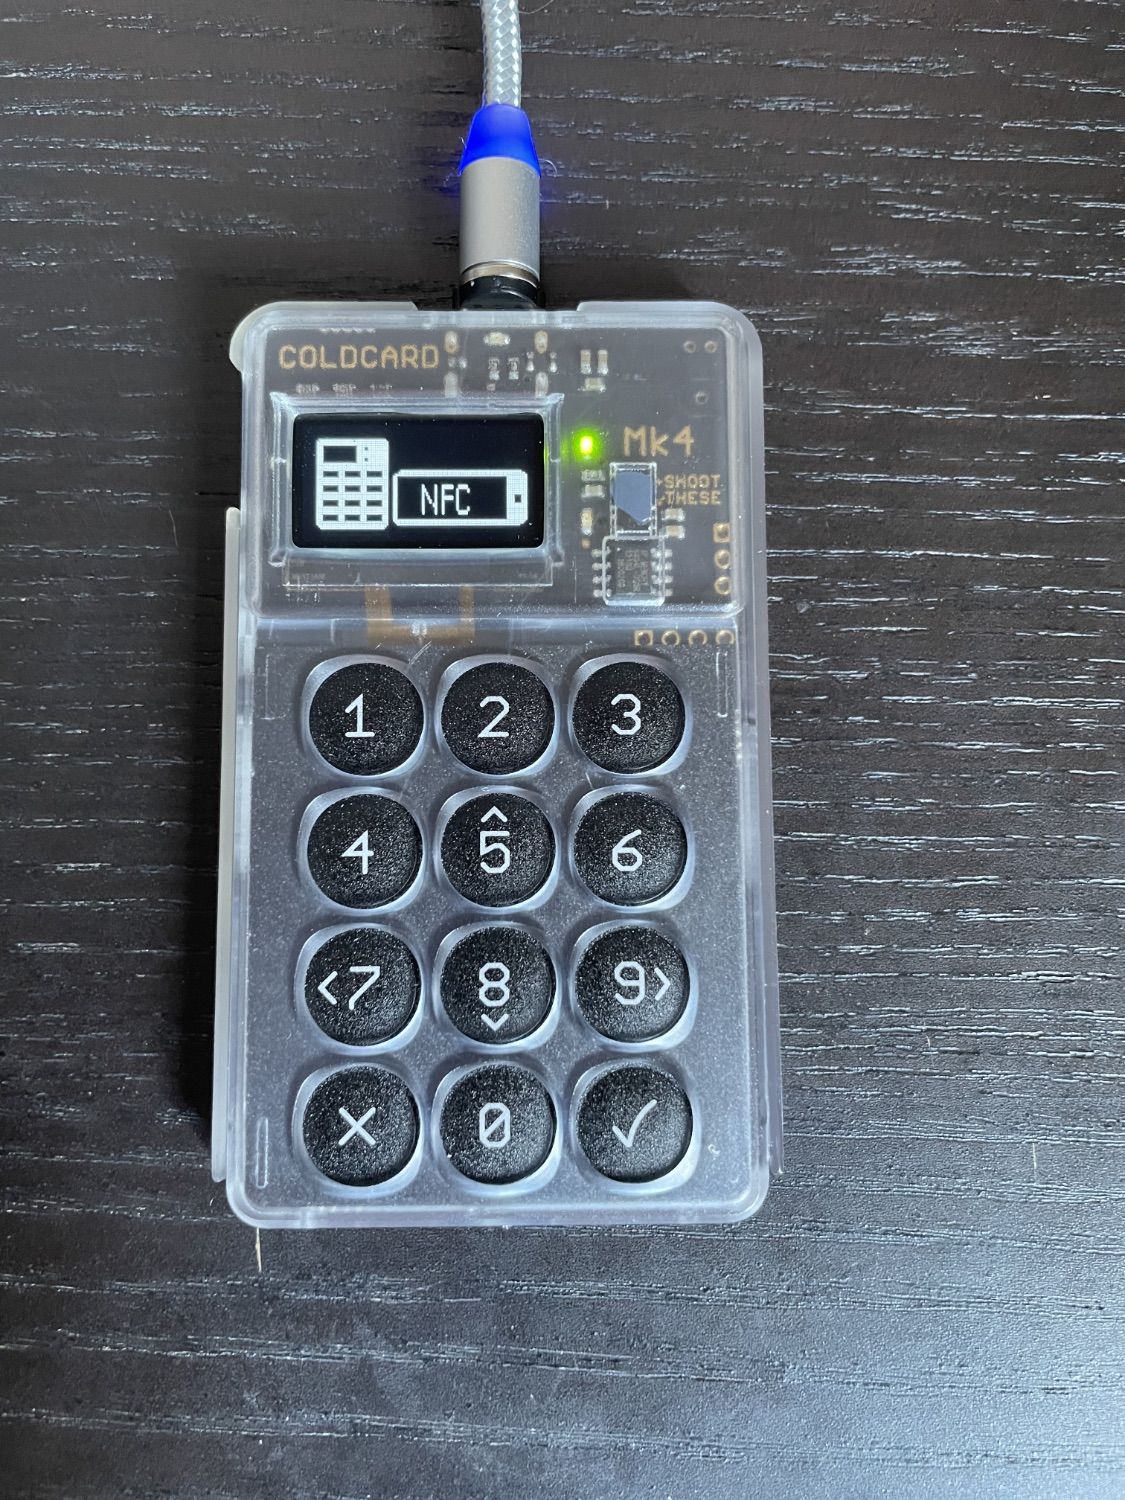
After logging in, navigate to Advanced tools -> Export Wallet -> Generic JSON. Click on OK (the check sign located at the bottom right corner) twice, and once the JSON file has been created, press 3.
Upon completion, a NFC symbol will be visible on the device.

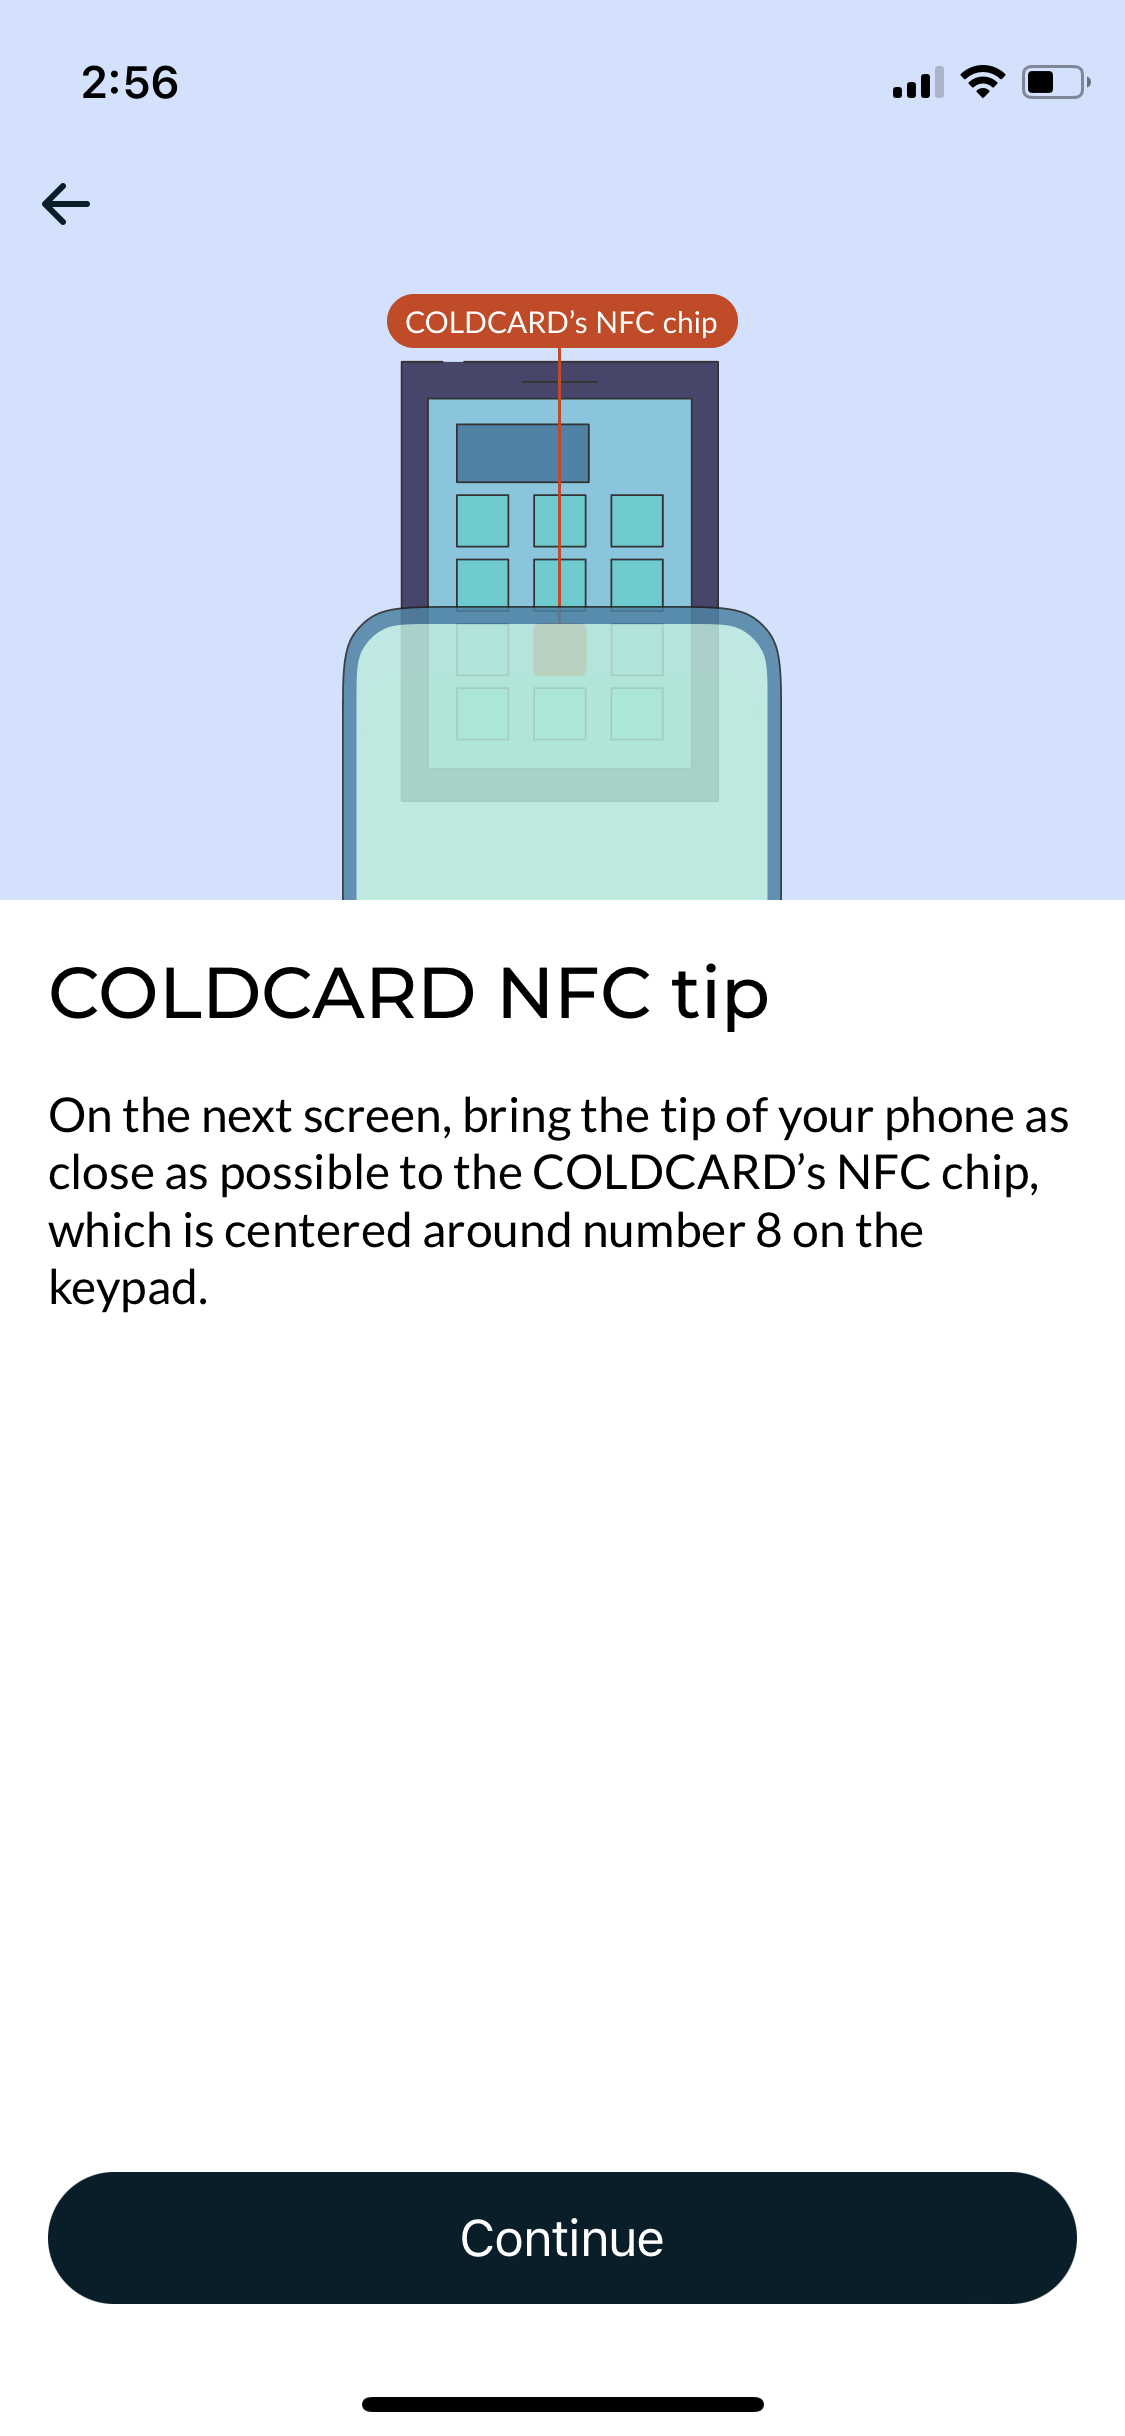
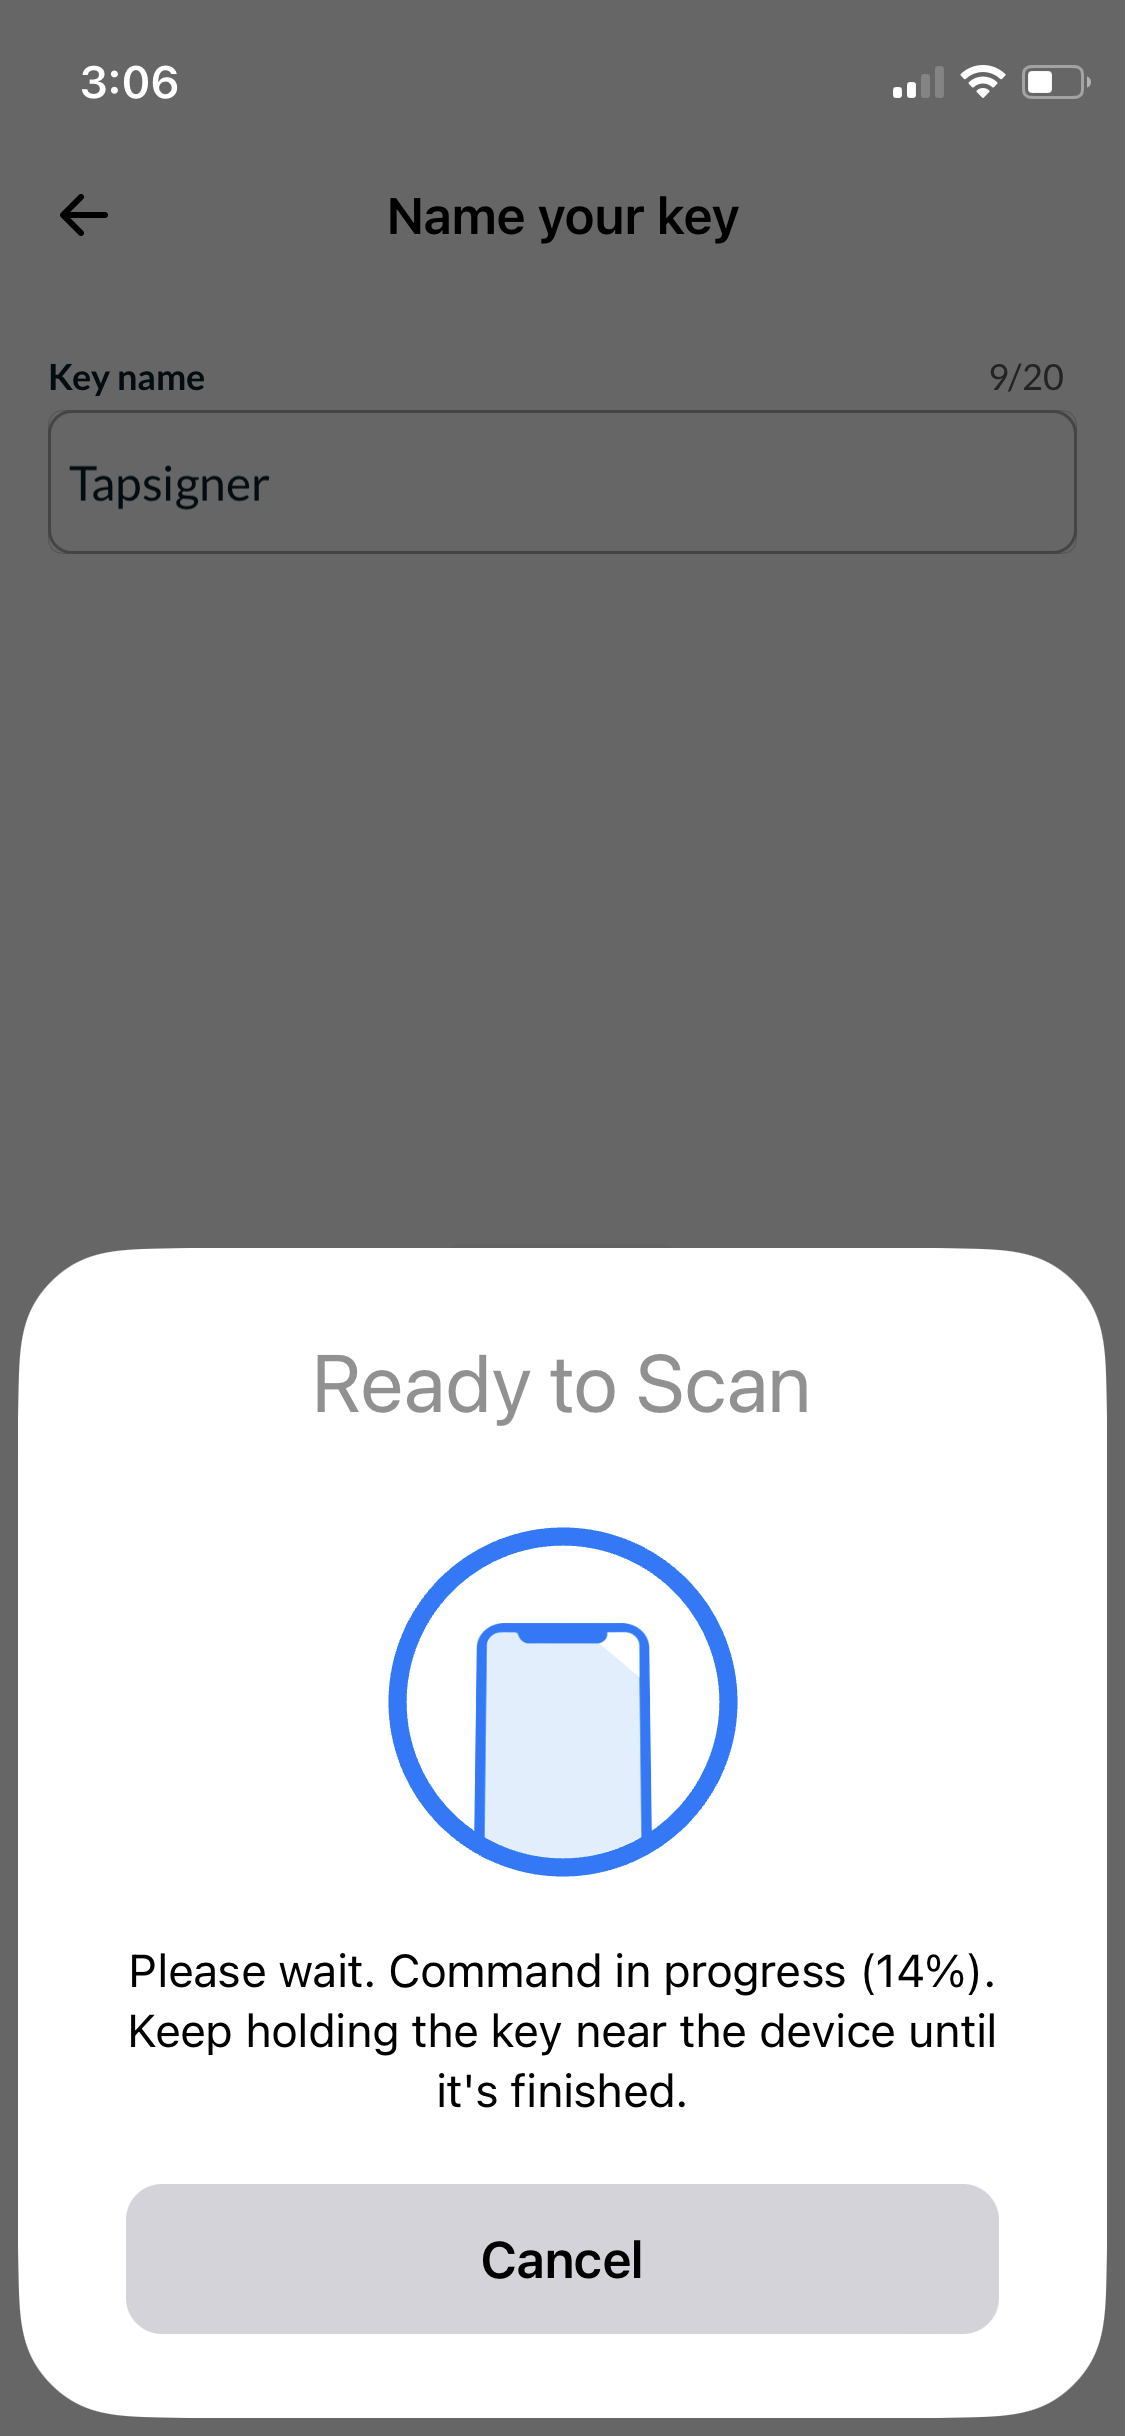
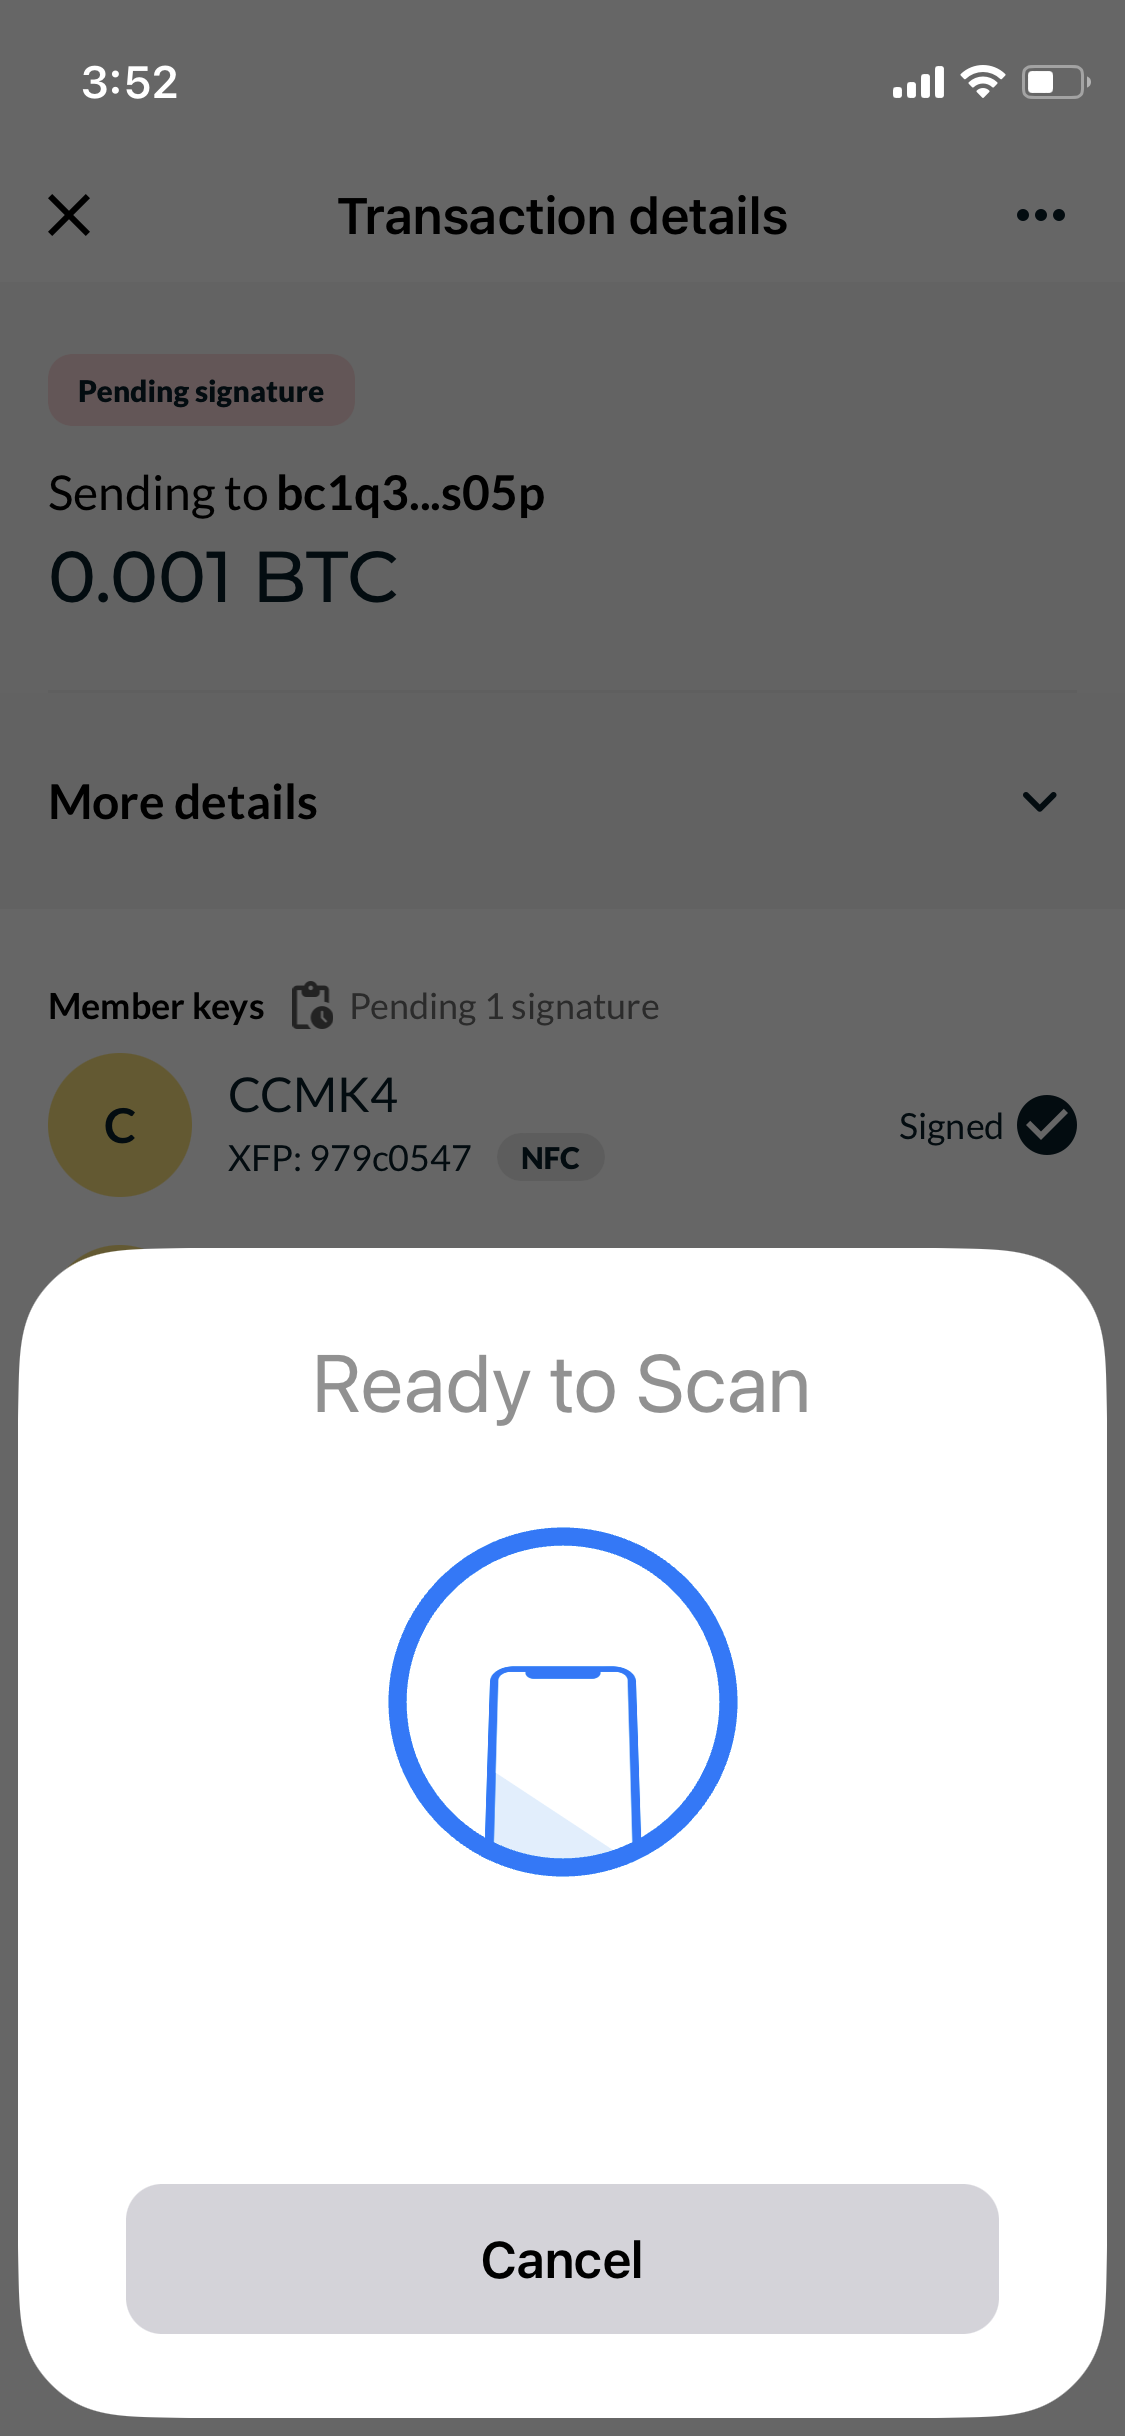
Go back to Nunchuk and tap Add a key at the top of the screen and then Add NFC Key -> Add COLDCARD. Tap Continue until you get to the Ready to Scan screen.
Rest the phone on Coldcard. I recommend that you put the Coldcard's case underneath the iPhone for stability, until Nuncuk finds the keys.
Then select the first option m/84h/0h/0h.

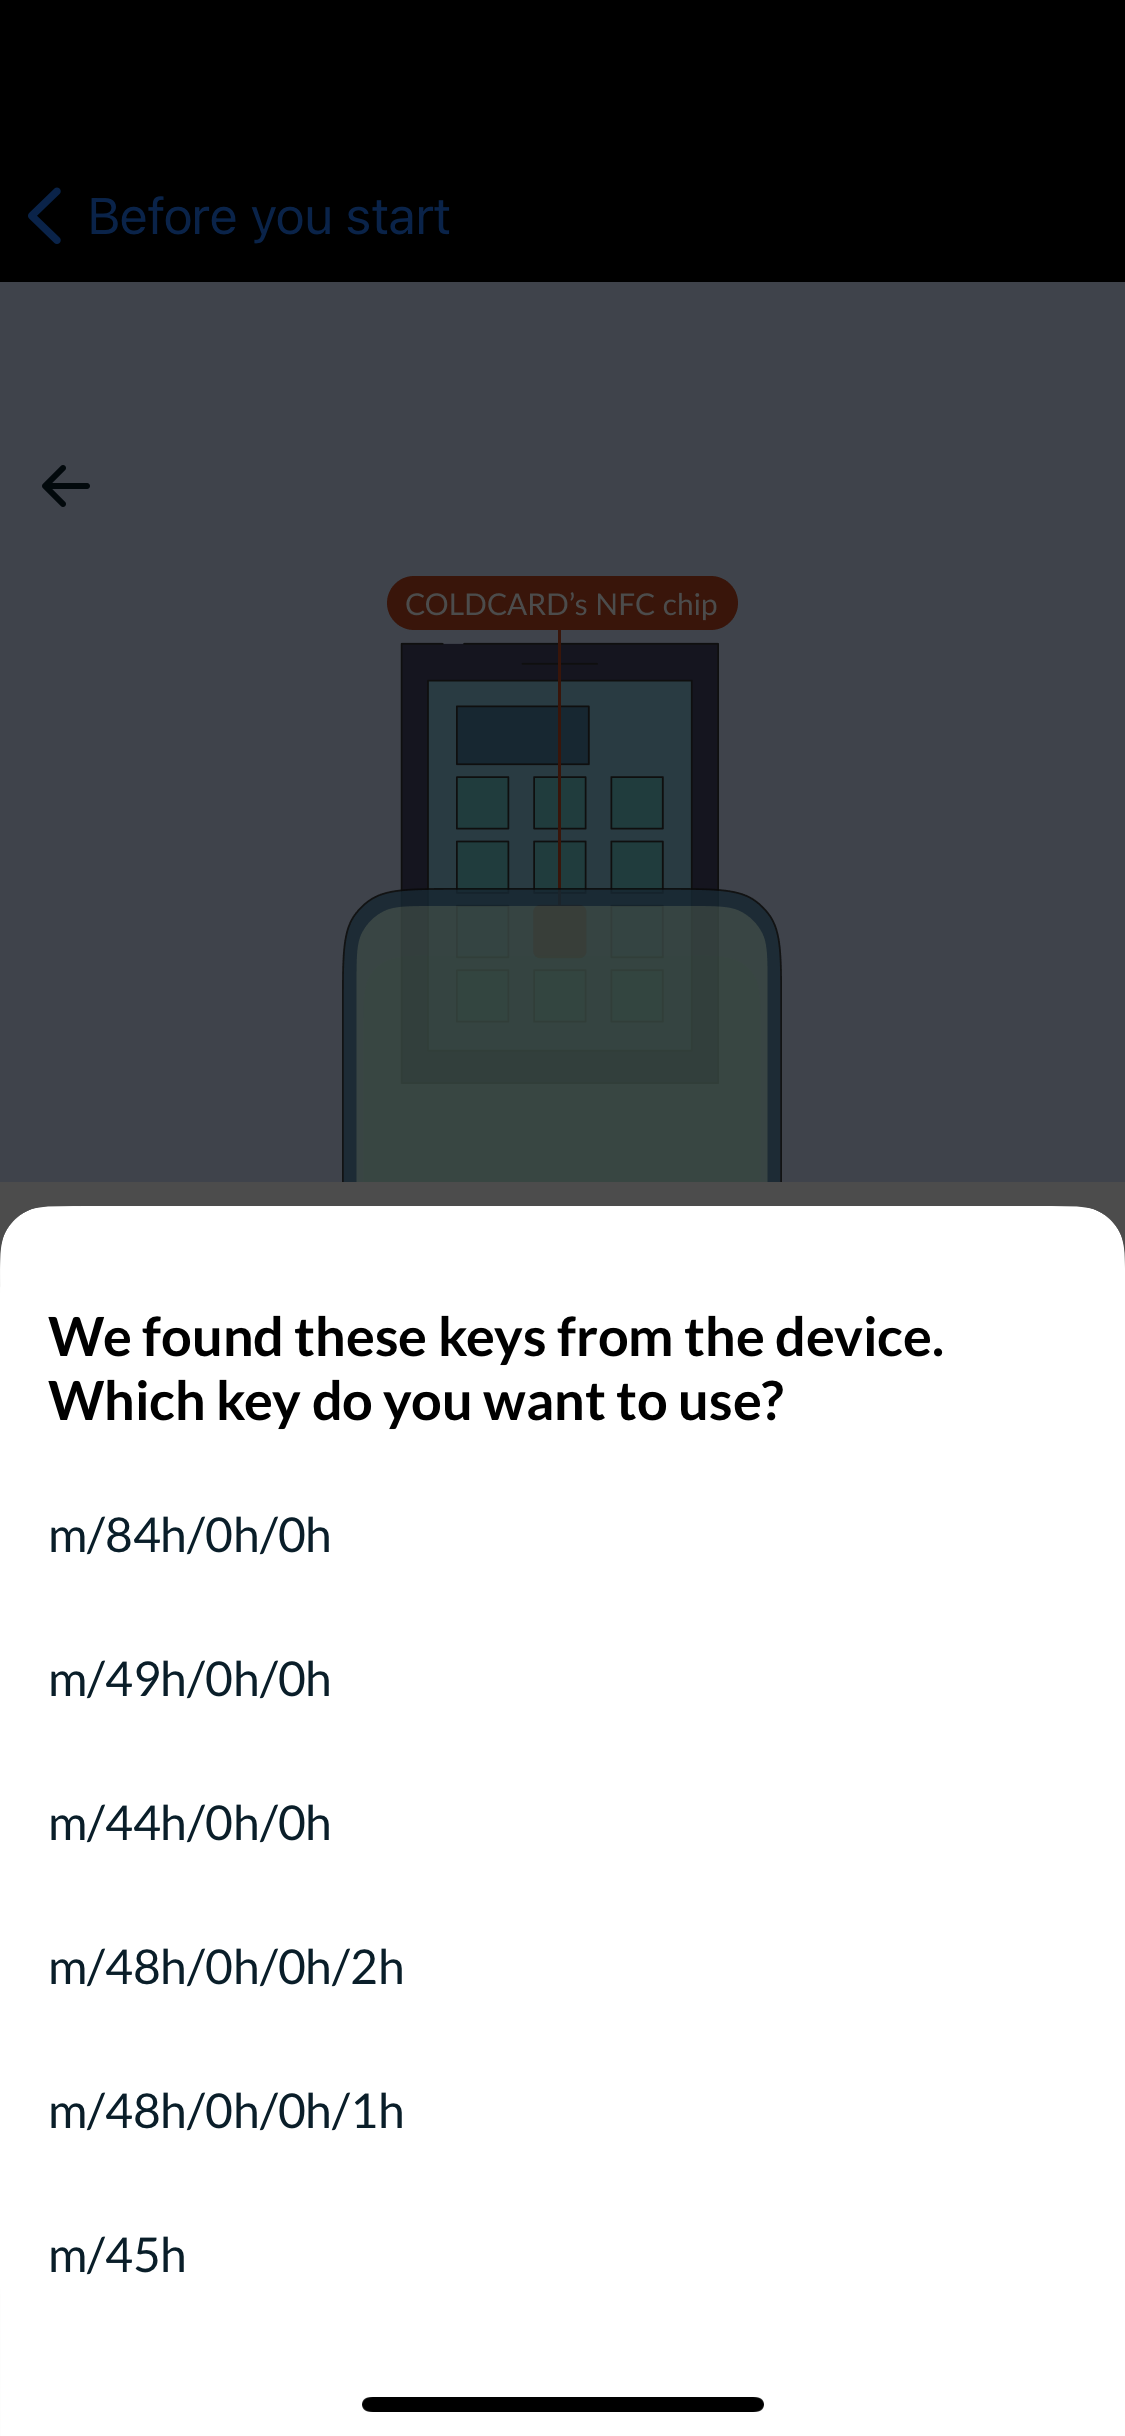
It is highly likely that you will not be able to scan Coldcard's key on the first try, due to a weak NFC signal. In that case, you will have to repeat the previous process and also adjust the phone's position.
On my iPhone 12 mini, the best way is to remove its case and position the top left corner right underneath button 5.
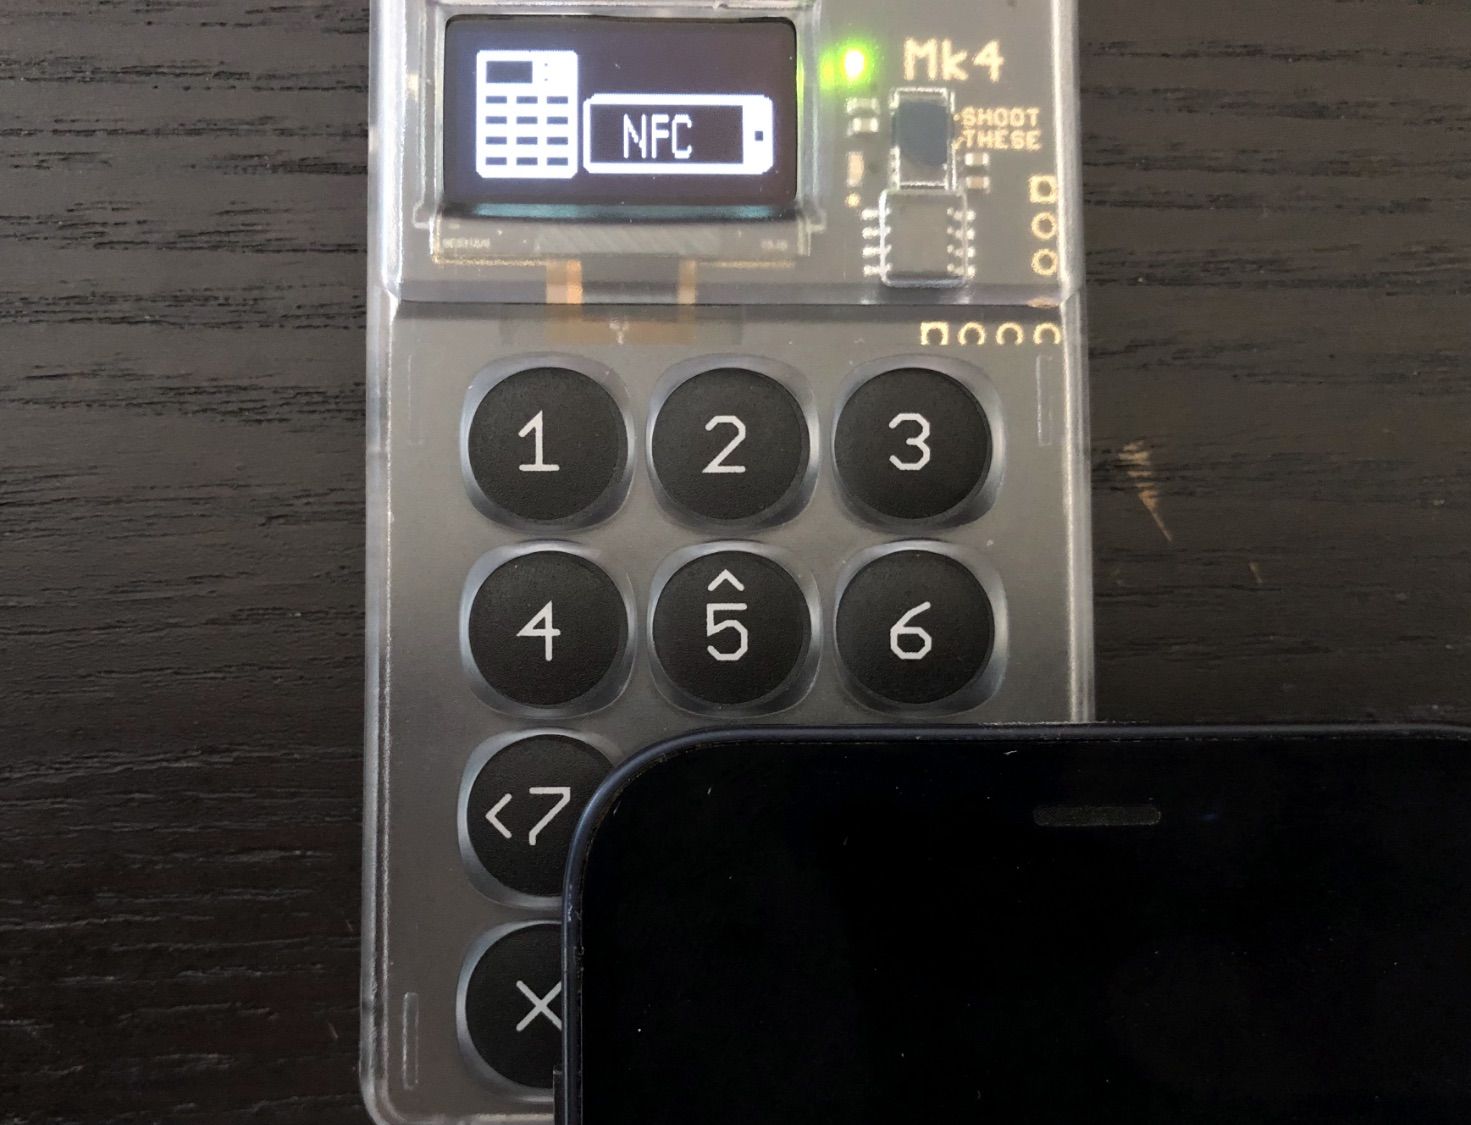
However, this is only true for adding the key. Signing a transaction with Coldcard requires a different approach (in my case), but more on that will be discussed later.
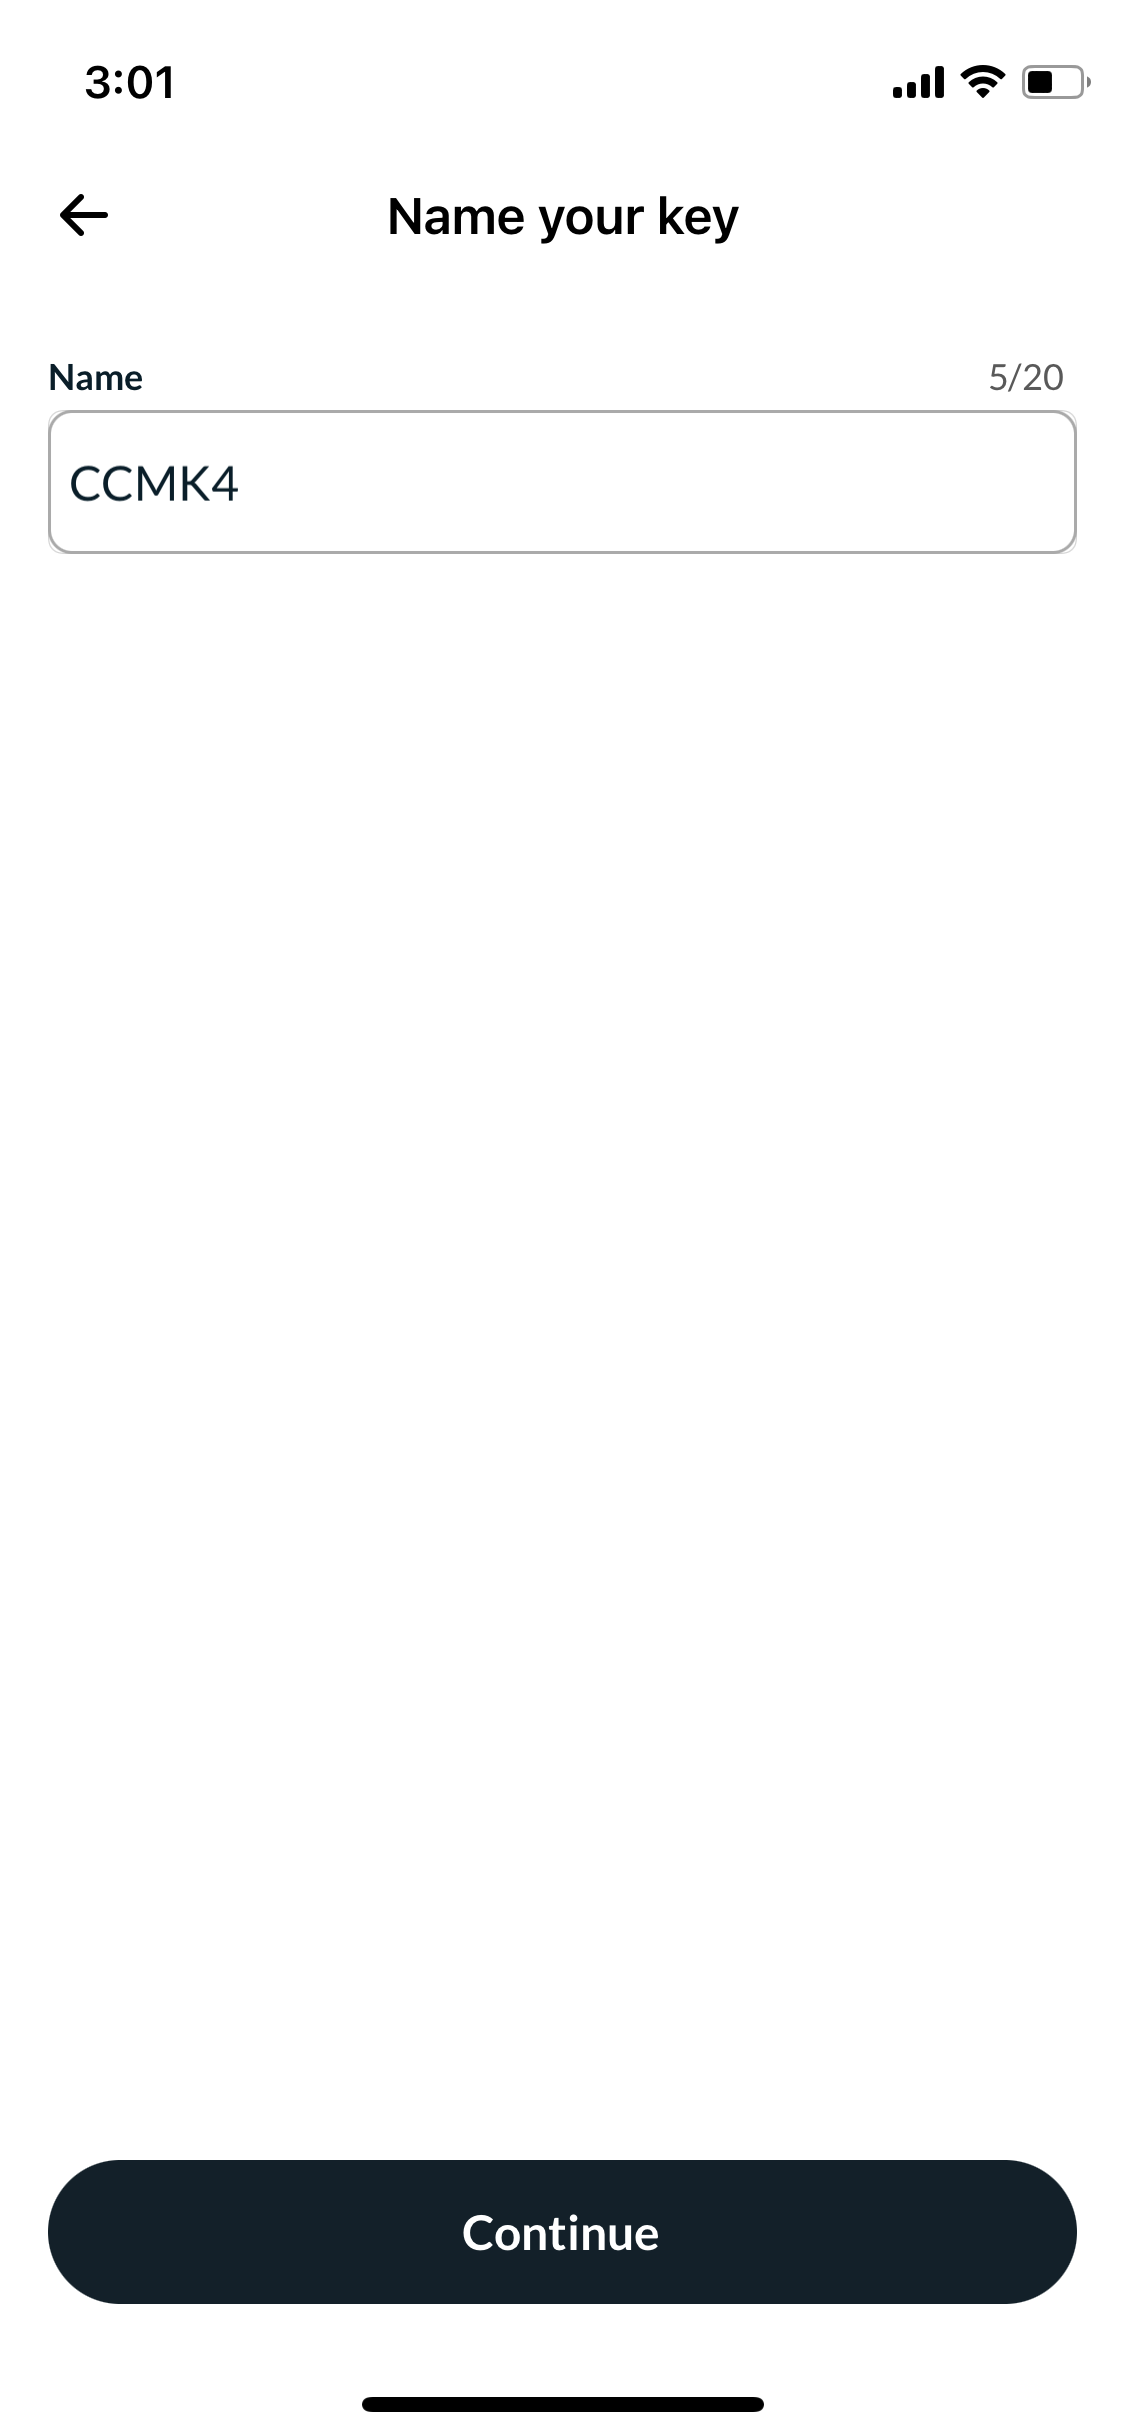
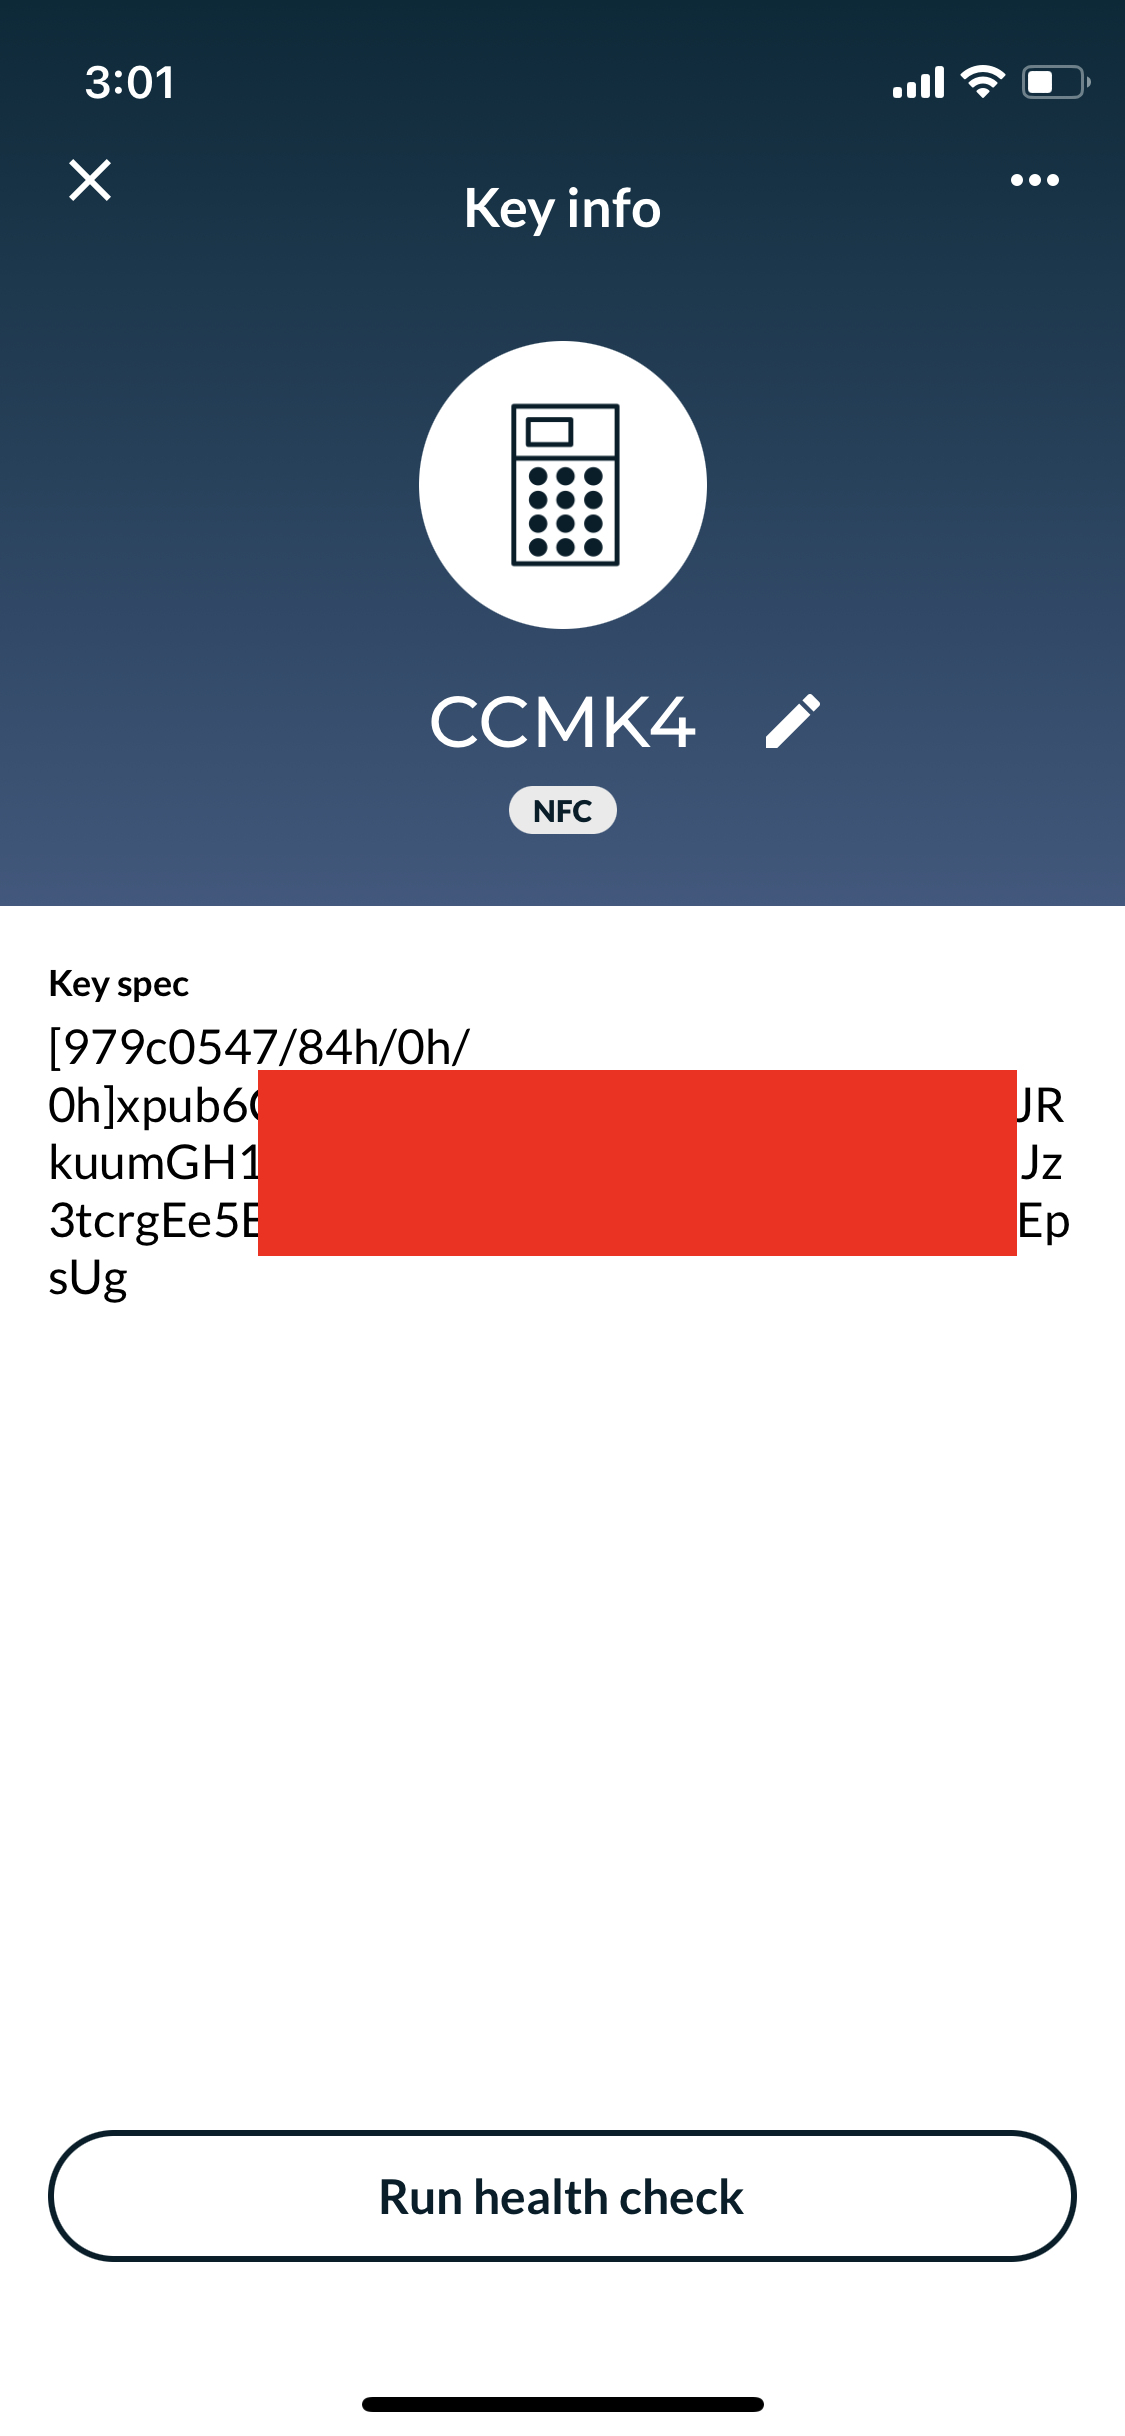
Once you have finished scanning, give your key a name such as CCMK4, close the information screen, and proceed to the next step.
#2 Add Tapsigner key
Fortunately, this step is a bit easier because the iPhone has no issues scanning Tapsigner at pretty much any position on the right side of the card.
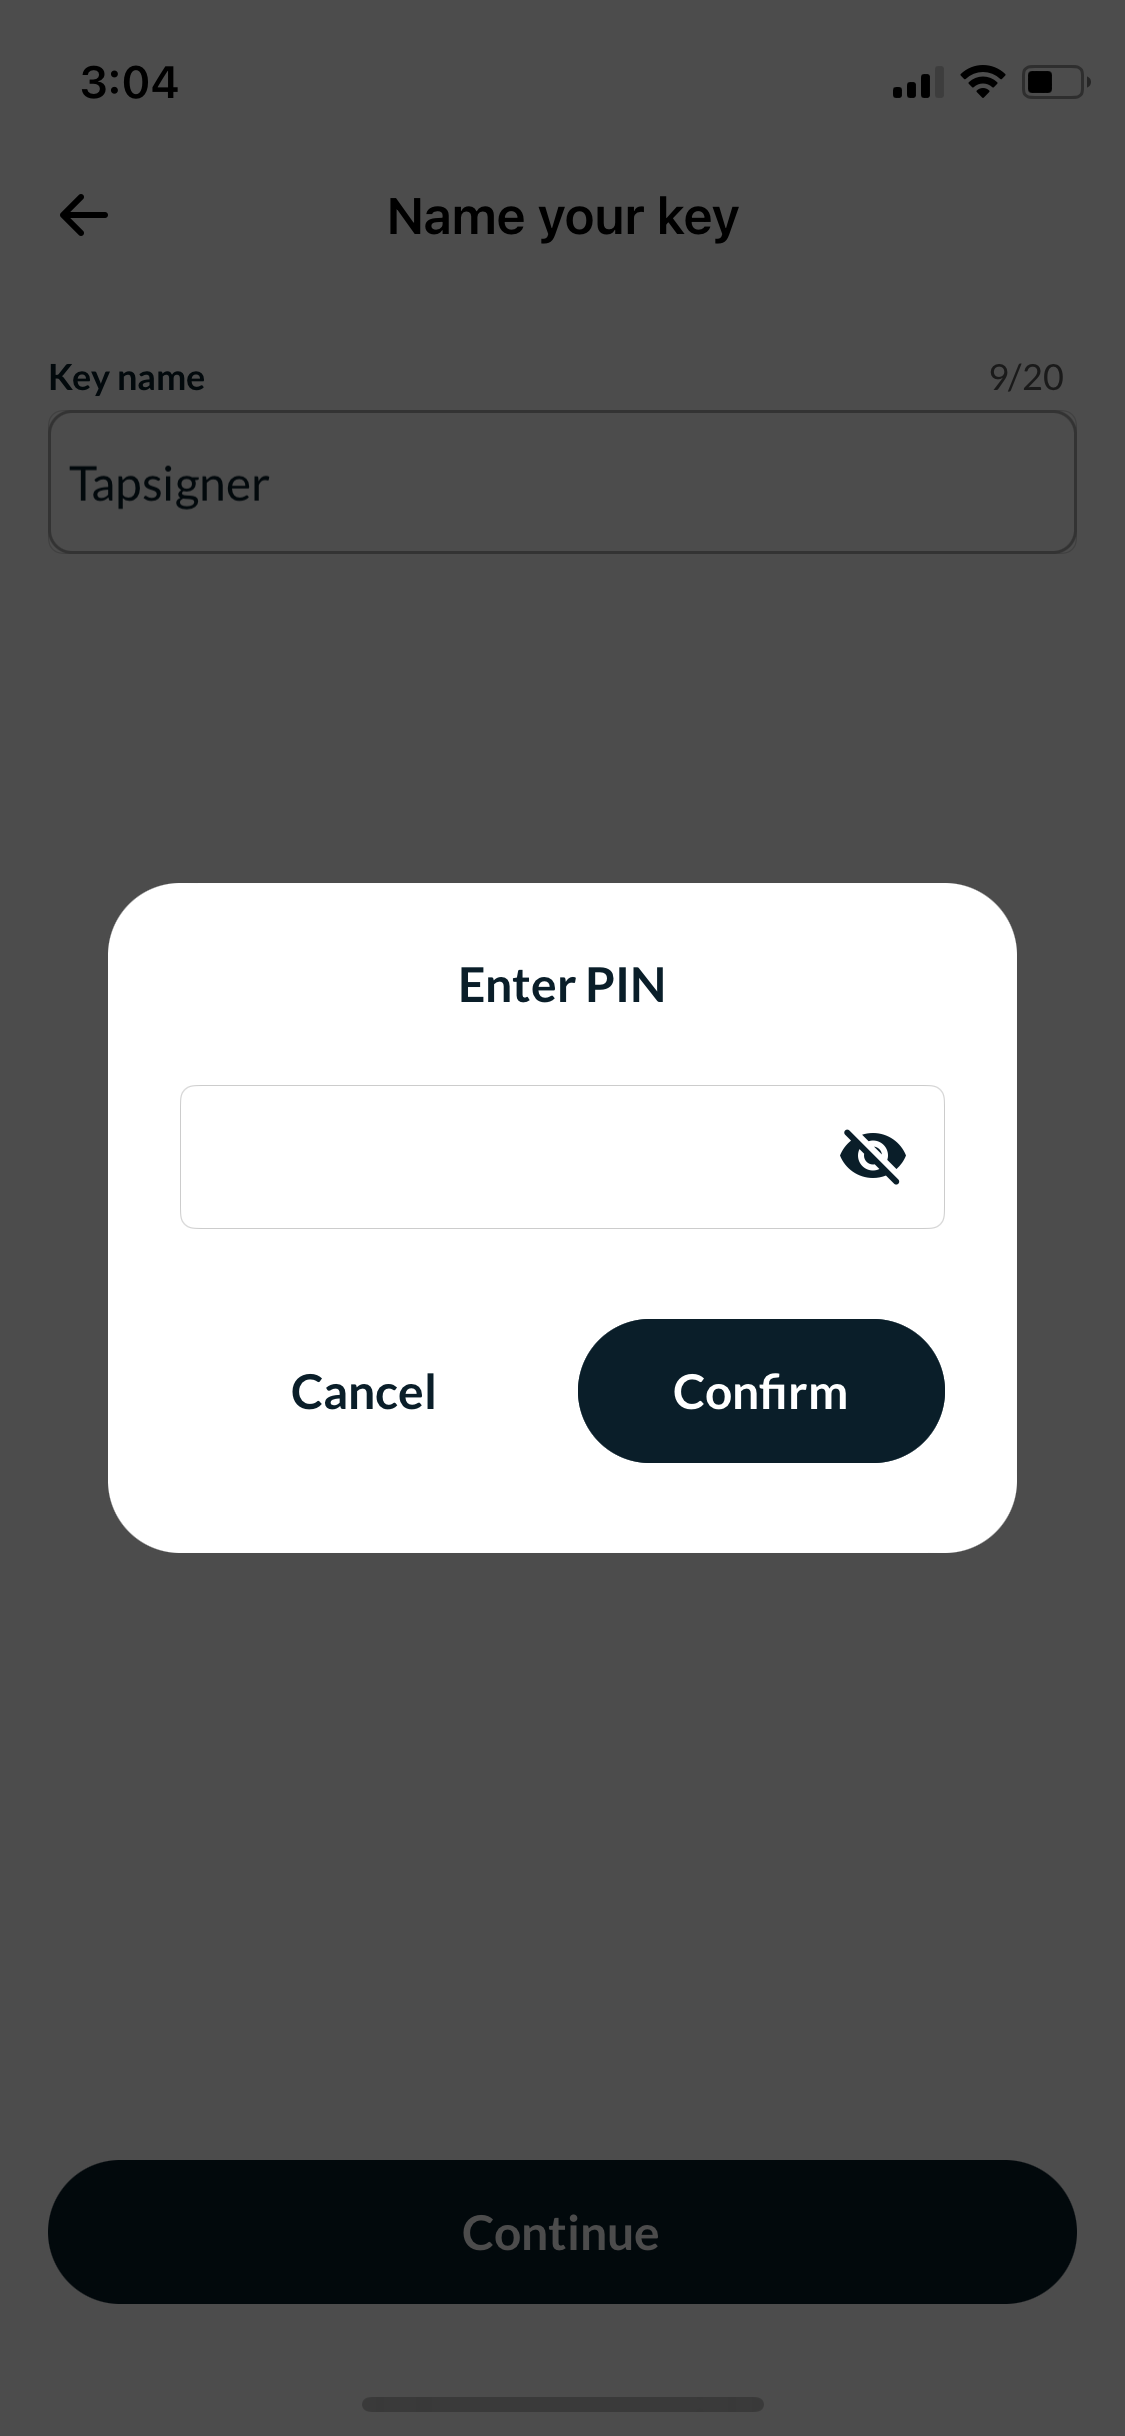
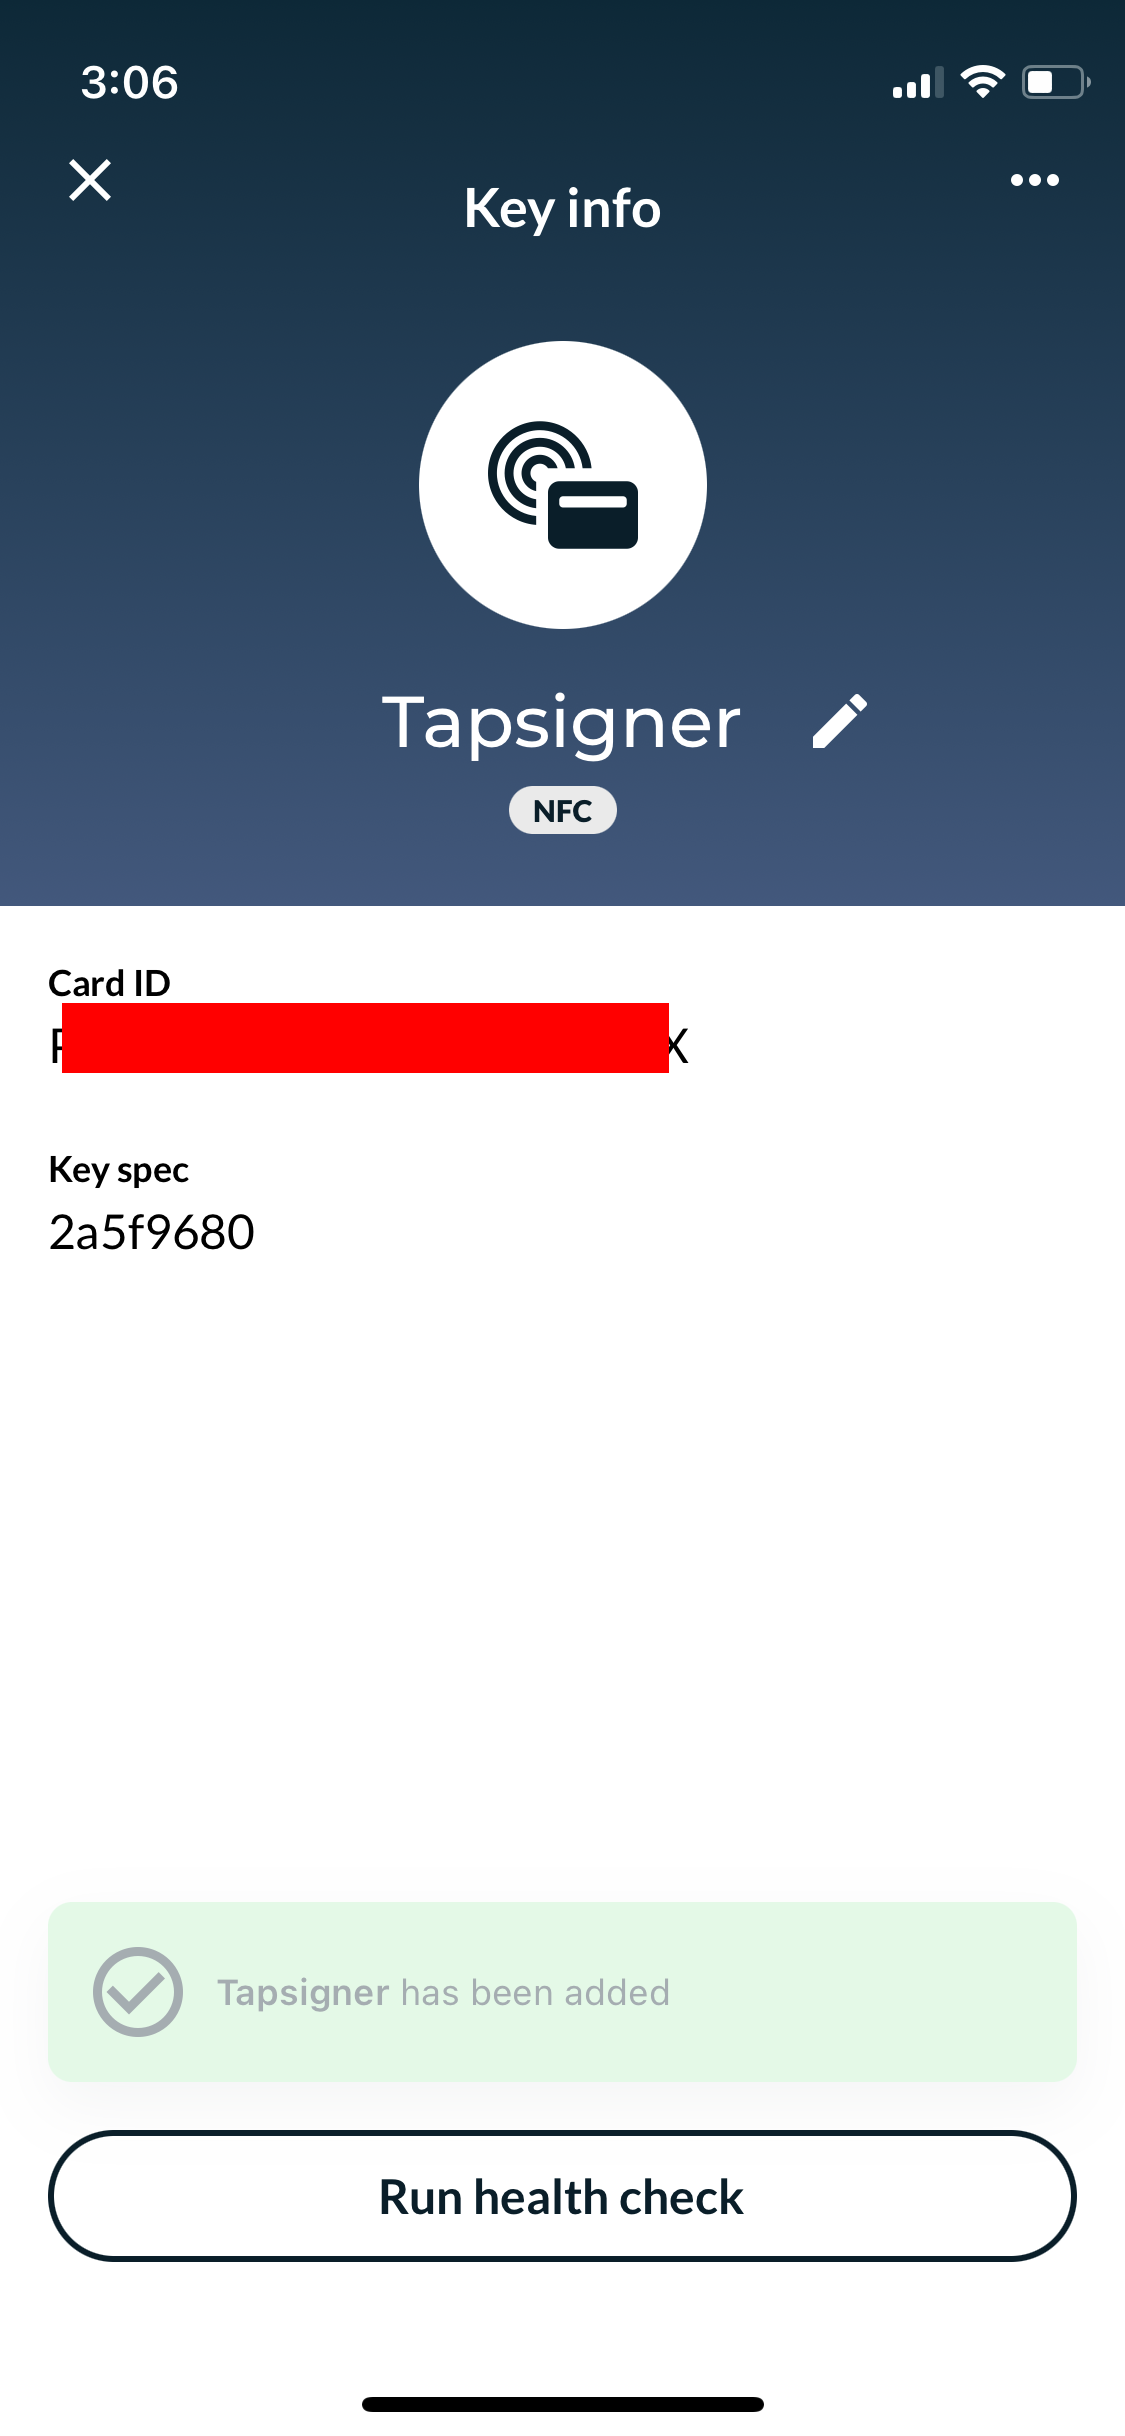
In the Keys section on the second half of the main Nunchuk screen, tap the + sign. But this time, tap Add NFC Key -> Add TAPSIGNER. Tap Continue on the Add a TAPSIGNER screen and scan Tapsigner with your iPhone.
If you have previously created a custom PIN for Tapsigner, simply enter a custom name for the key (e.g., Tapsigner), enter the PIN, and confirm by scanning the card again.
Otherwise, you'll be prompted to Set up CVC first. In that case, please refer to the video below.
After you are done, close the key info screen to return to the Nunchuk's home screen and continue to the next step.
TAPSIGNER
Secure NFC Bitcoin wallet that fits in your pocket. Affordable alternative to Coldcard.
#3 Add a hot wallet key
The last key will come from a hot wallet, either created directly by Nunchuk or imported from another wallet, such as Green or Bluewallet.
Let's create a new wallet.
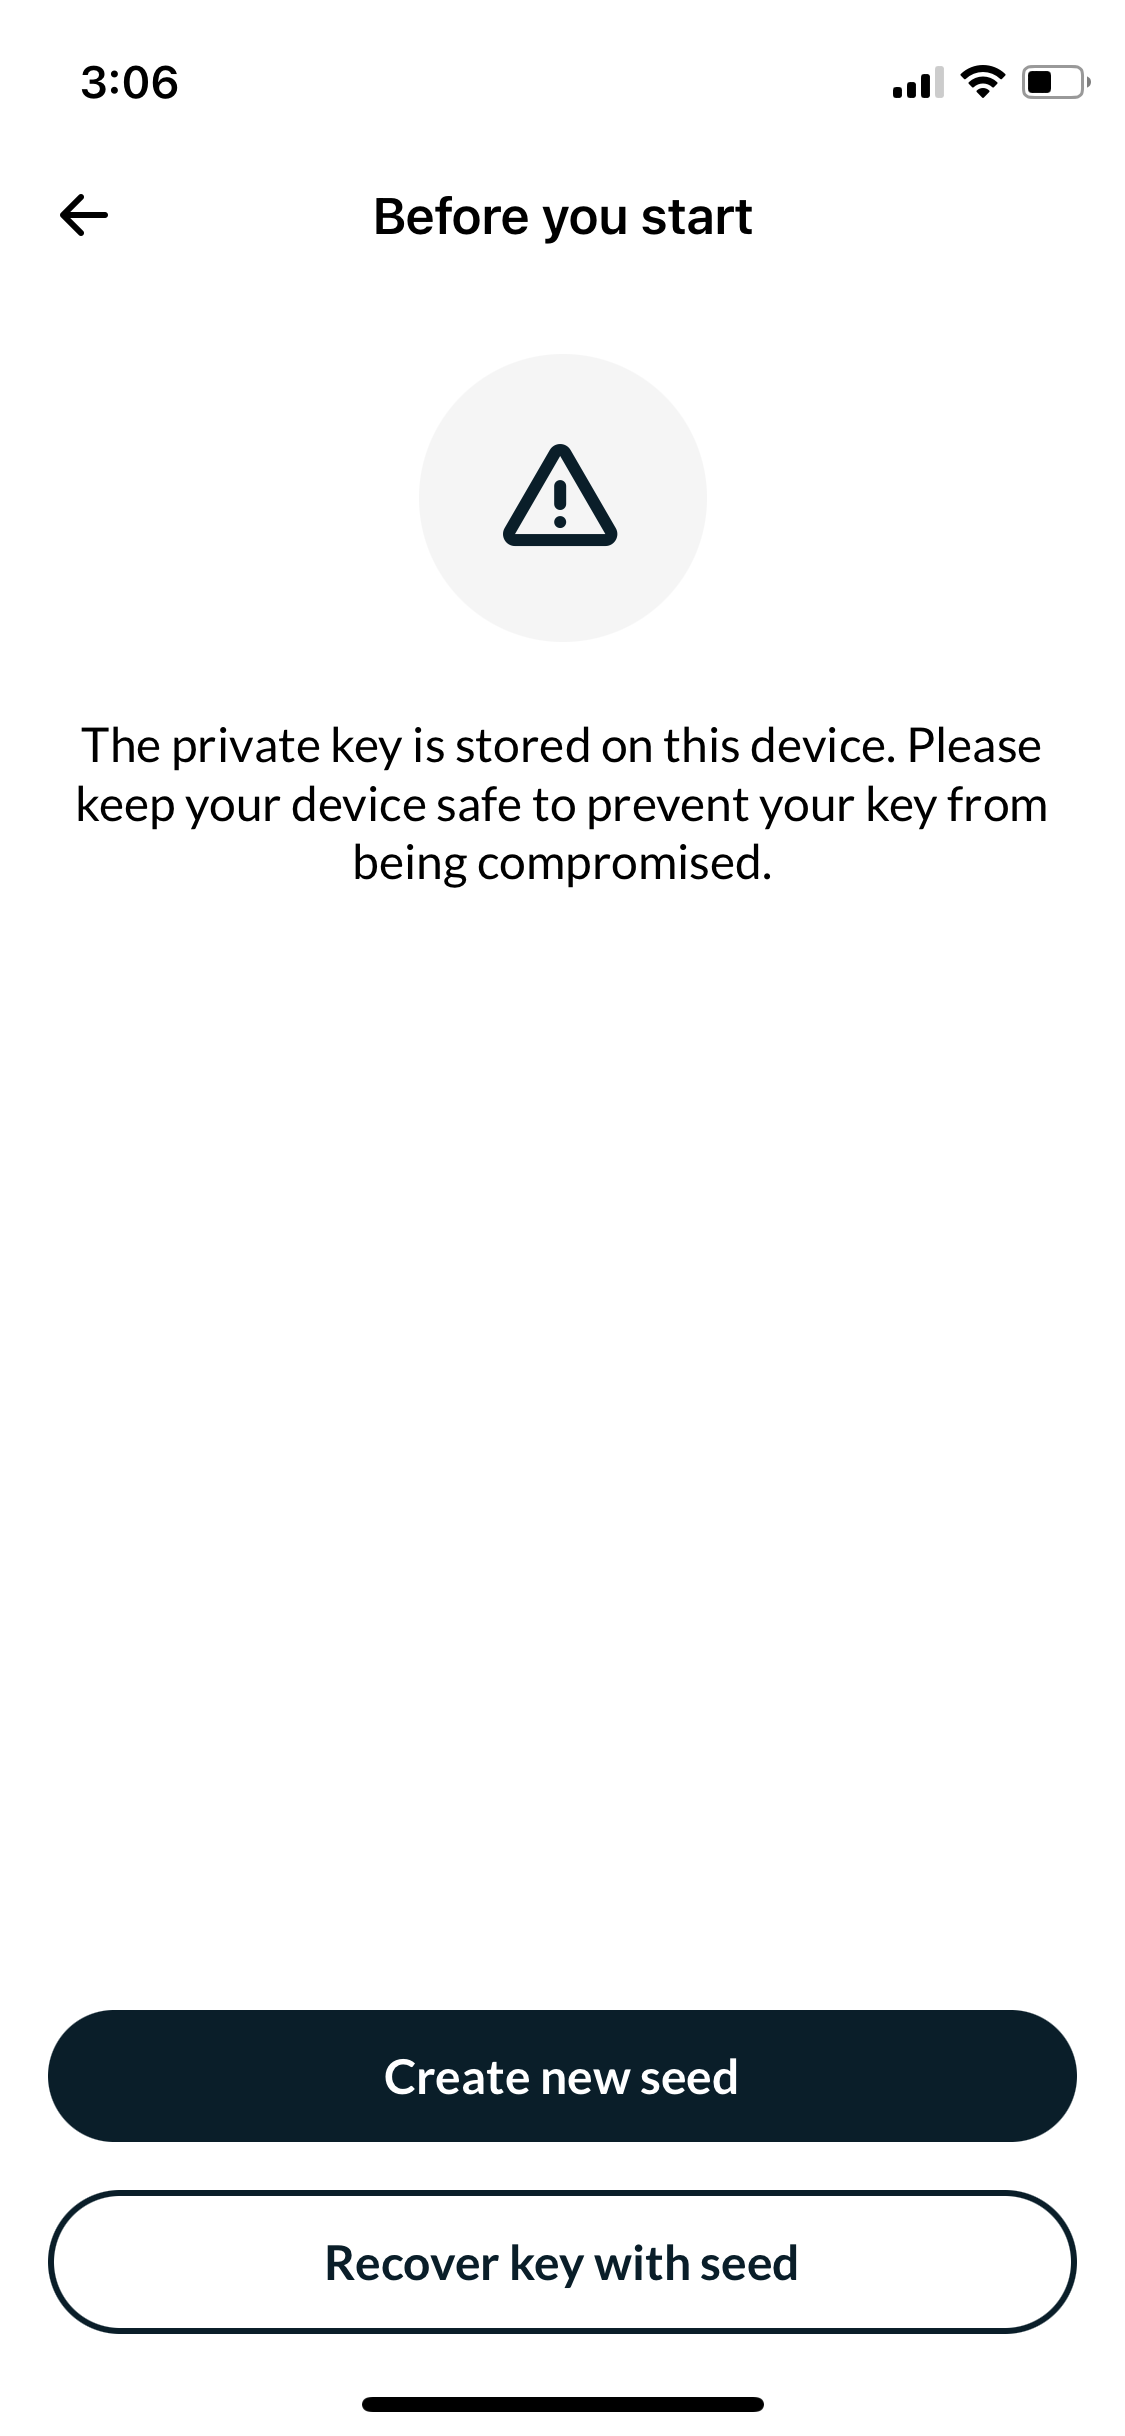
Tap Add a key on Nunchuk's home screen again, and then Add software key -> Create new seed.
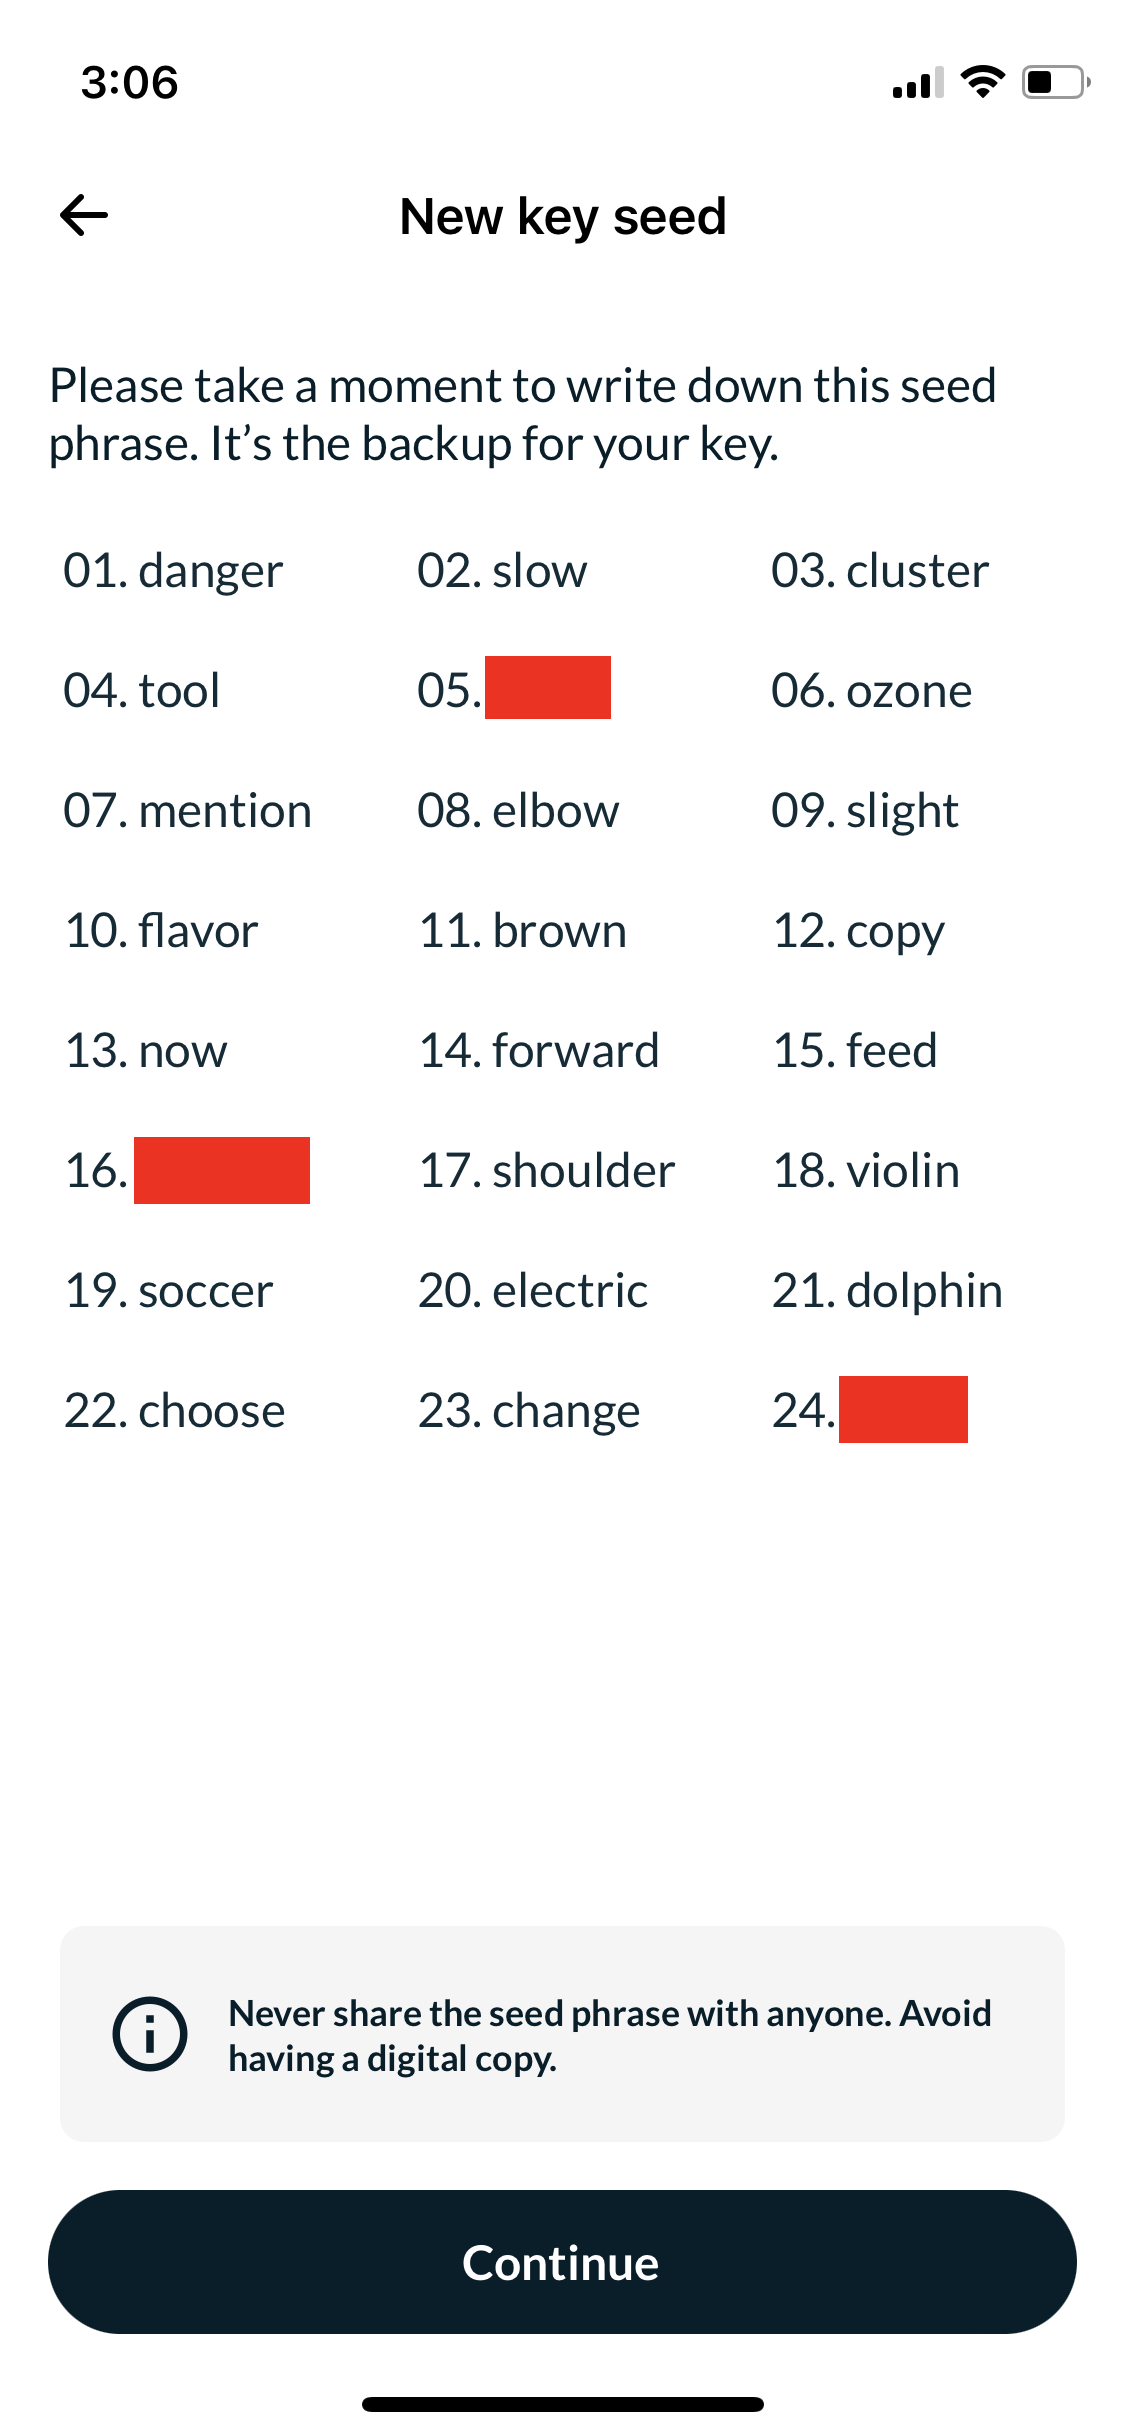
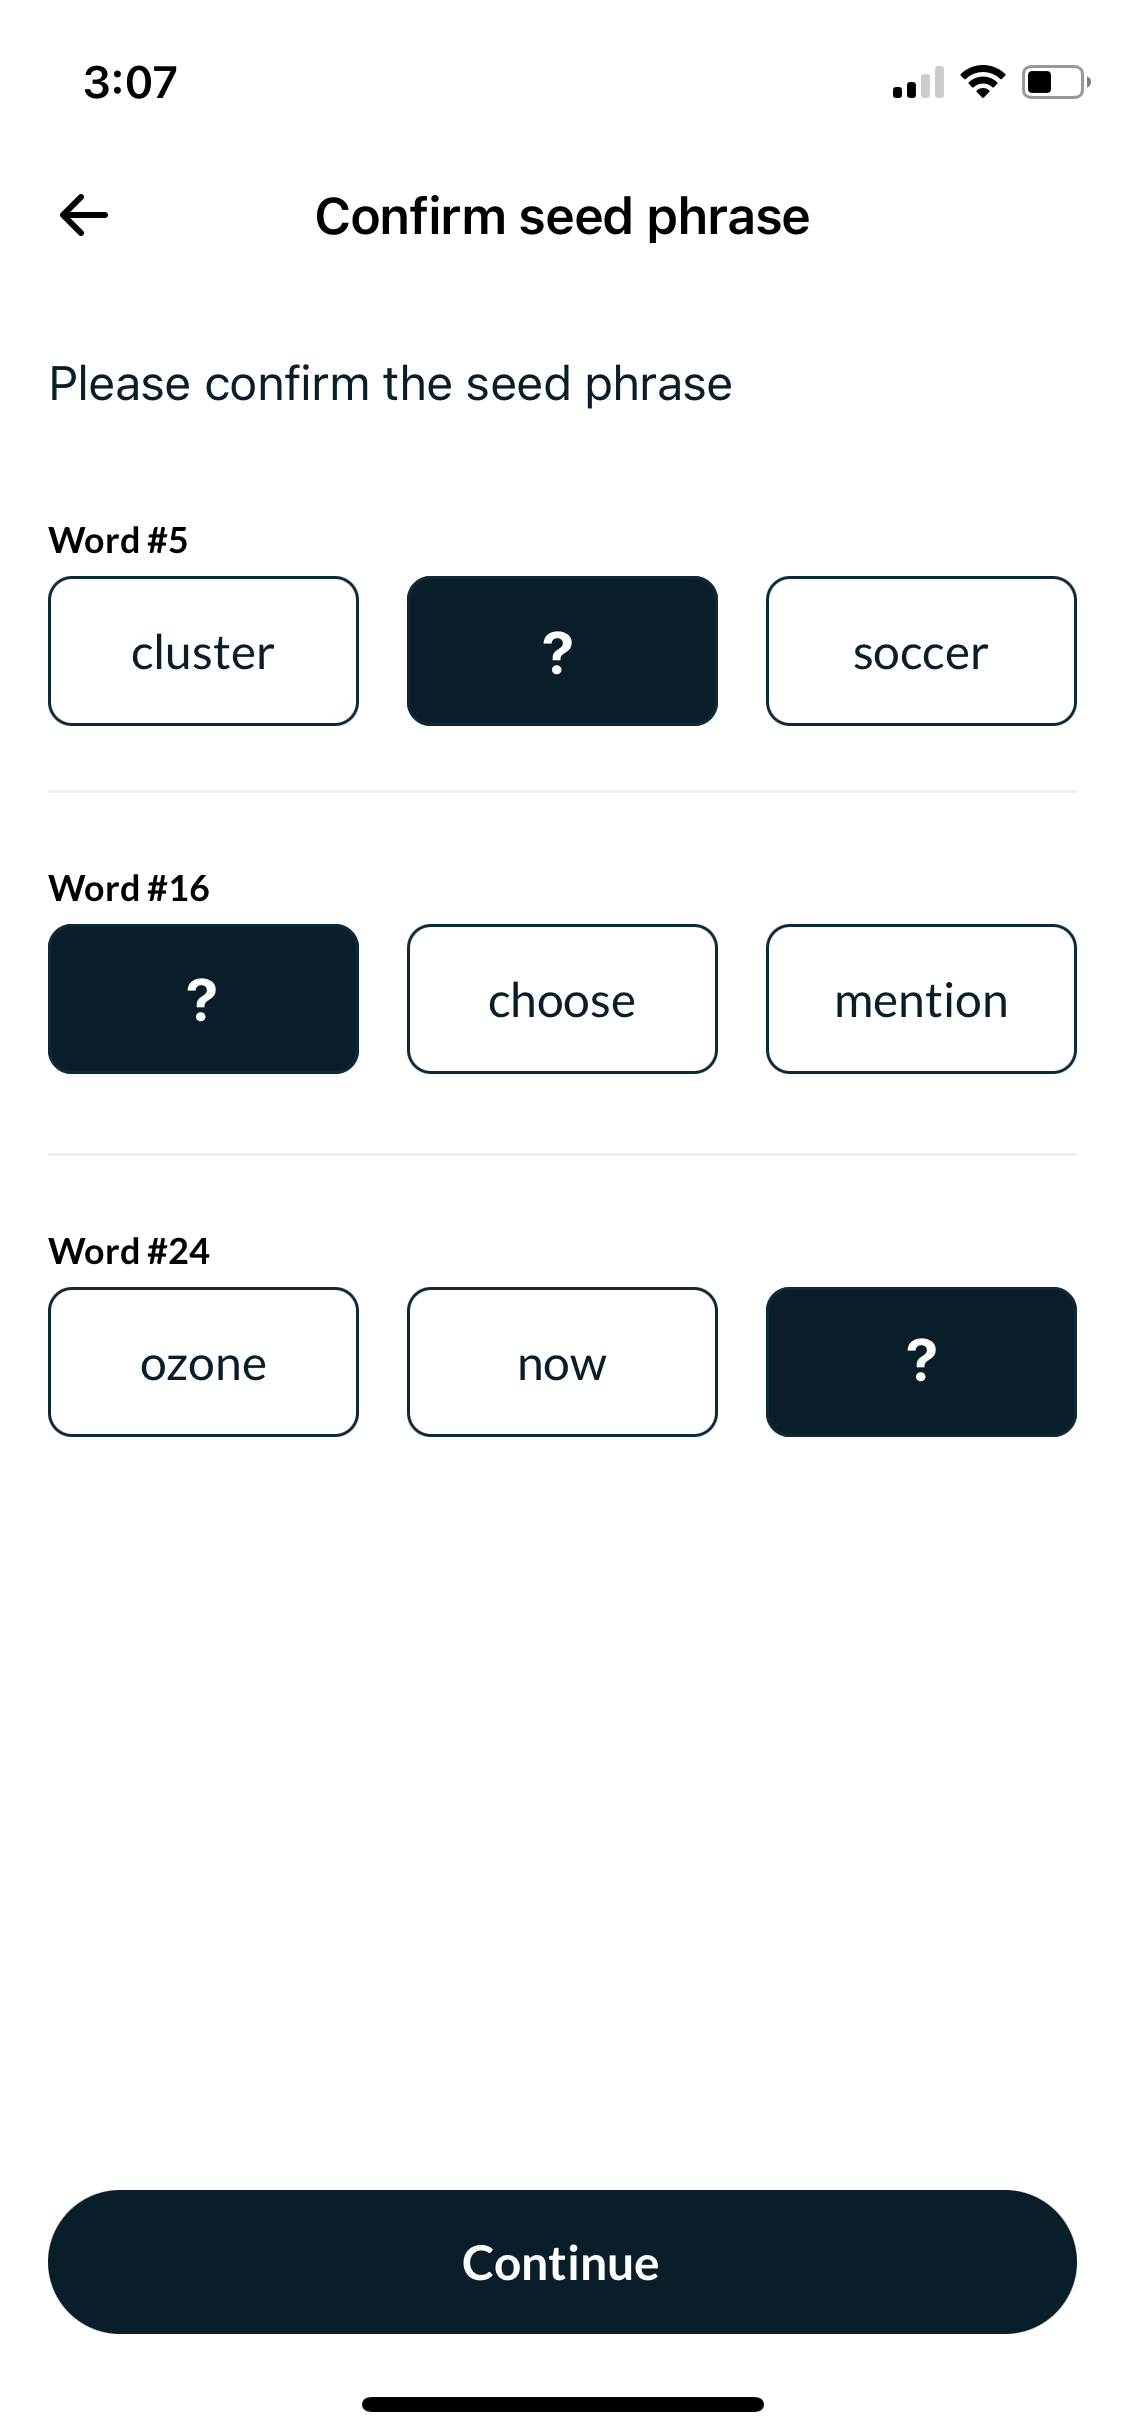
You will be presented with 24 words. Make sure to save them somewhere safe!
How to safely backup your crypto savings
Never lose your coins to a hardware failure or thieves. Protect your bitcoin!
Once the seed is safely stored, tap Continue, confirm three random seed words, and proceed to the next step.
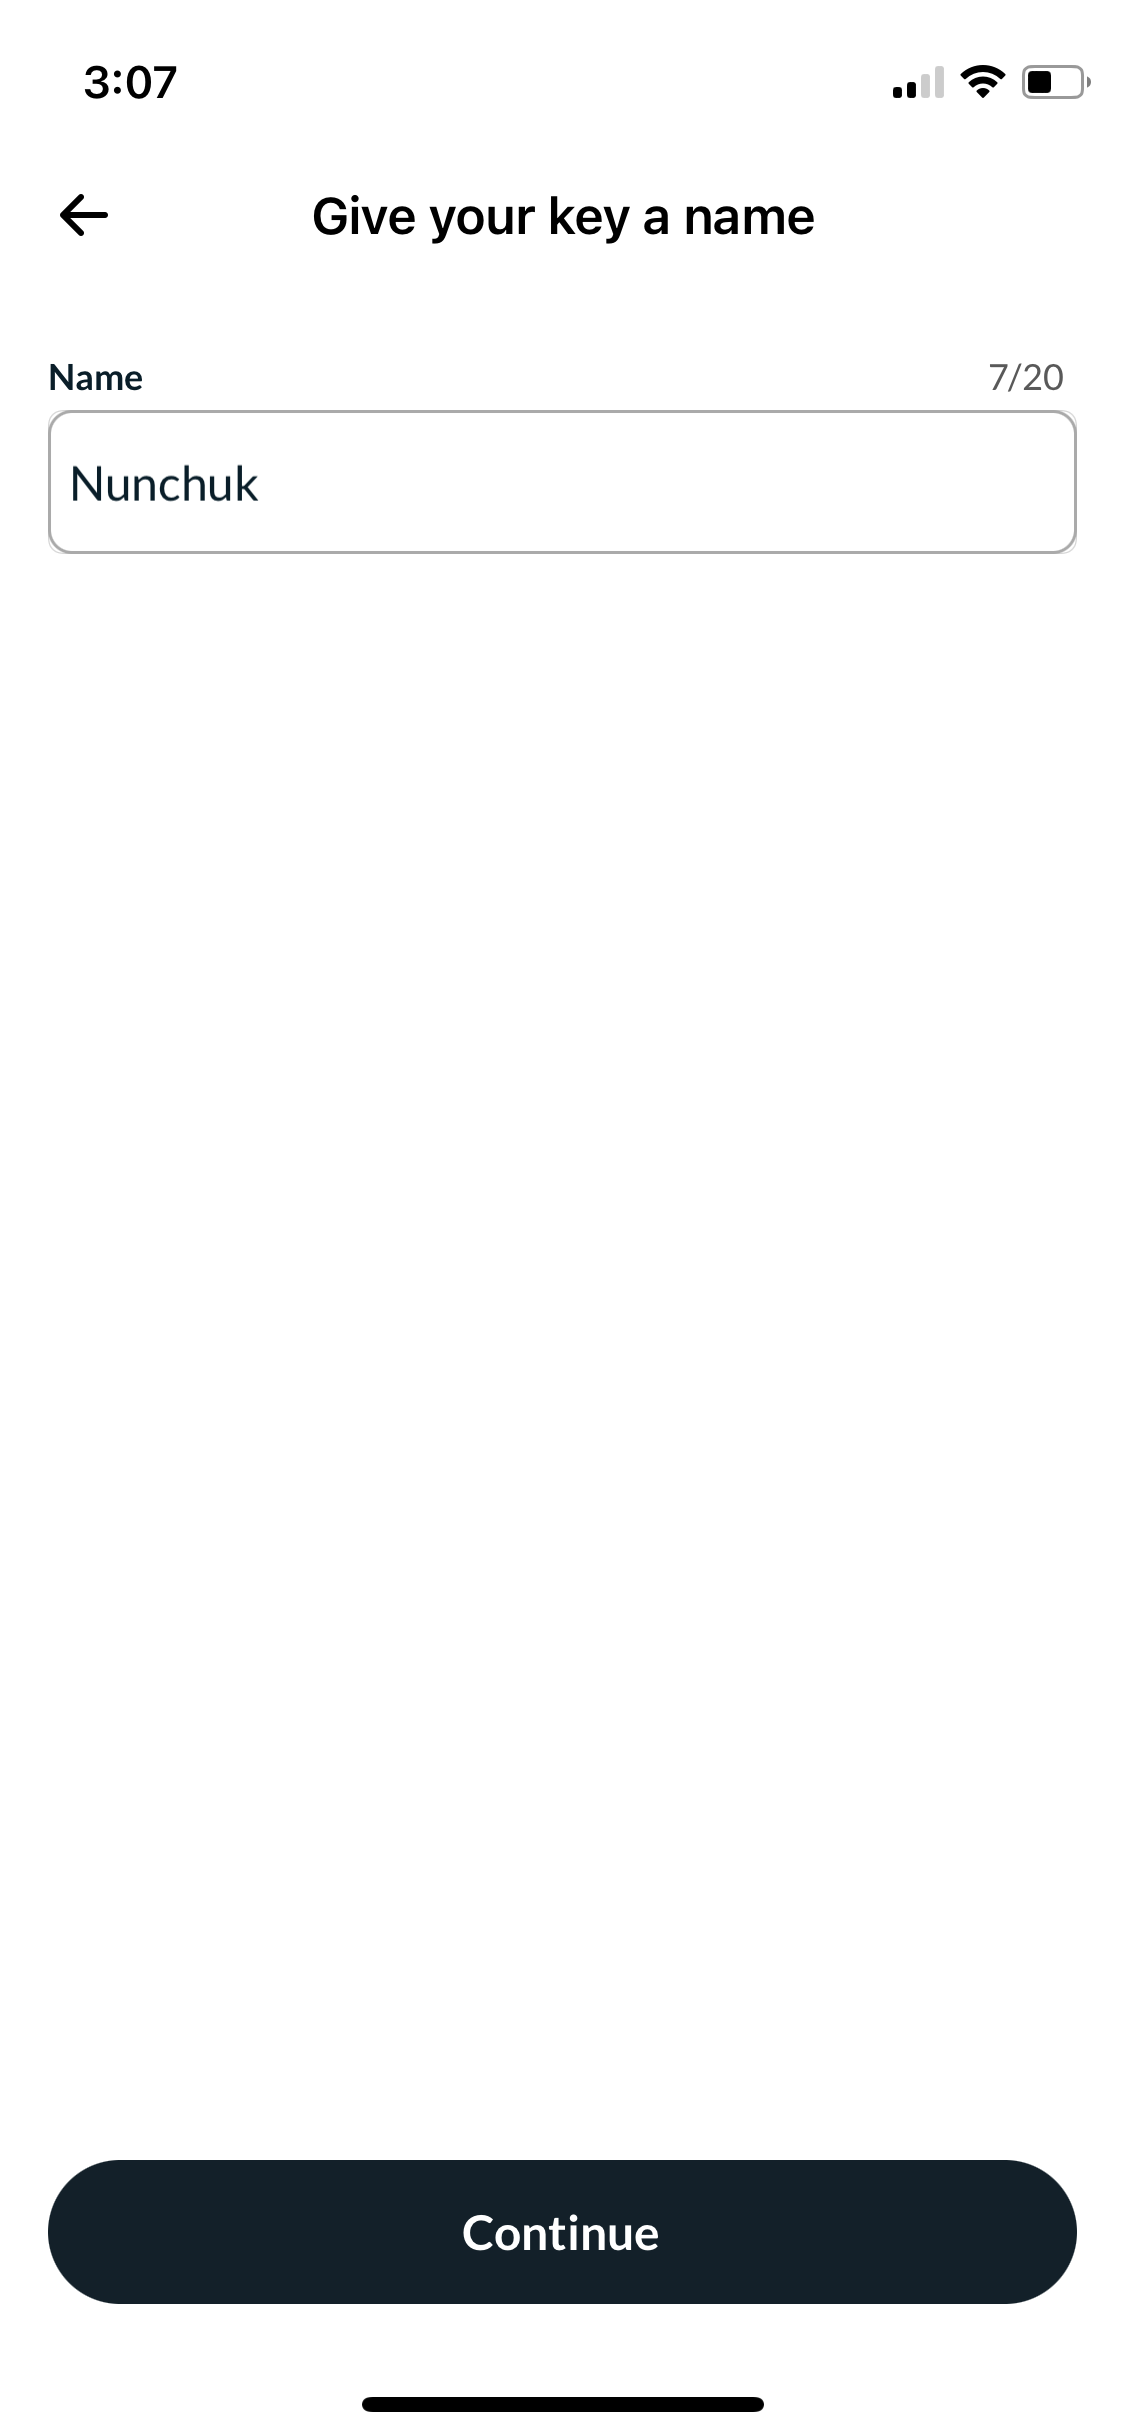
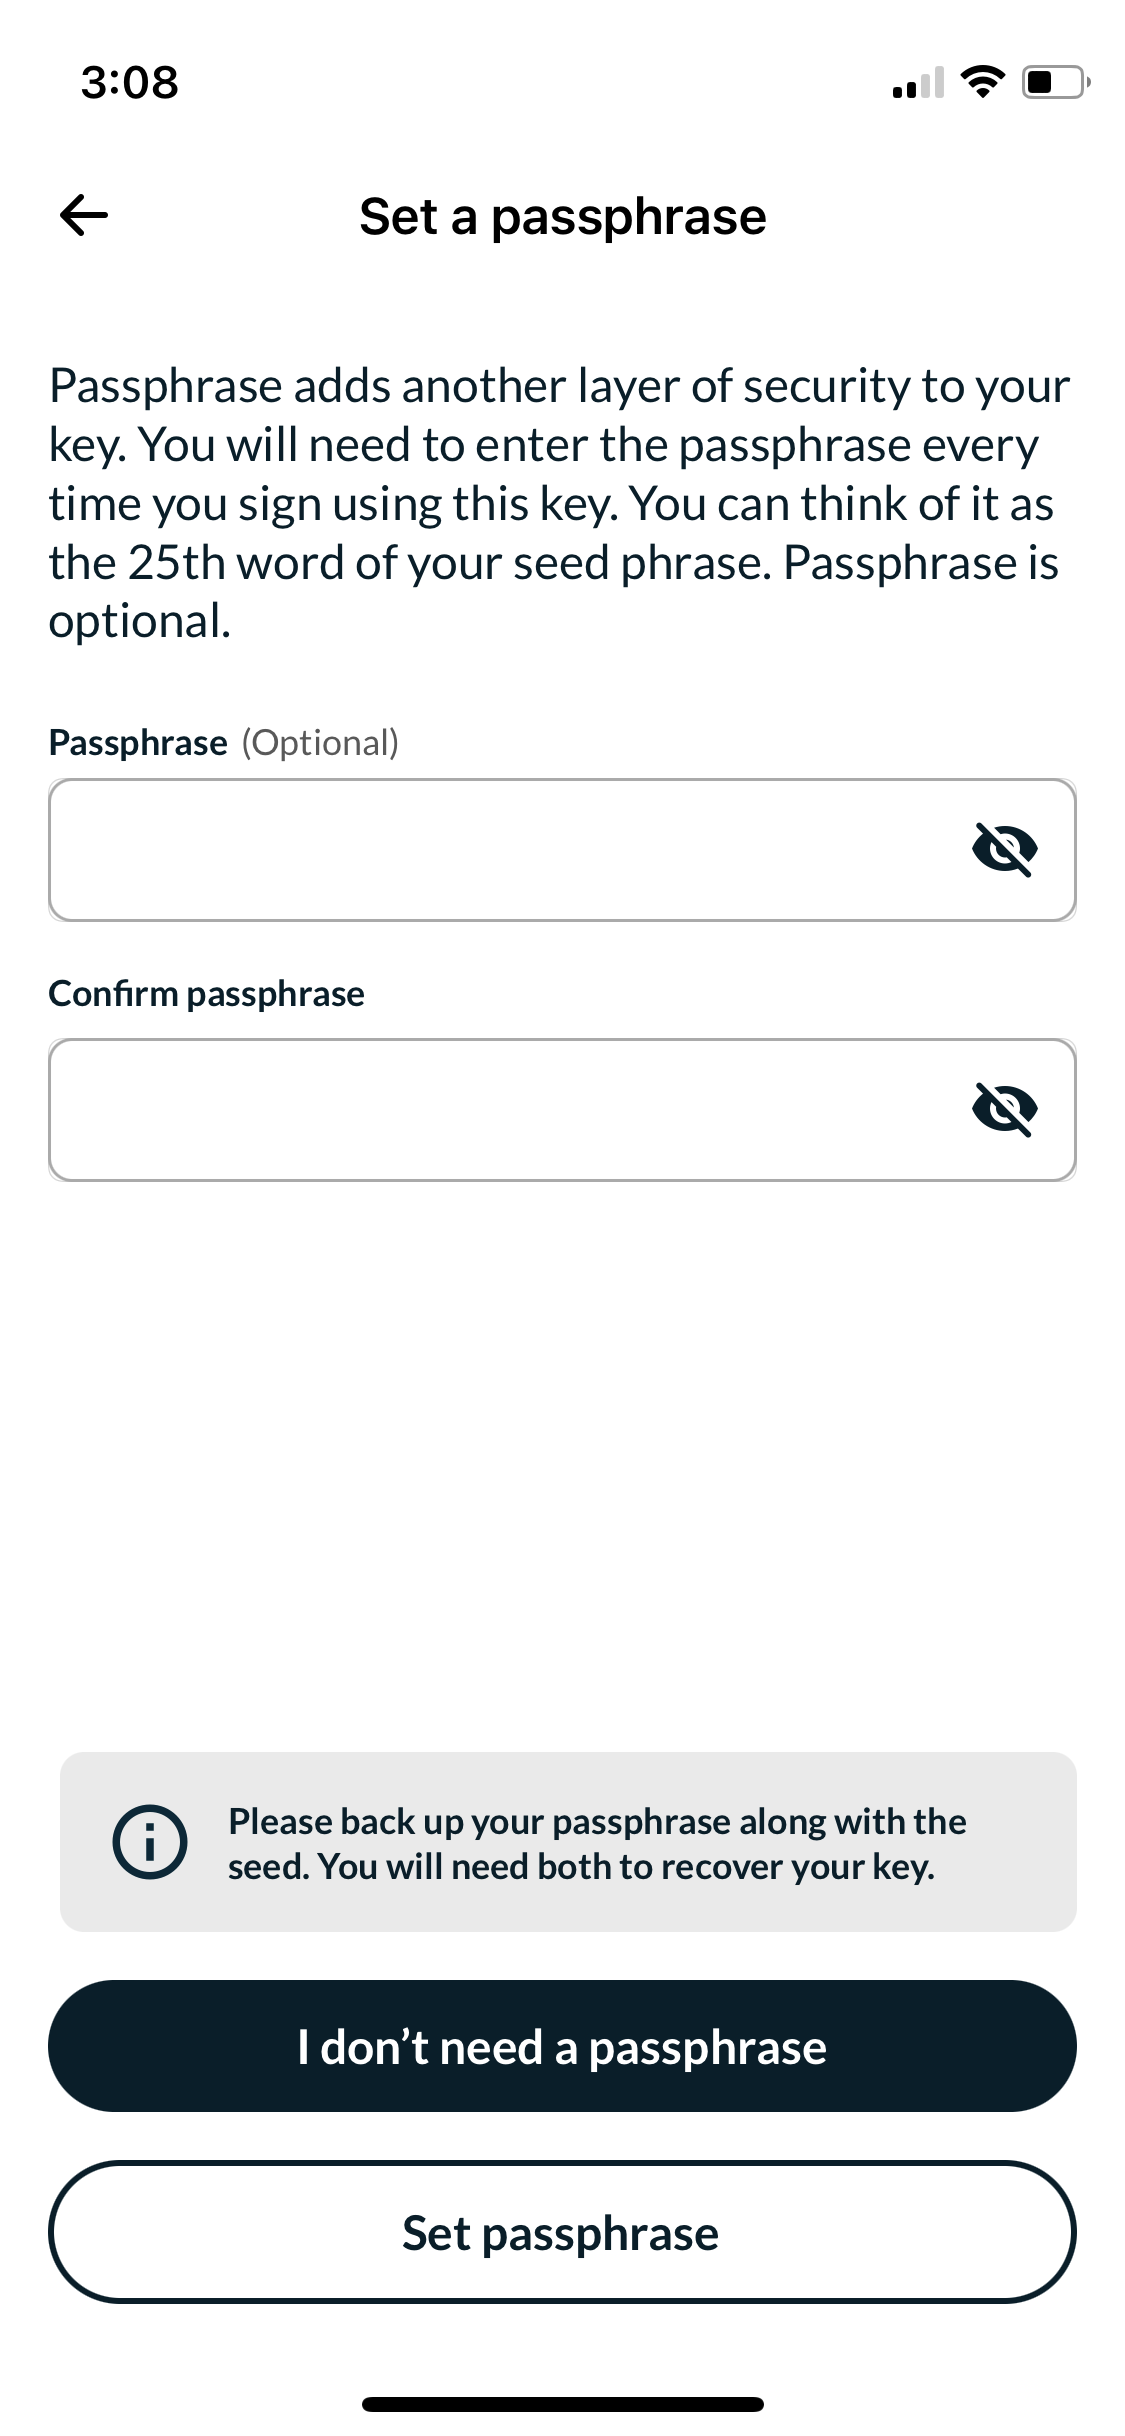
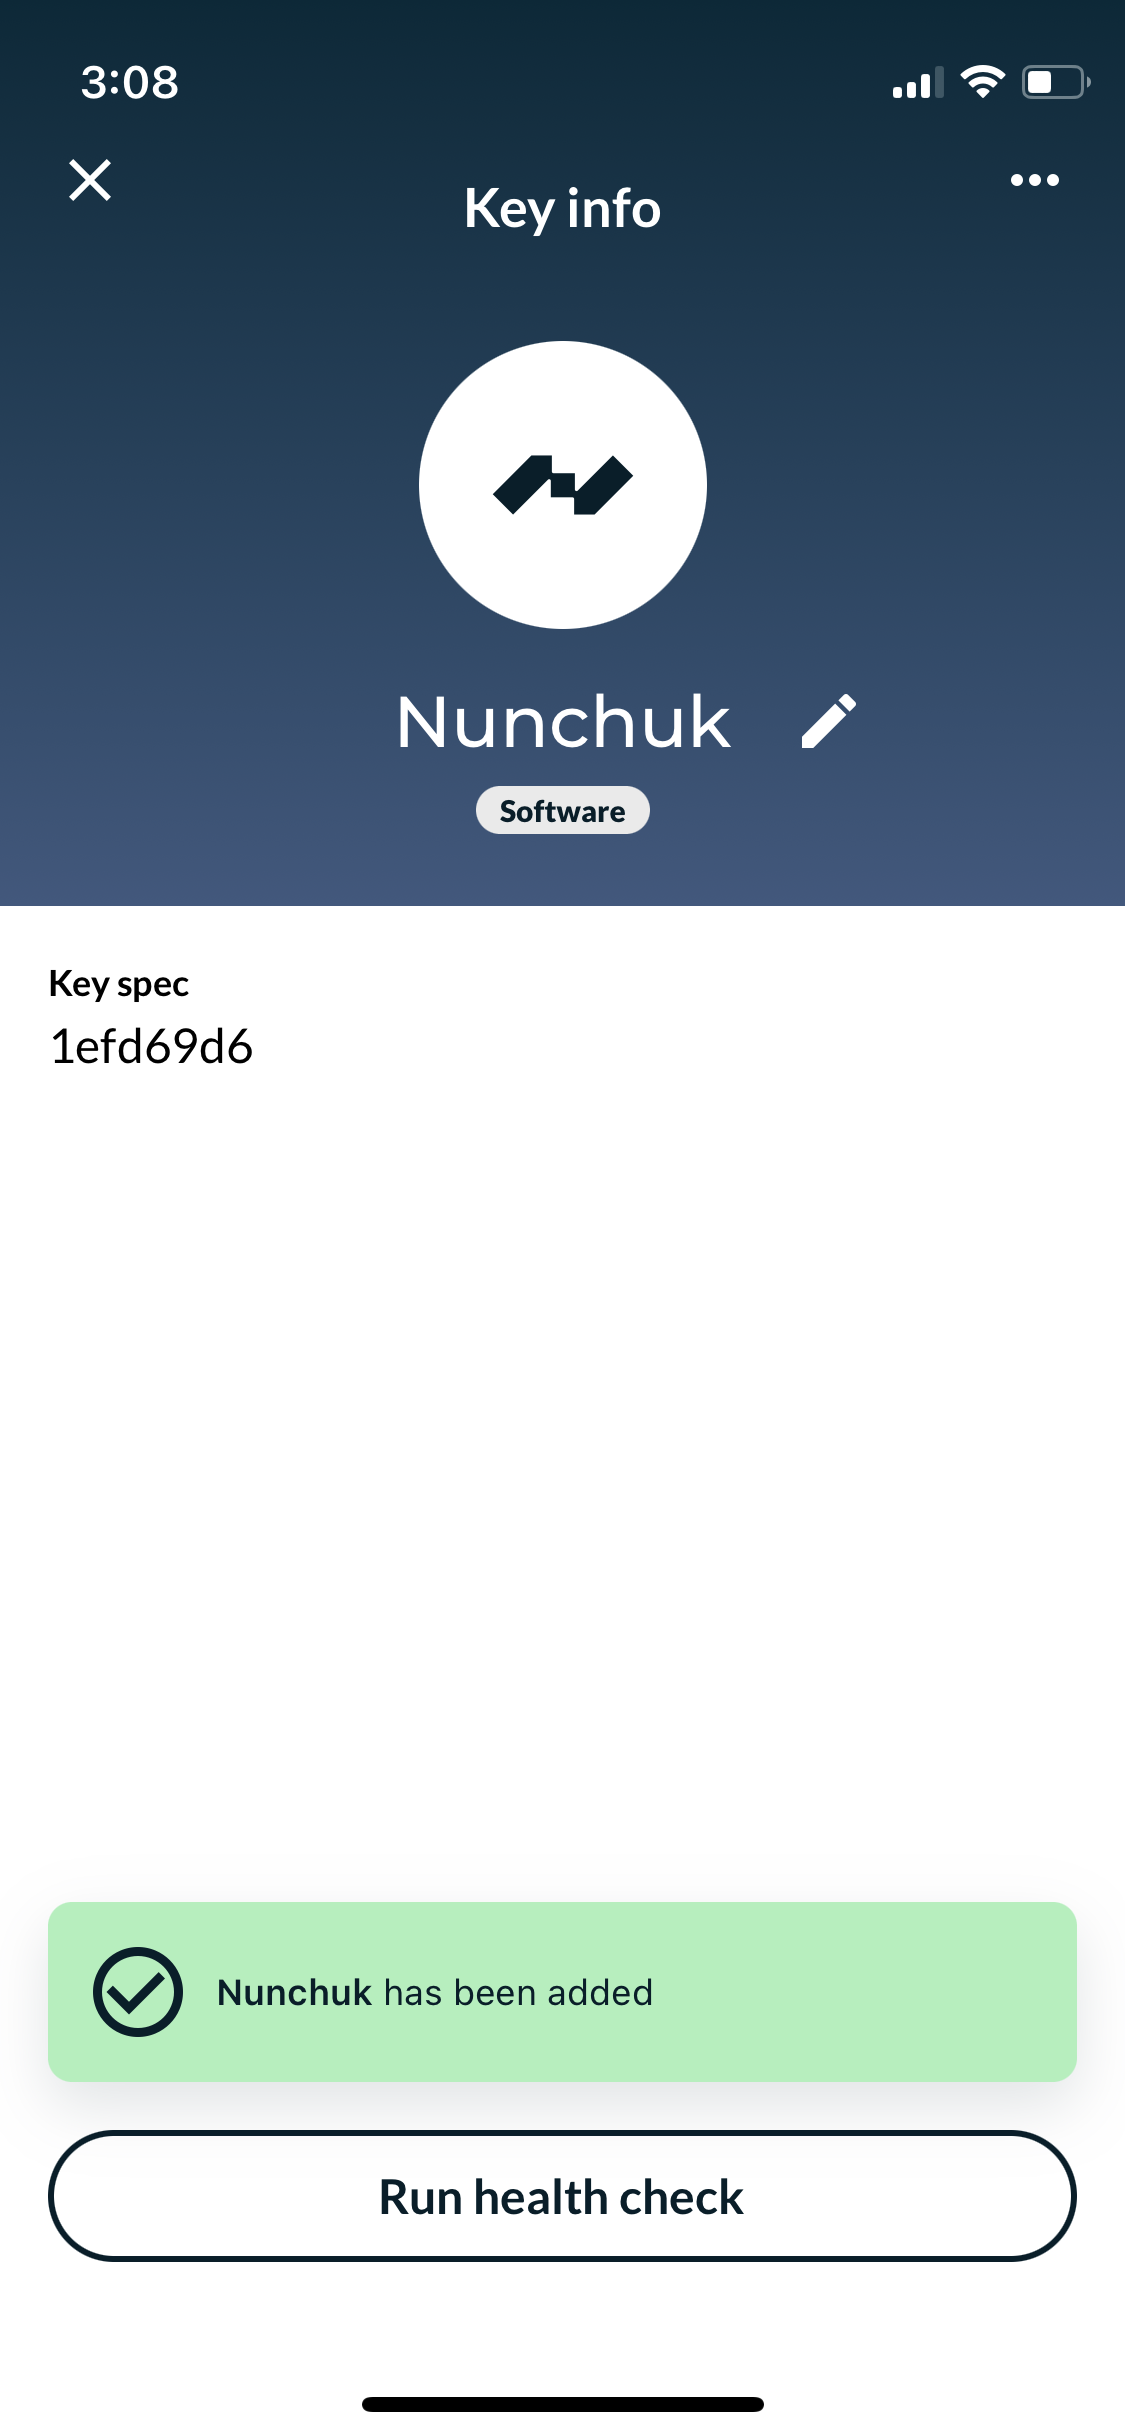
Assign a name to the key, such as "Nunchuk" or "Hot wallet". In the subsequent step, select I don't need a passphrase unless you desire one.
The addition of a passphrase does not necessarily enhance security in this case, as this key is employed as part of a multisignature configuration.
Now, close the key information screen and continue to the subsequent step, where we will finally generate the multisignature wallet.
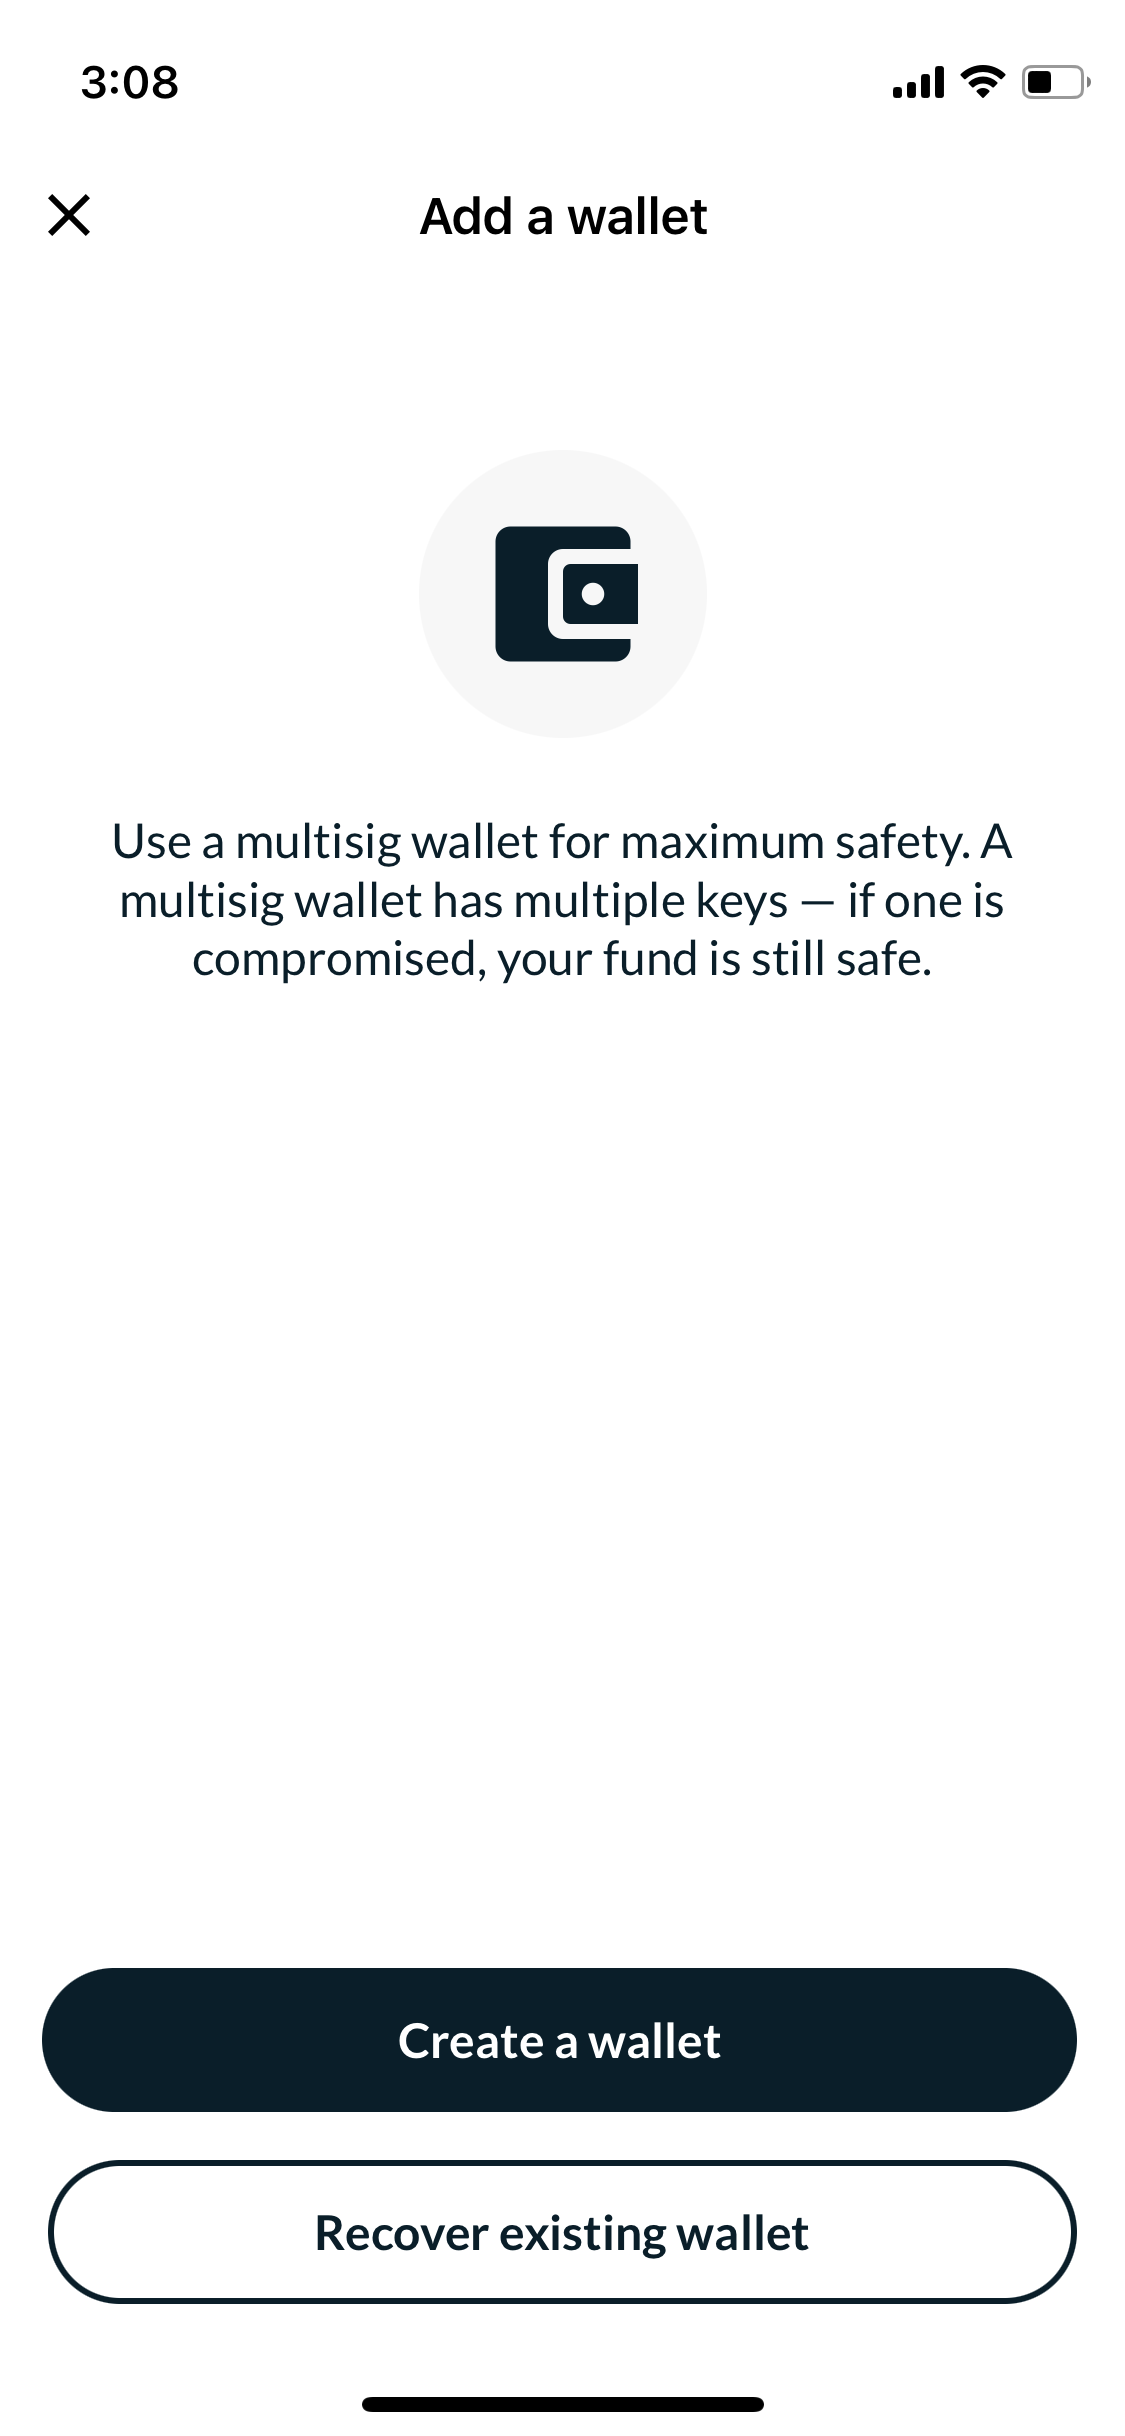
Create a 2-of-3 Multisig Wallet
After setting up the necessary number of keys for our desired setup, we can proceed to create the wallet itself. To start, tap on Add a wallet at the top of the screen, and then select Create a wallet.
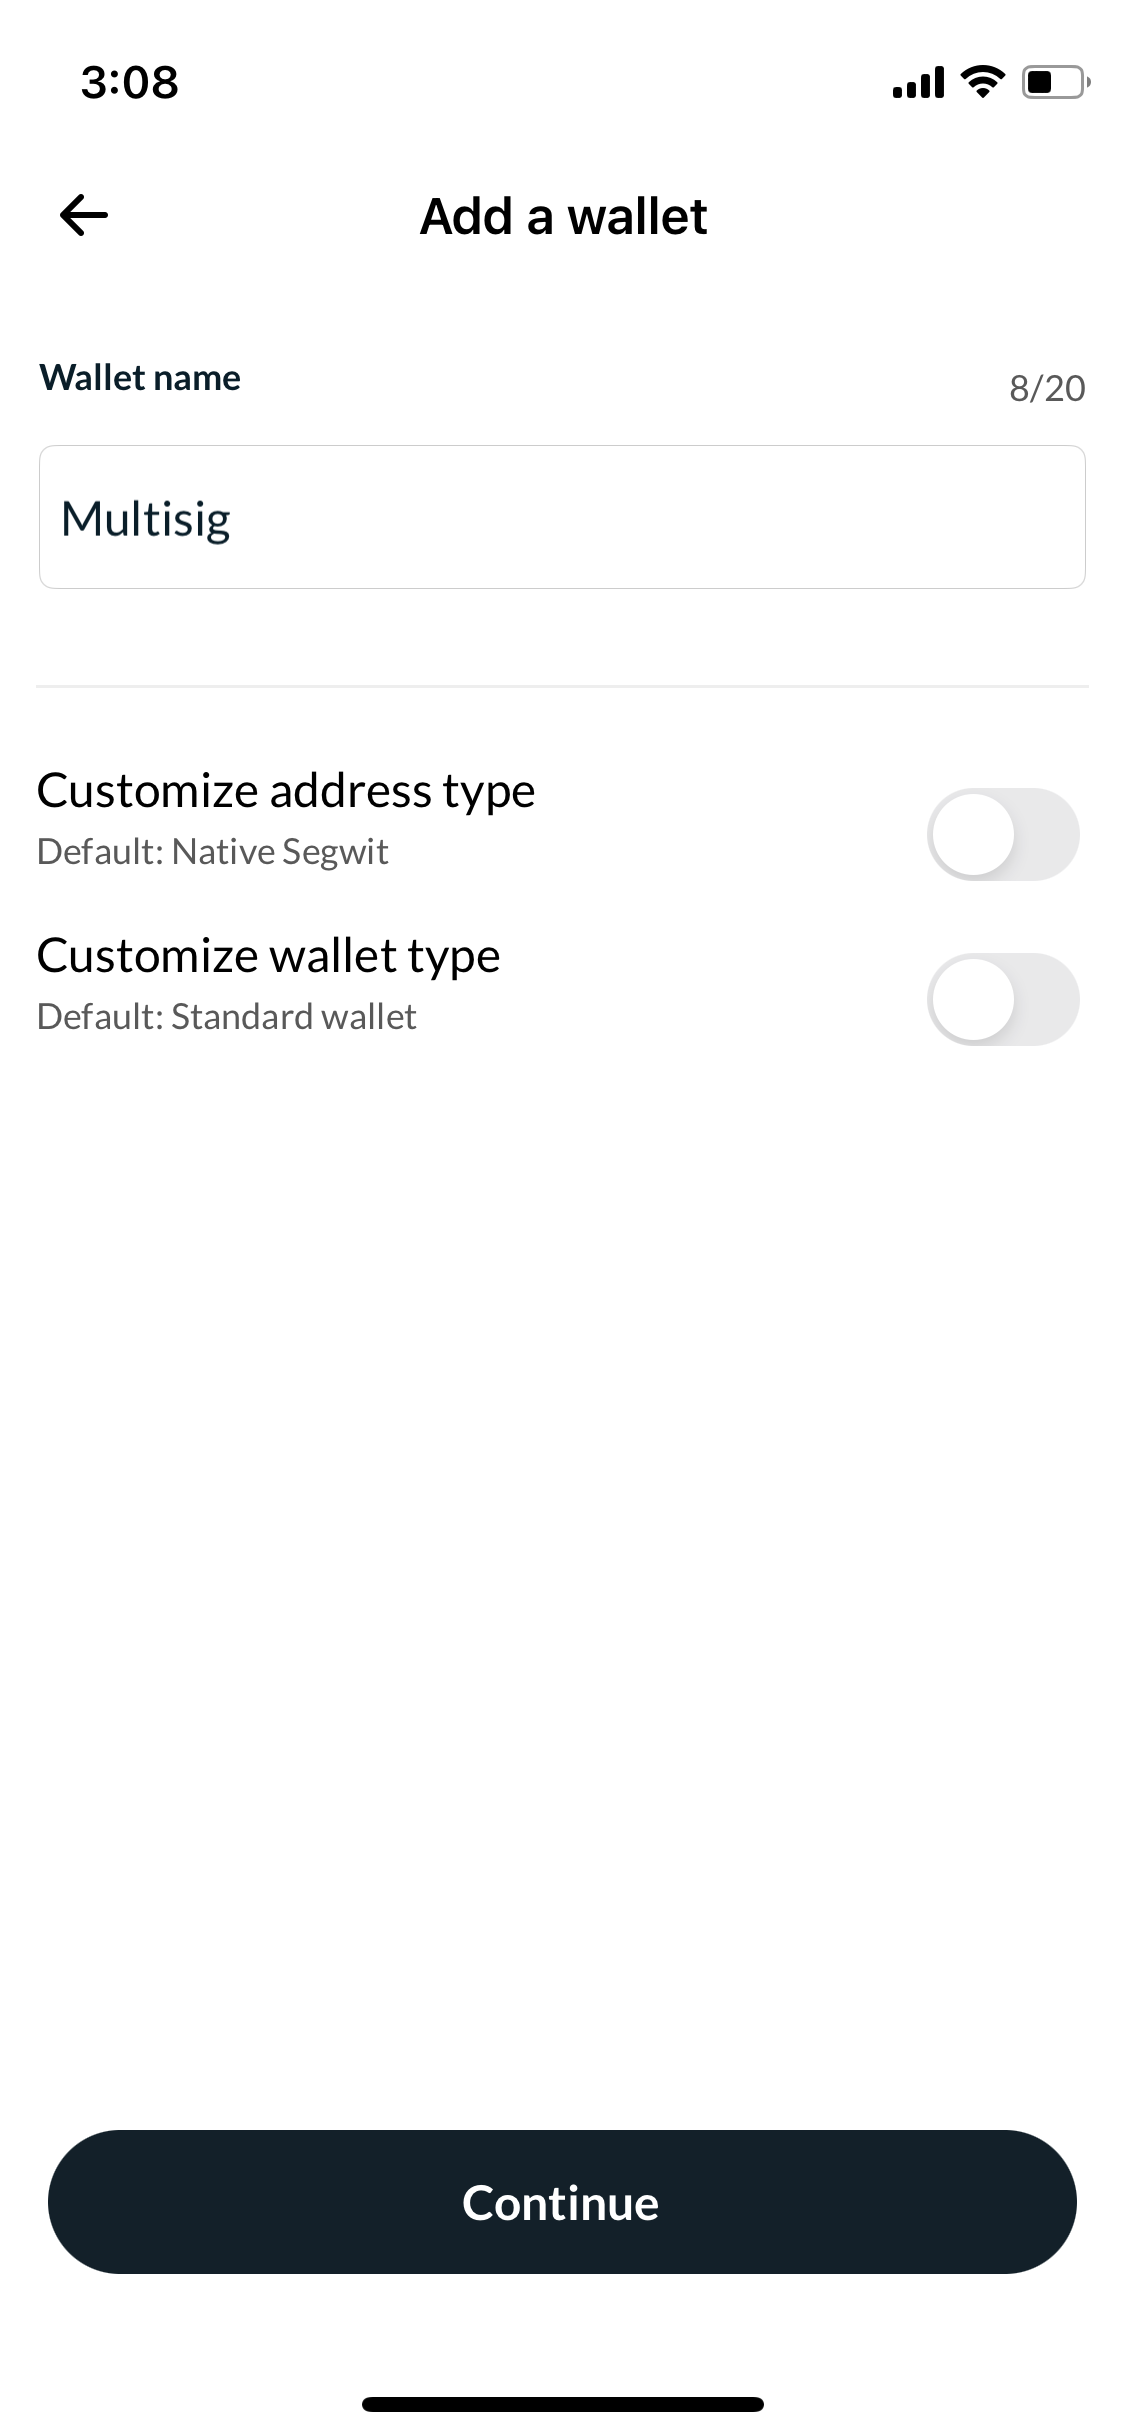
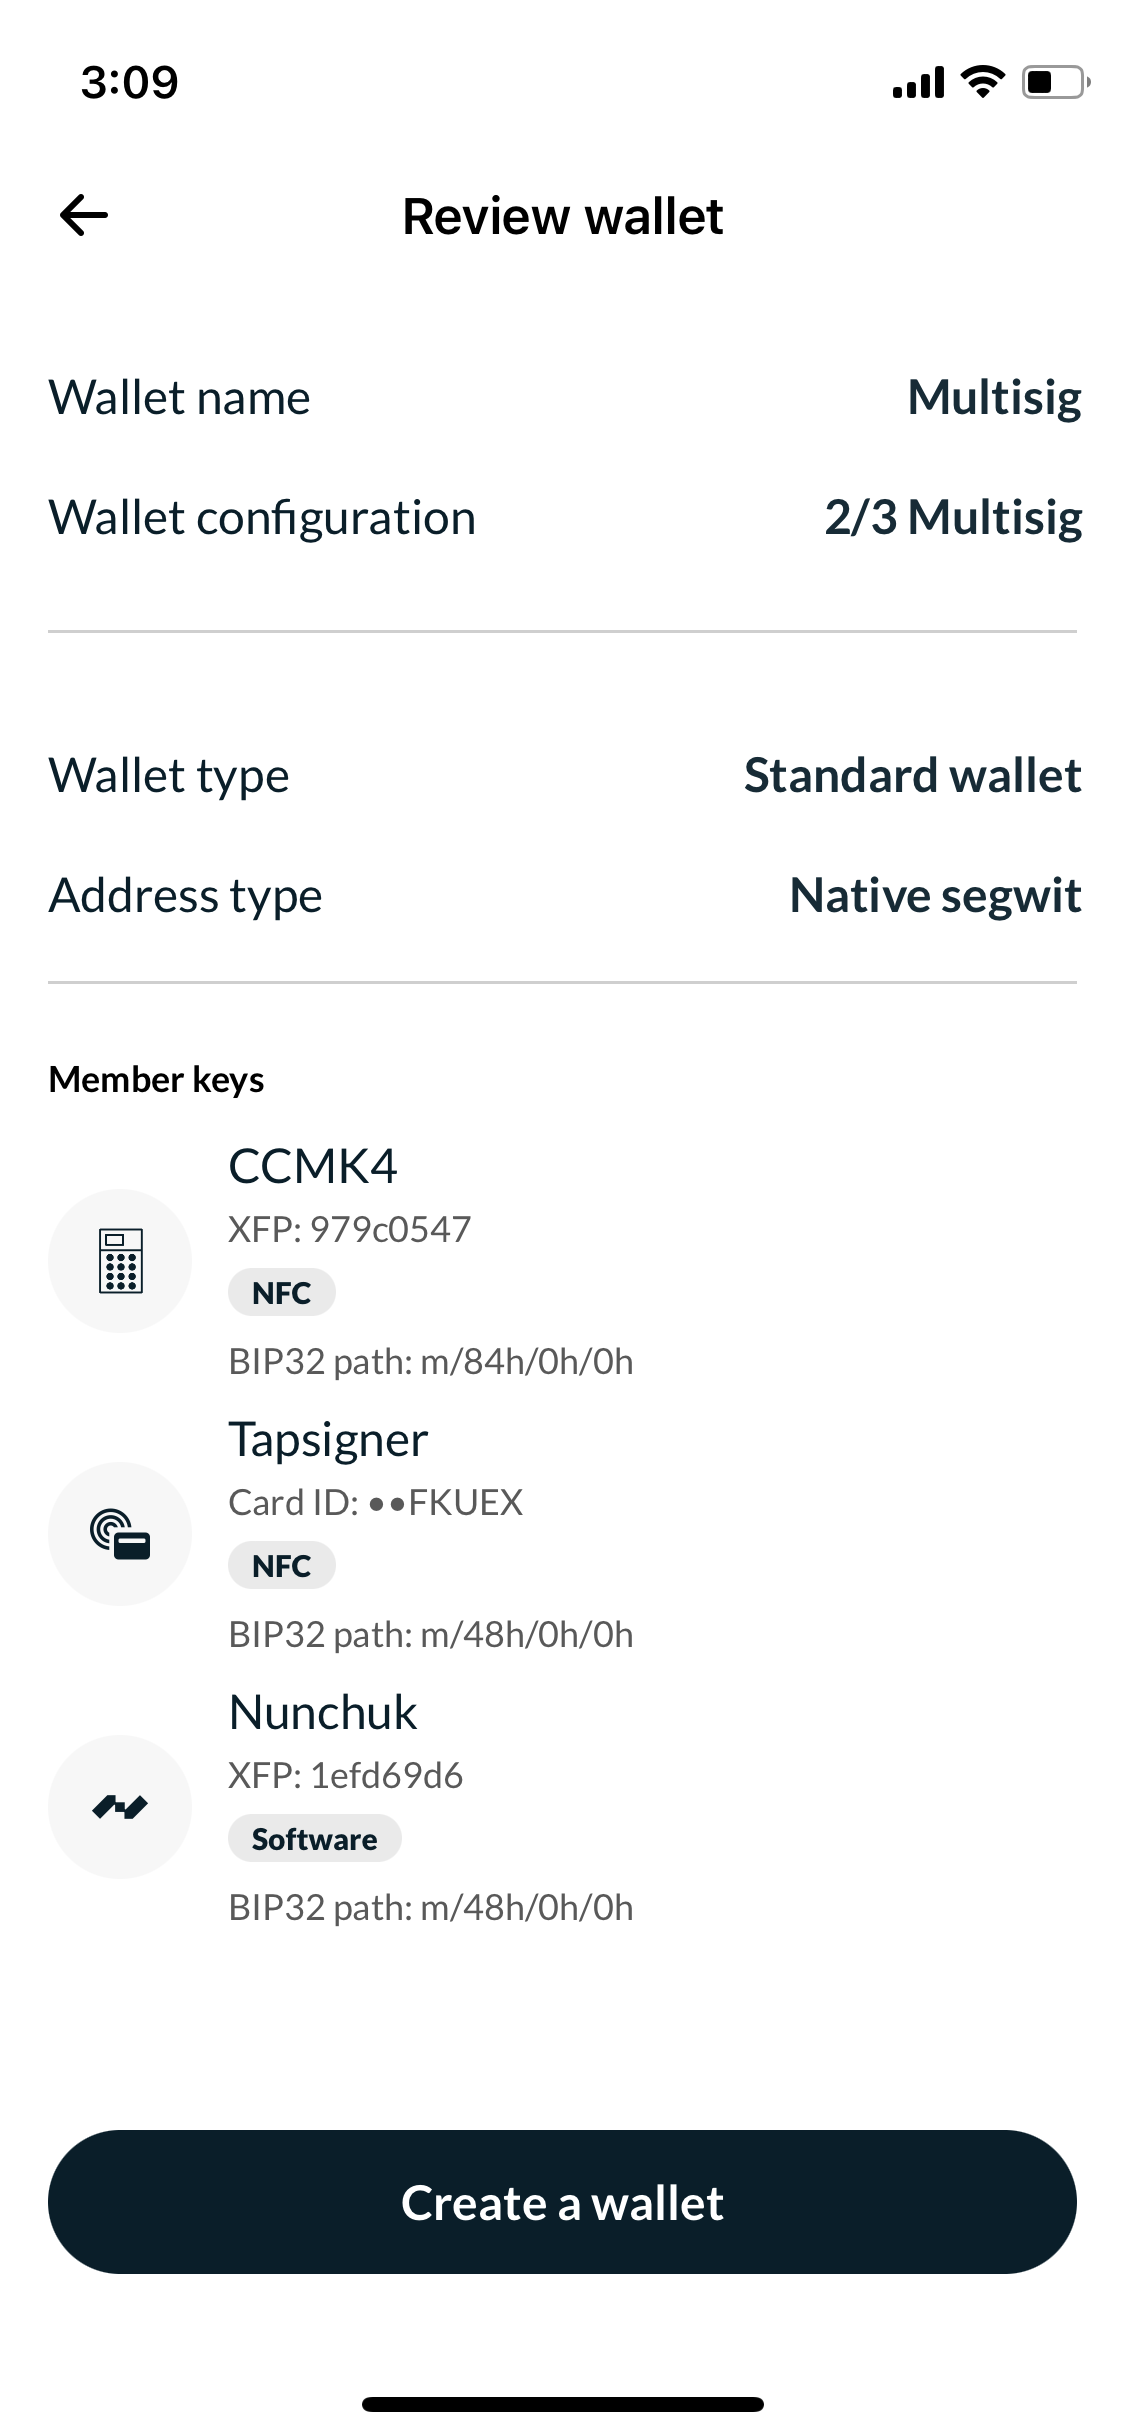
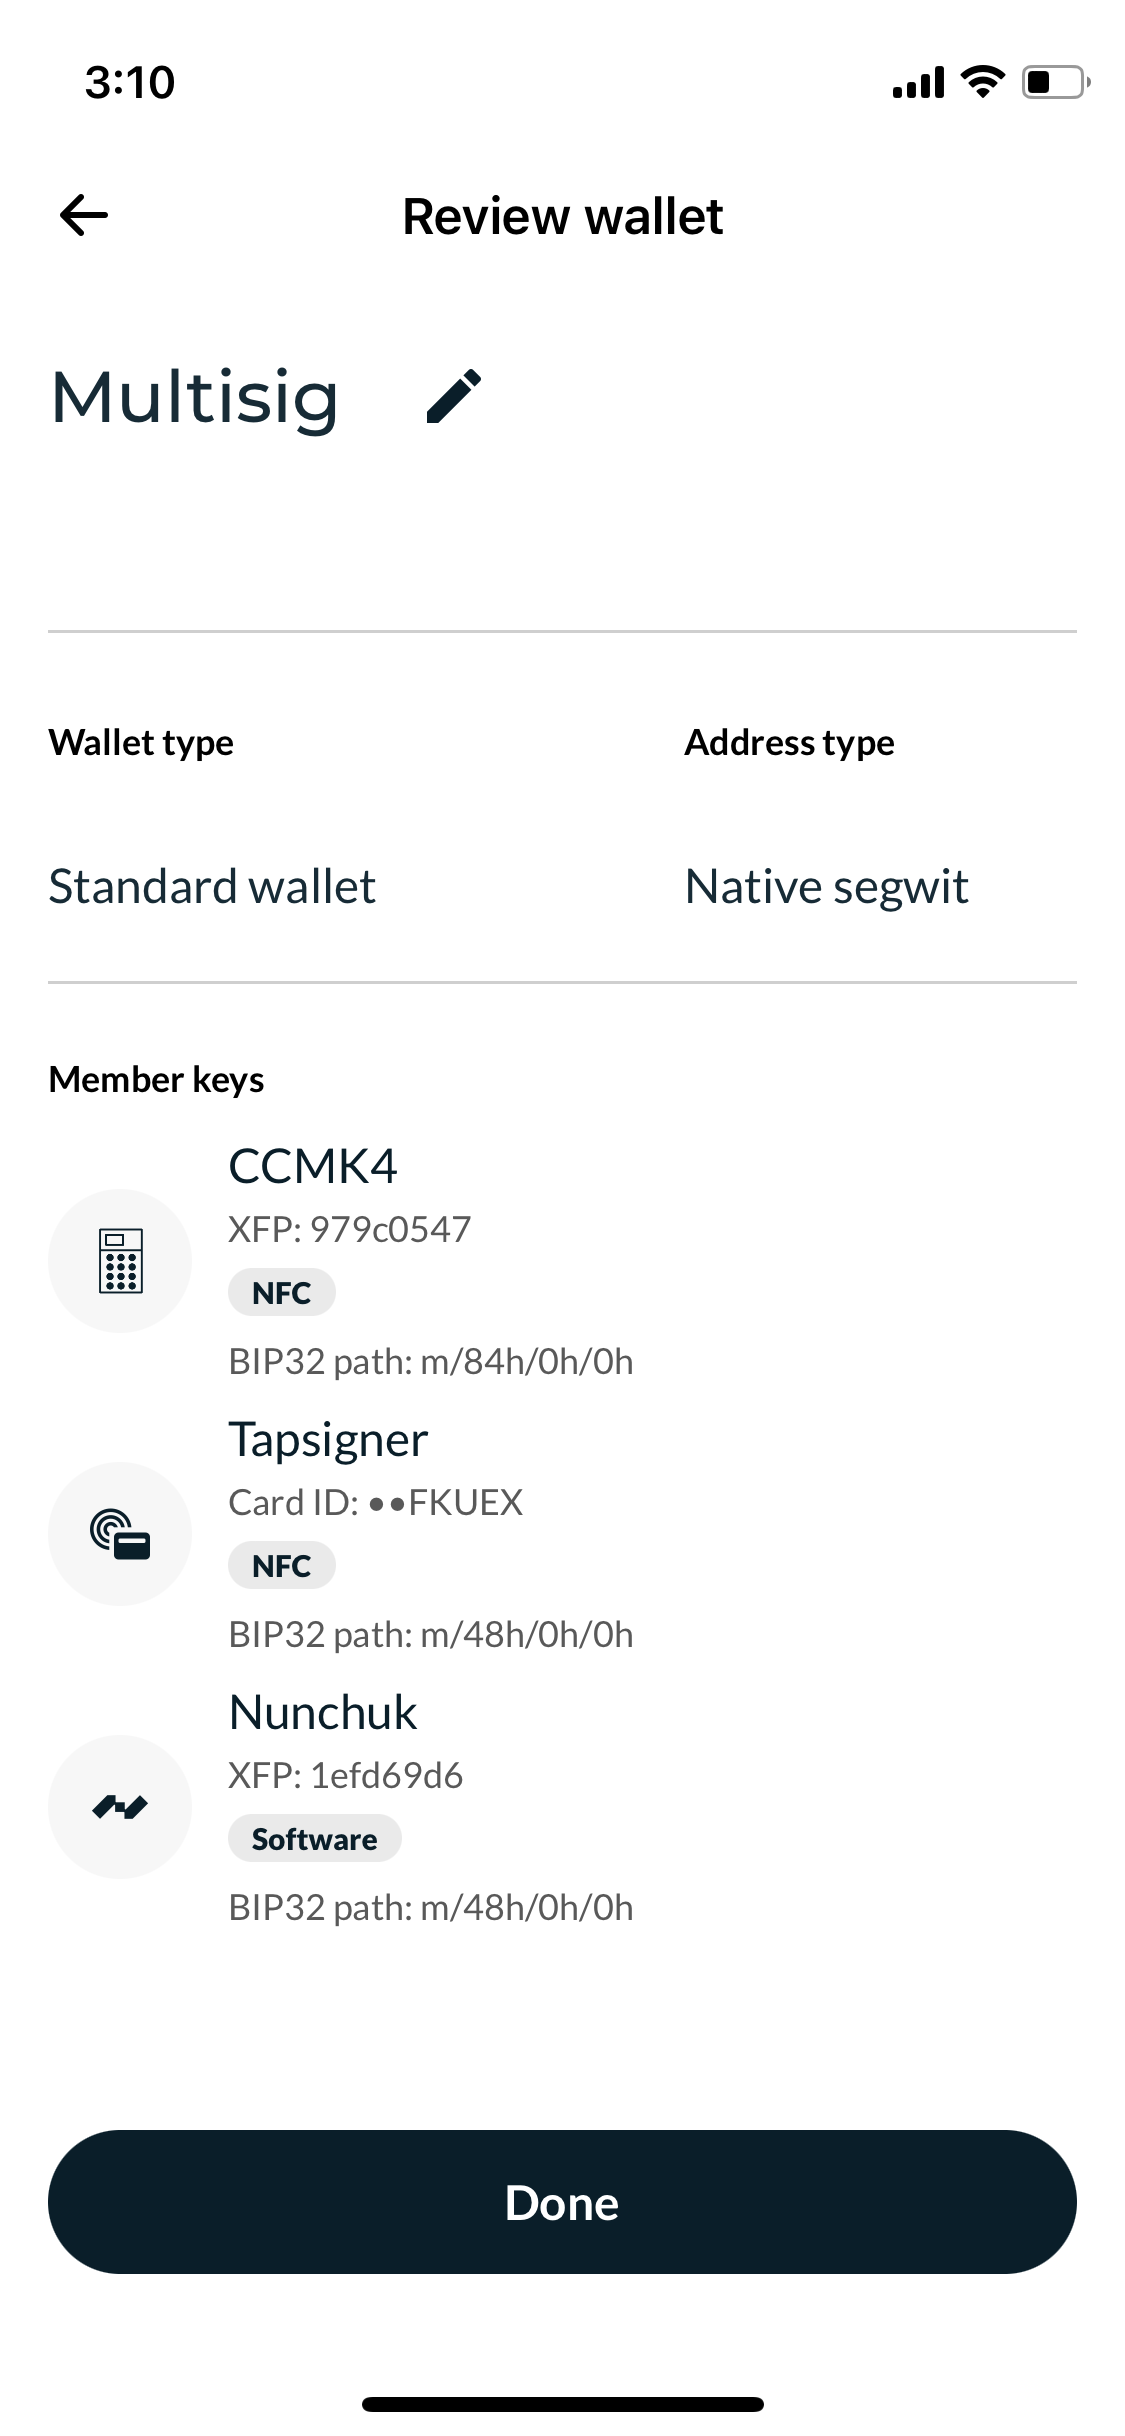
Please choose a name for the wallet, for example, "Multisig". Proceed to the next step unless you wish to specify custom address and wallet types.
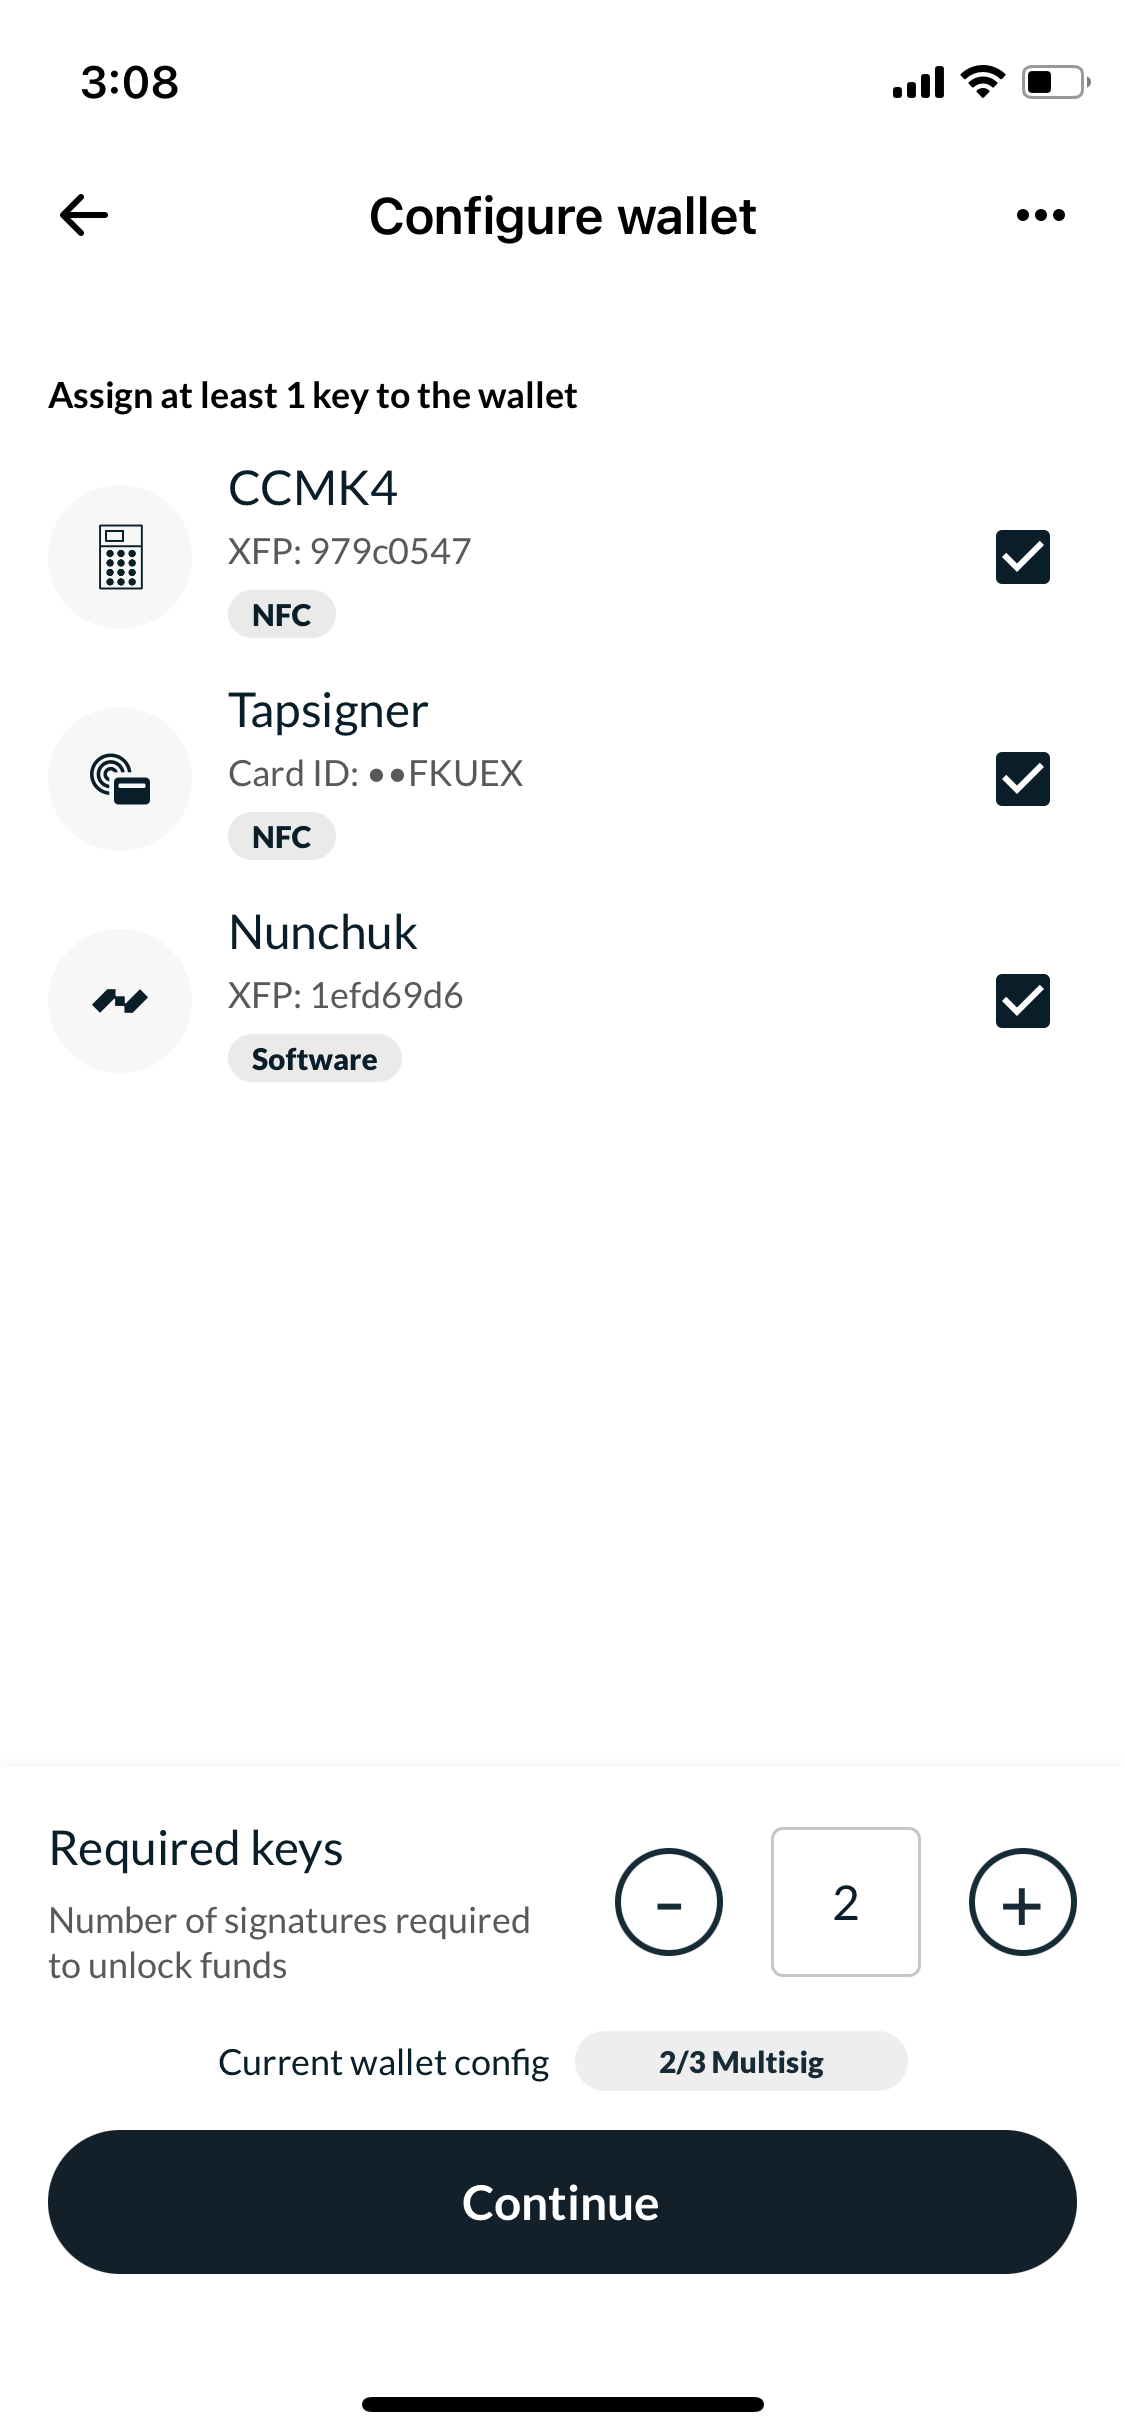
Select all three keys (CCMK4, Tapsigner, and Nunchuk). At the bottom of the screen, under Required keys, select two so that the Current wallet config indicates 2/3 Multisig.
Please review the wallet setup in the next step. If you are satisfied with the settings, tap Create a wallet.
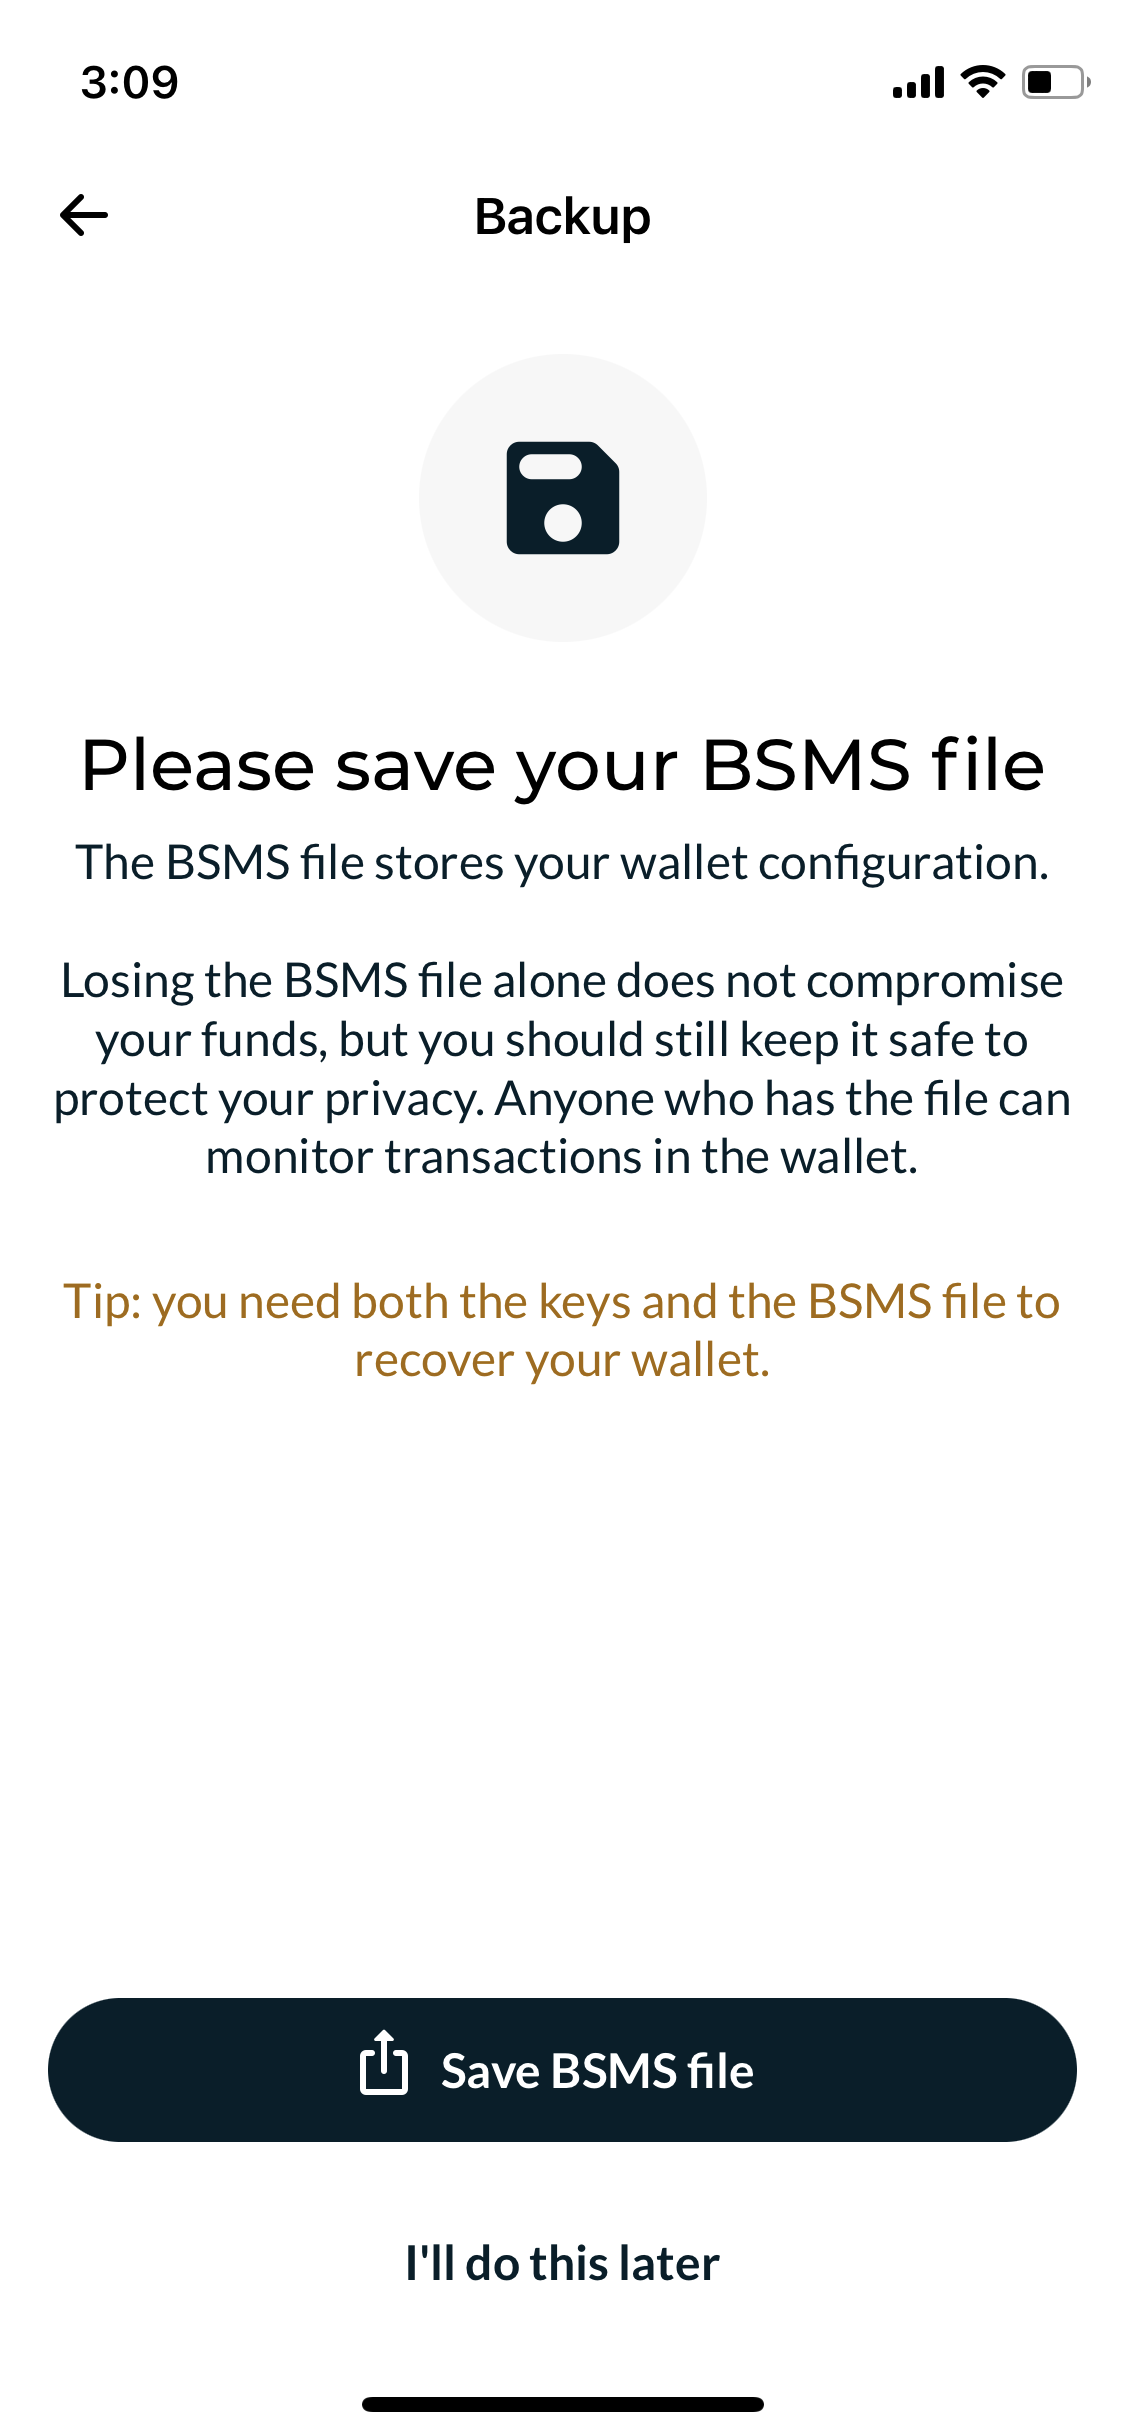
You will be prompted to save a BSMS file, which stores your wallet configuration. You can choose to do this later, but remember to do it at some point if you intend to use this multisig wallet in real life.
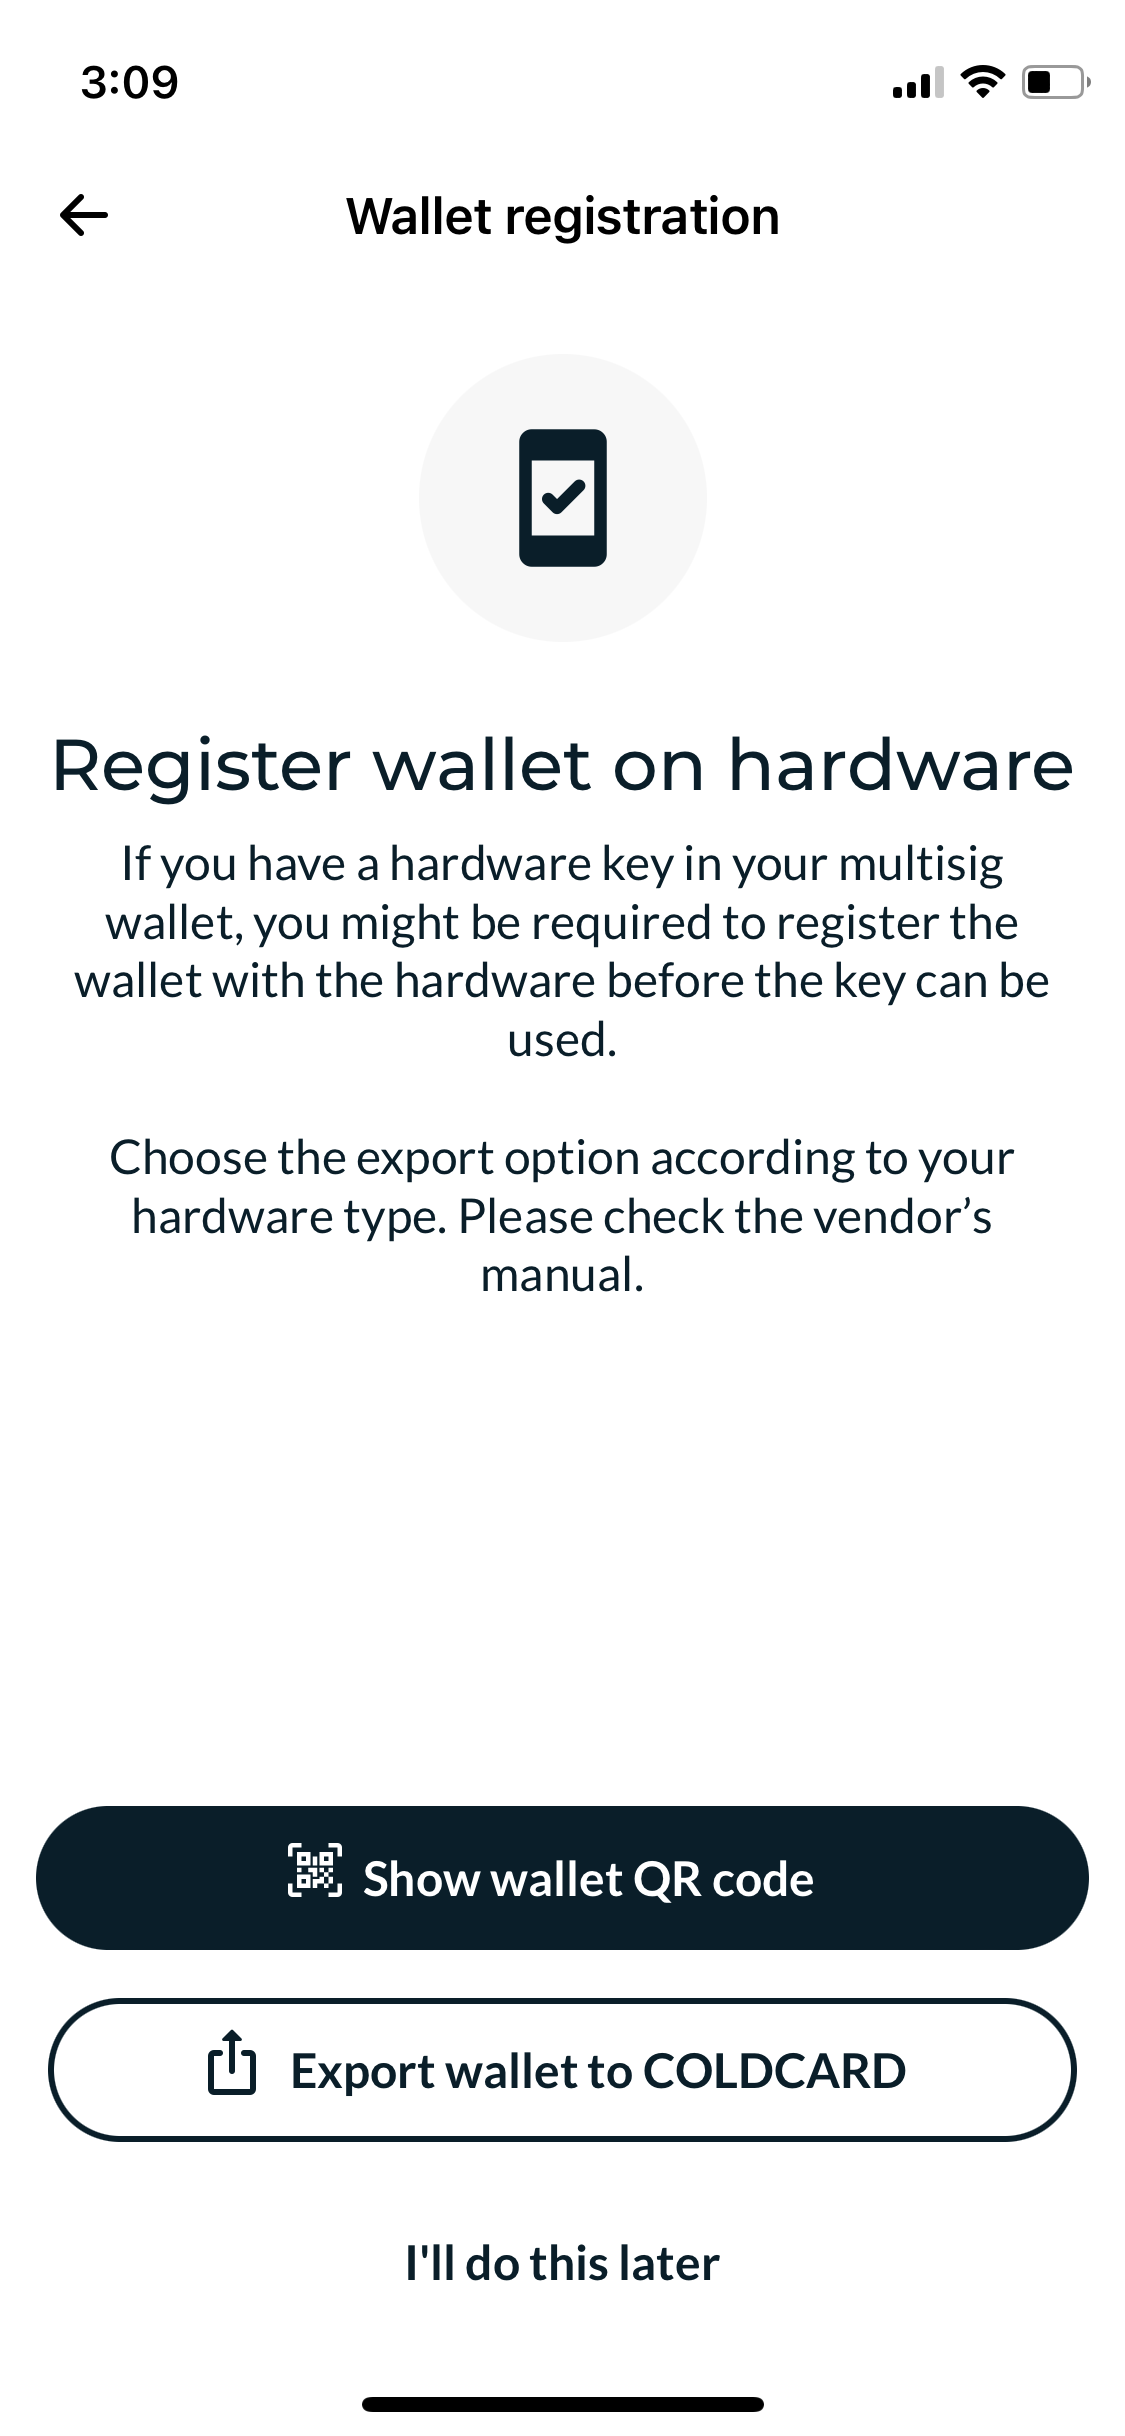
In the next step, you will need to register the wallet with Coldcard.
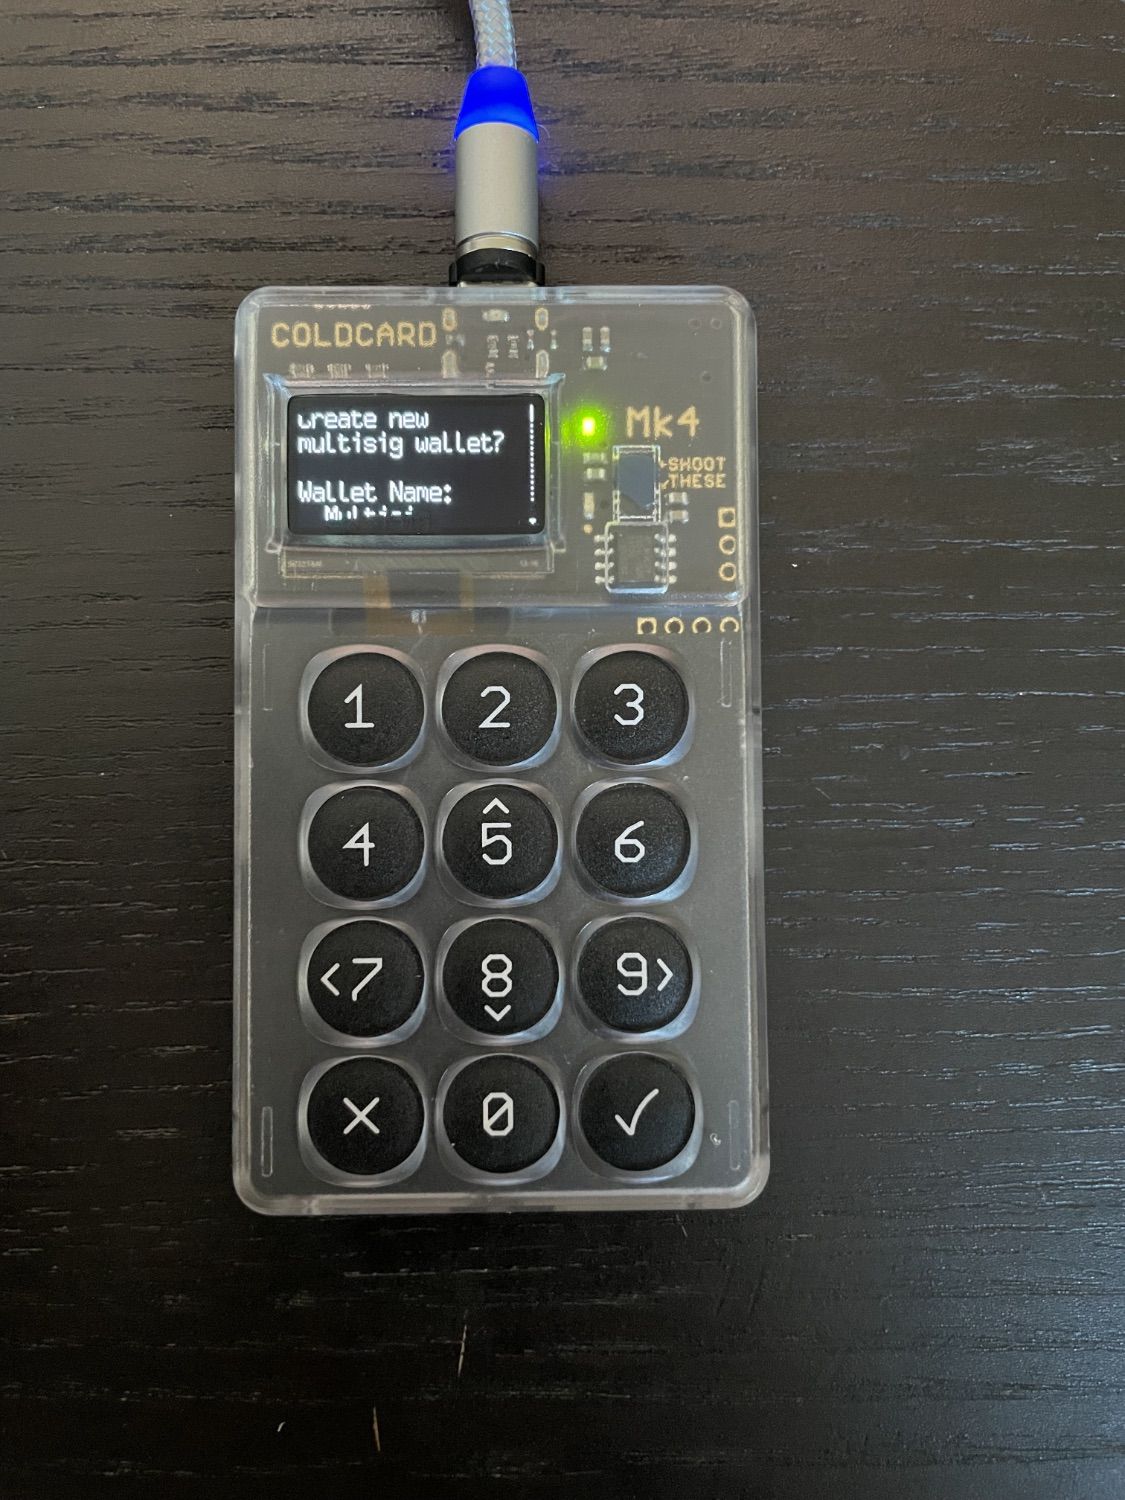
In Nunchuk, tap Export wallet to COLDCARD -> Export via NFC. On your Coldcard device, navigate to Settings -> Multisig Wallets -> Import via NFC.
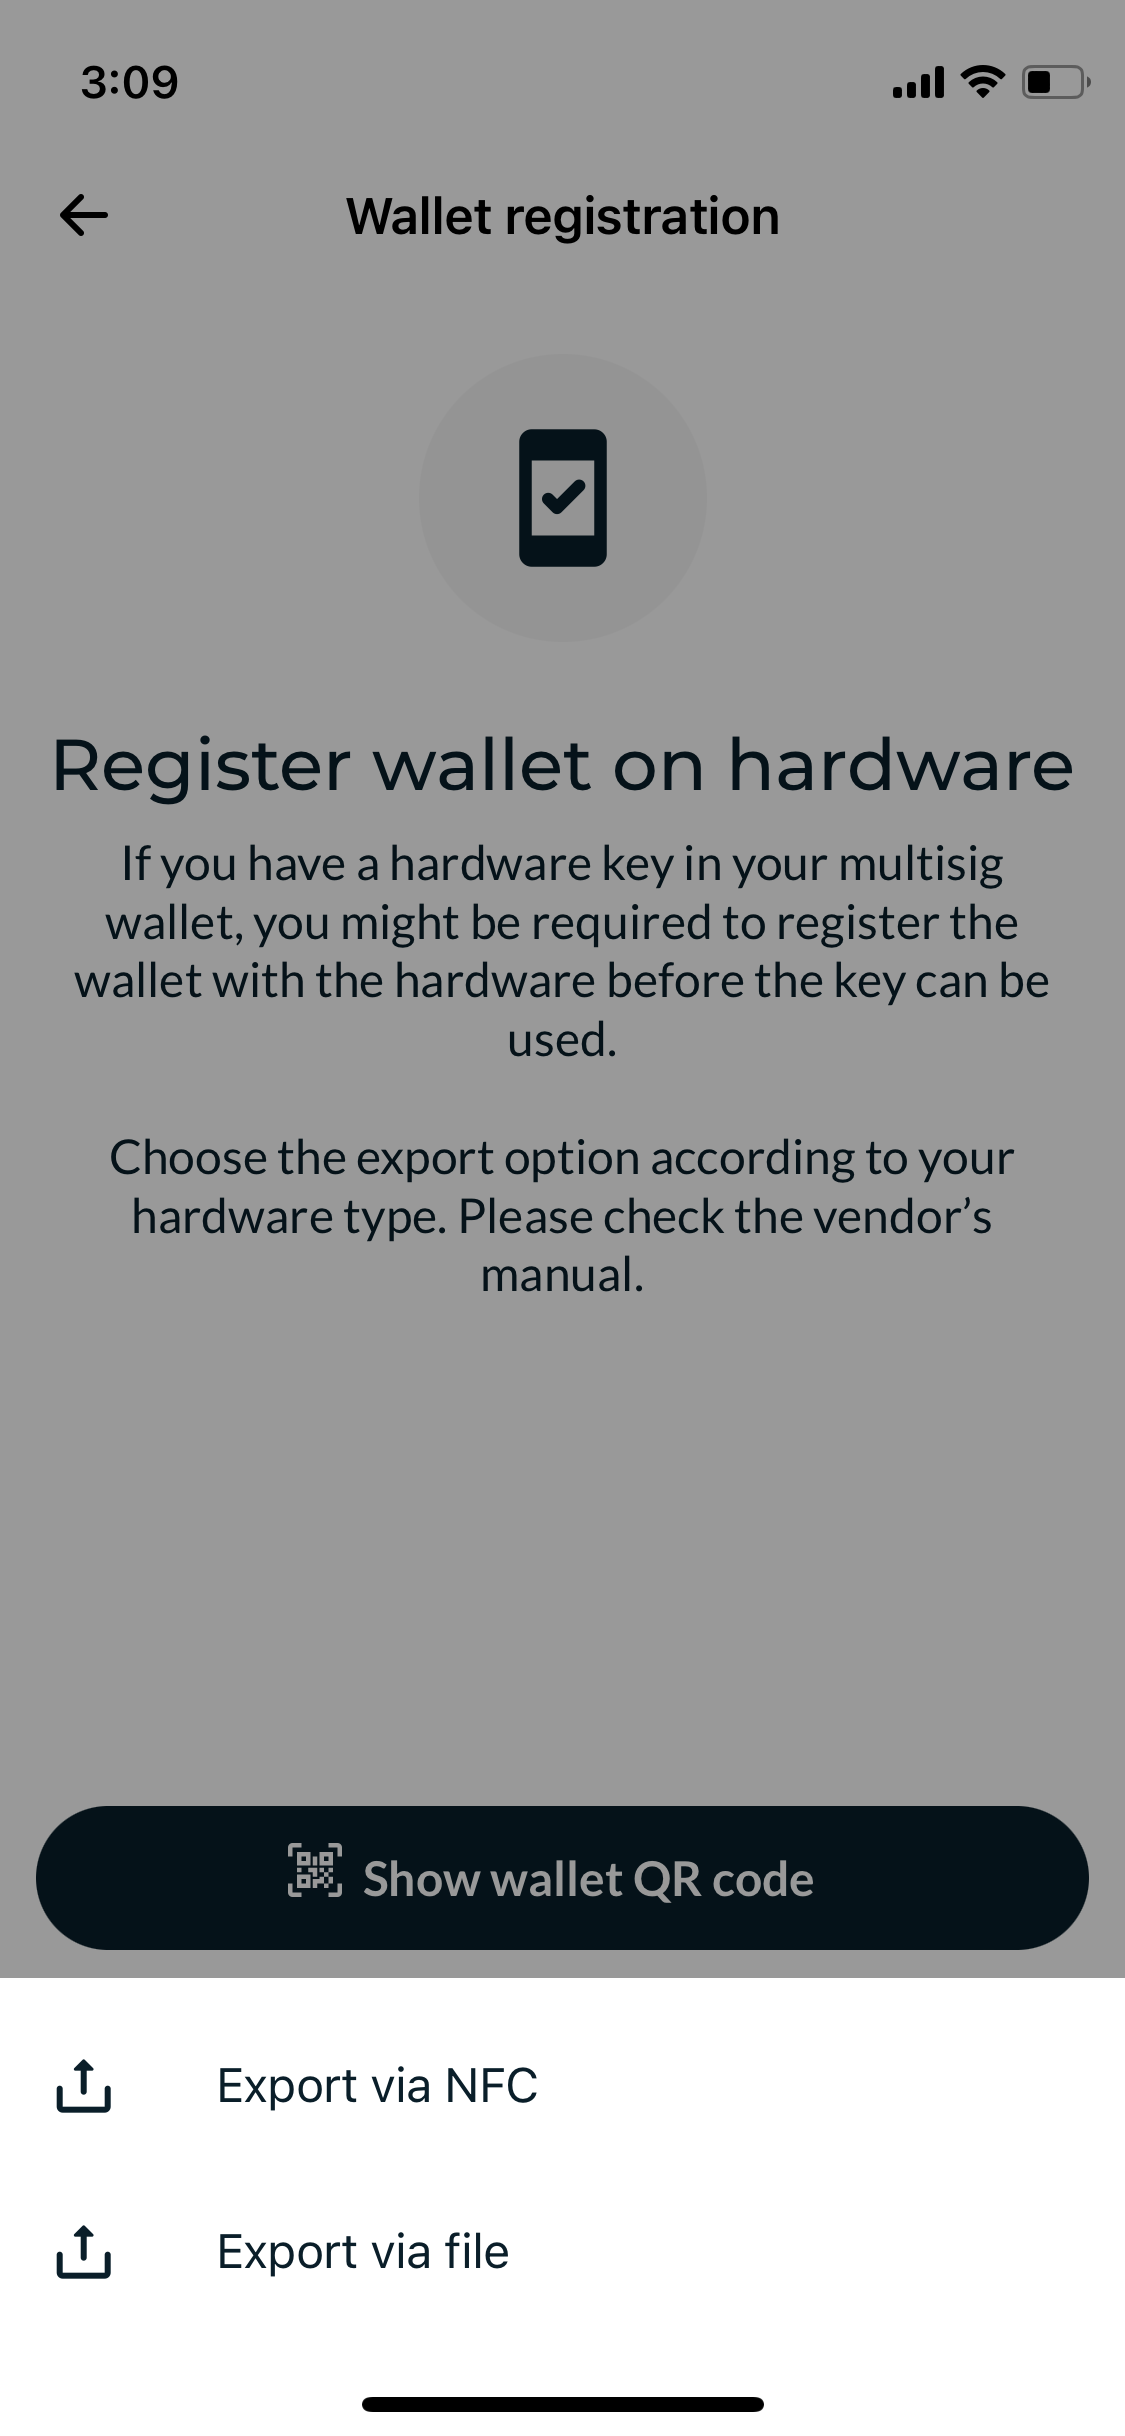
Scan the device with your phone, ensuring that you place the phone on Coldcard correctly. It is possible for this process to fail again.
After the scanning is complete, you will see a wallet review on Nunchuk. Click Done and return to Coldcard to confirm the wallet creation by pressing the OK button.
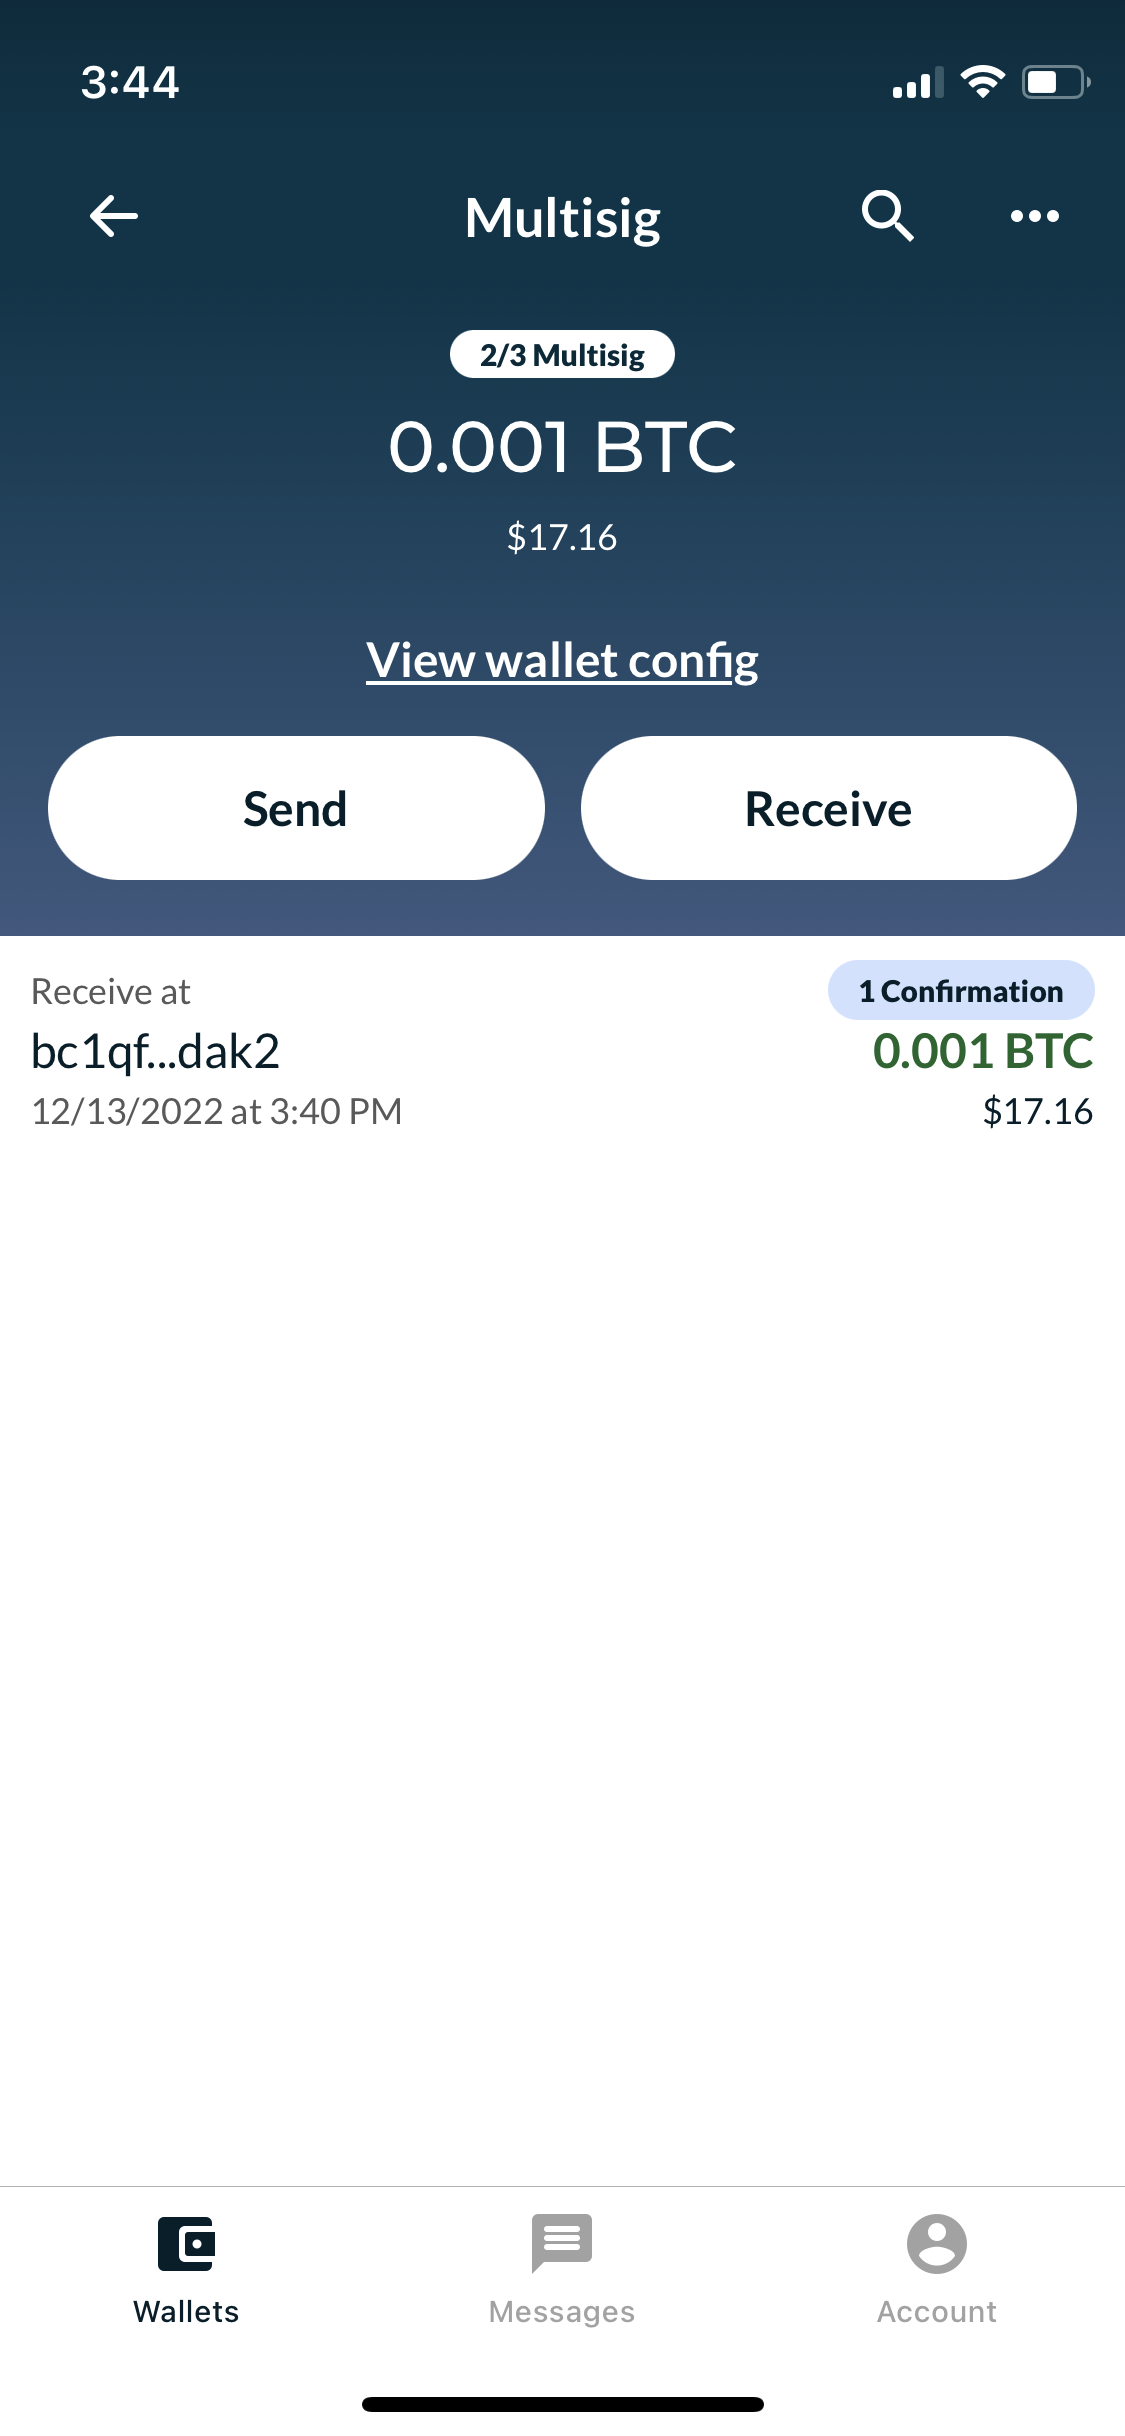
You now have a functional and secure multisignature wallet on your iPhone, capable of 2-of-3 authentication.
Test the setup
It is advisable to test the multisig wallet with a smaller amount before loading it with all of your savings.
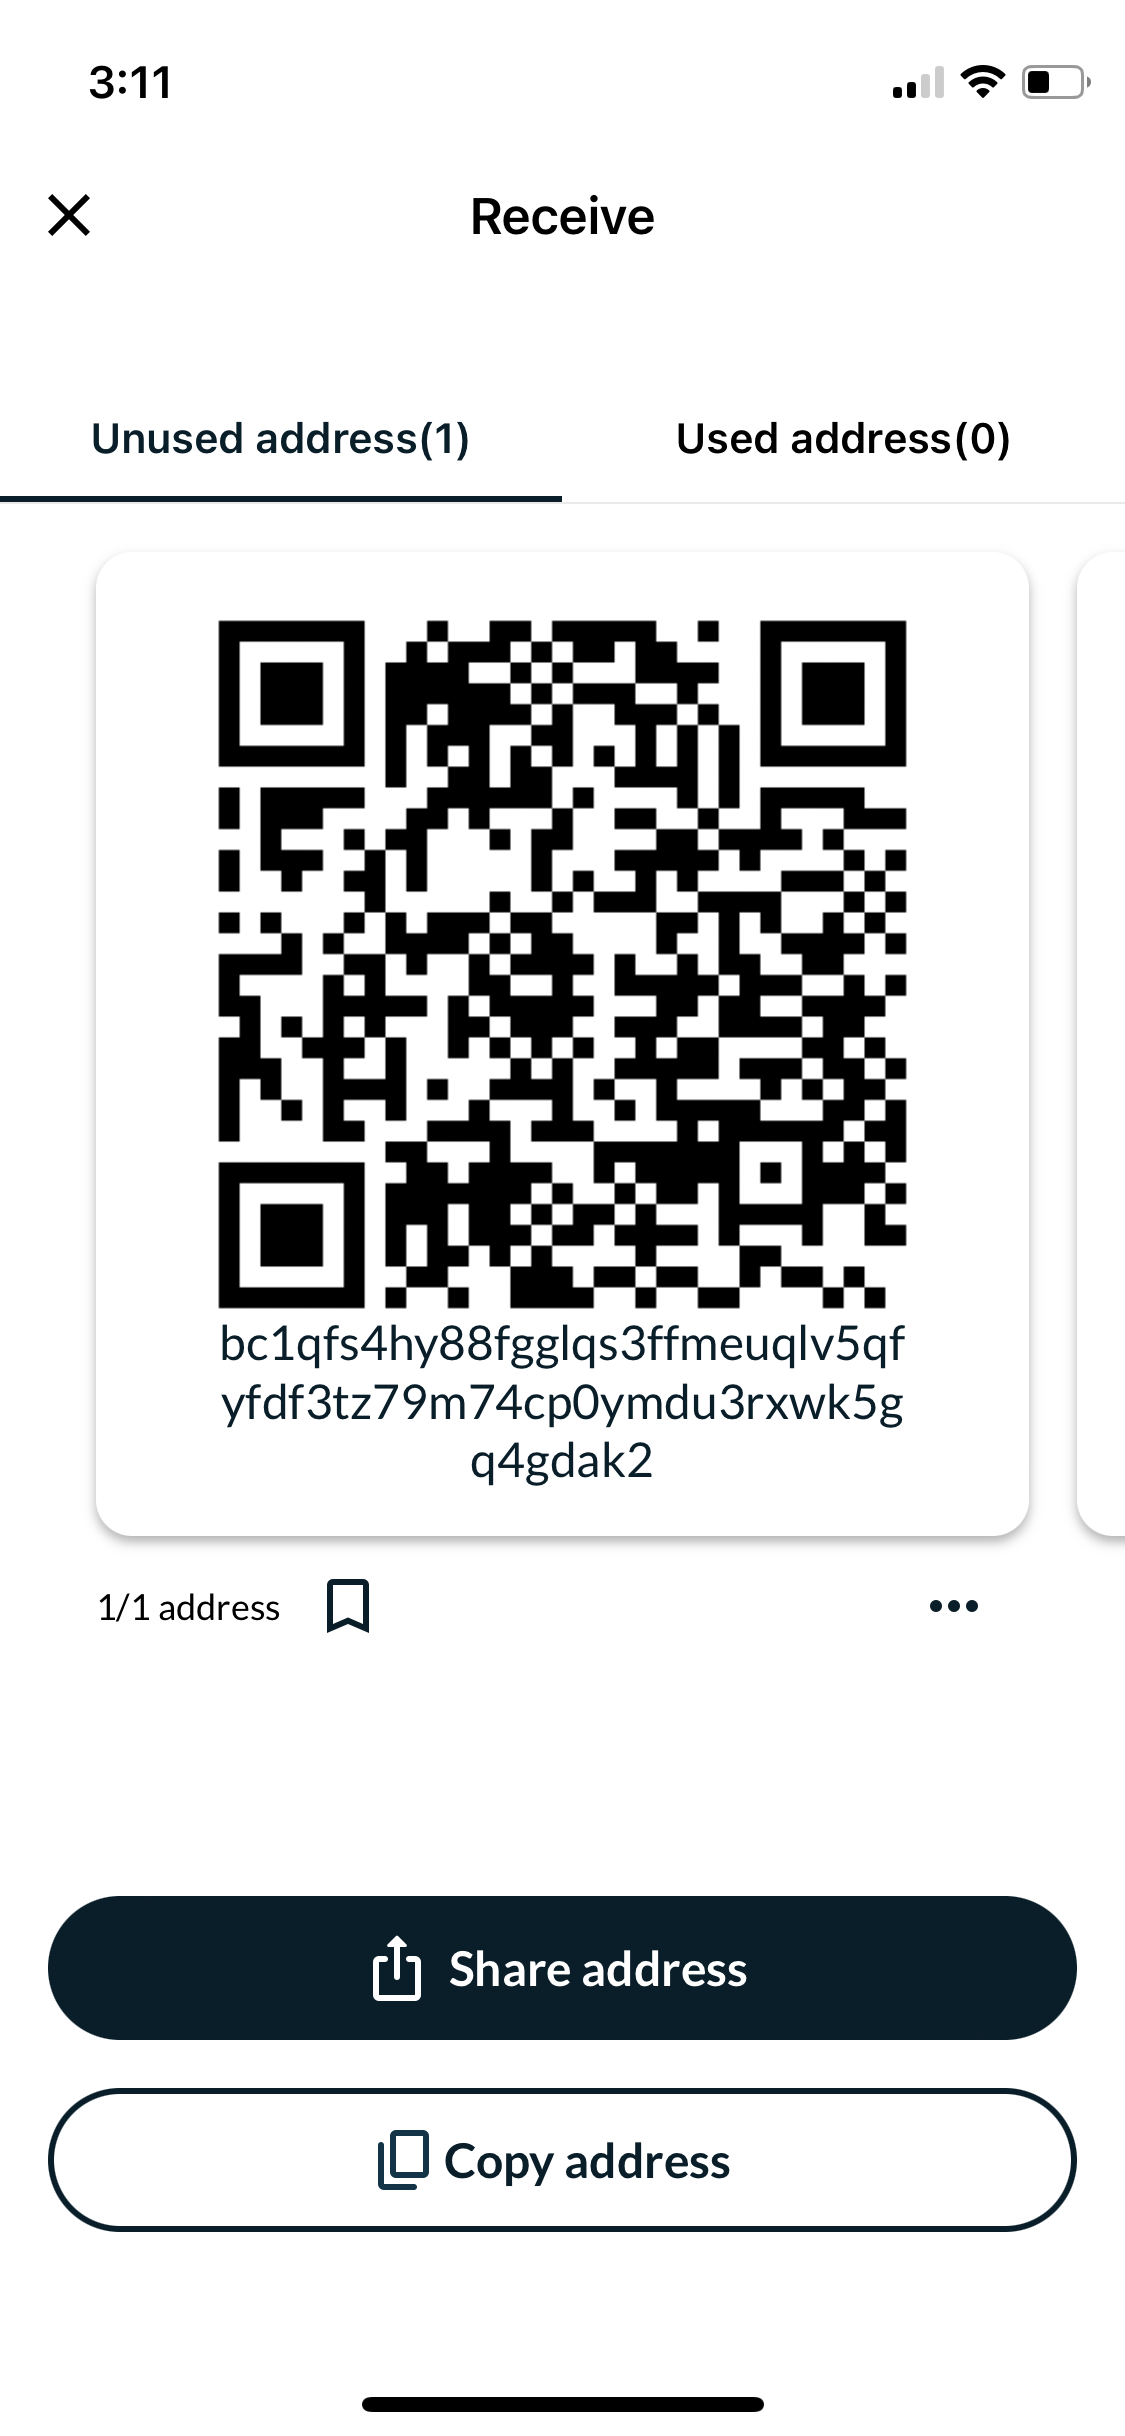
Receive bitcoin
Tap on the Multisig wallet recently created in Nunchuk, and then select Receive.
Transfer a small sum, for instance, $20 worth of bitcoin, to the address generated by your wallet, and wait for confirmation on the network.
Spend bitcoin
Once it is confirmed, let's send the amount out of the wallet. Inside the Multisig wallet, tap Send and select the amount (Send all in my case). Paste in the address of the wallet to which you want to send bitcoin, add a note, and click Create transaction.
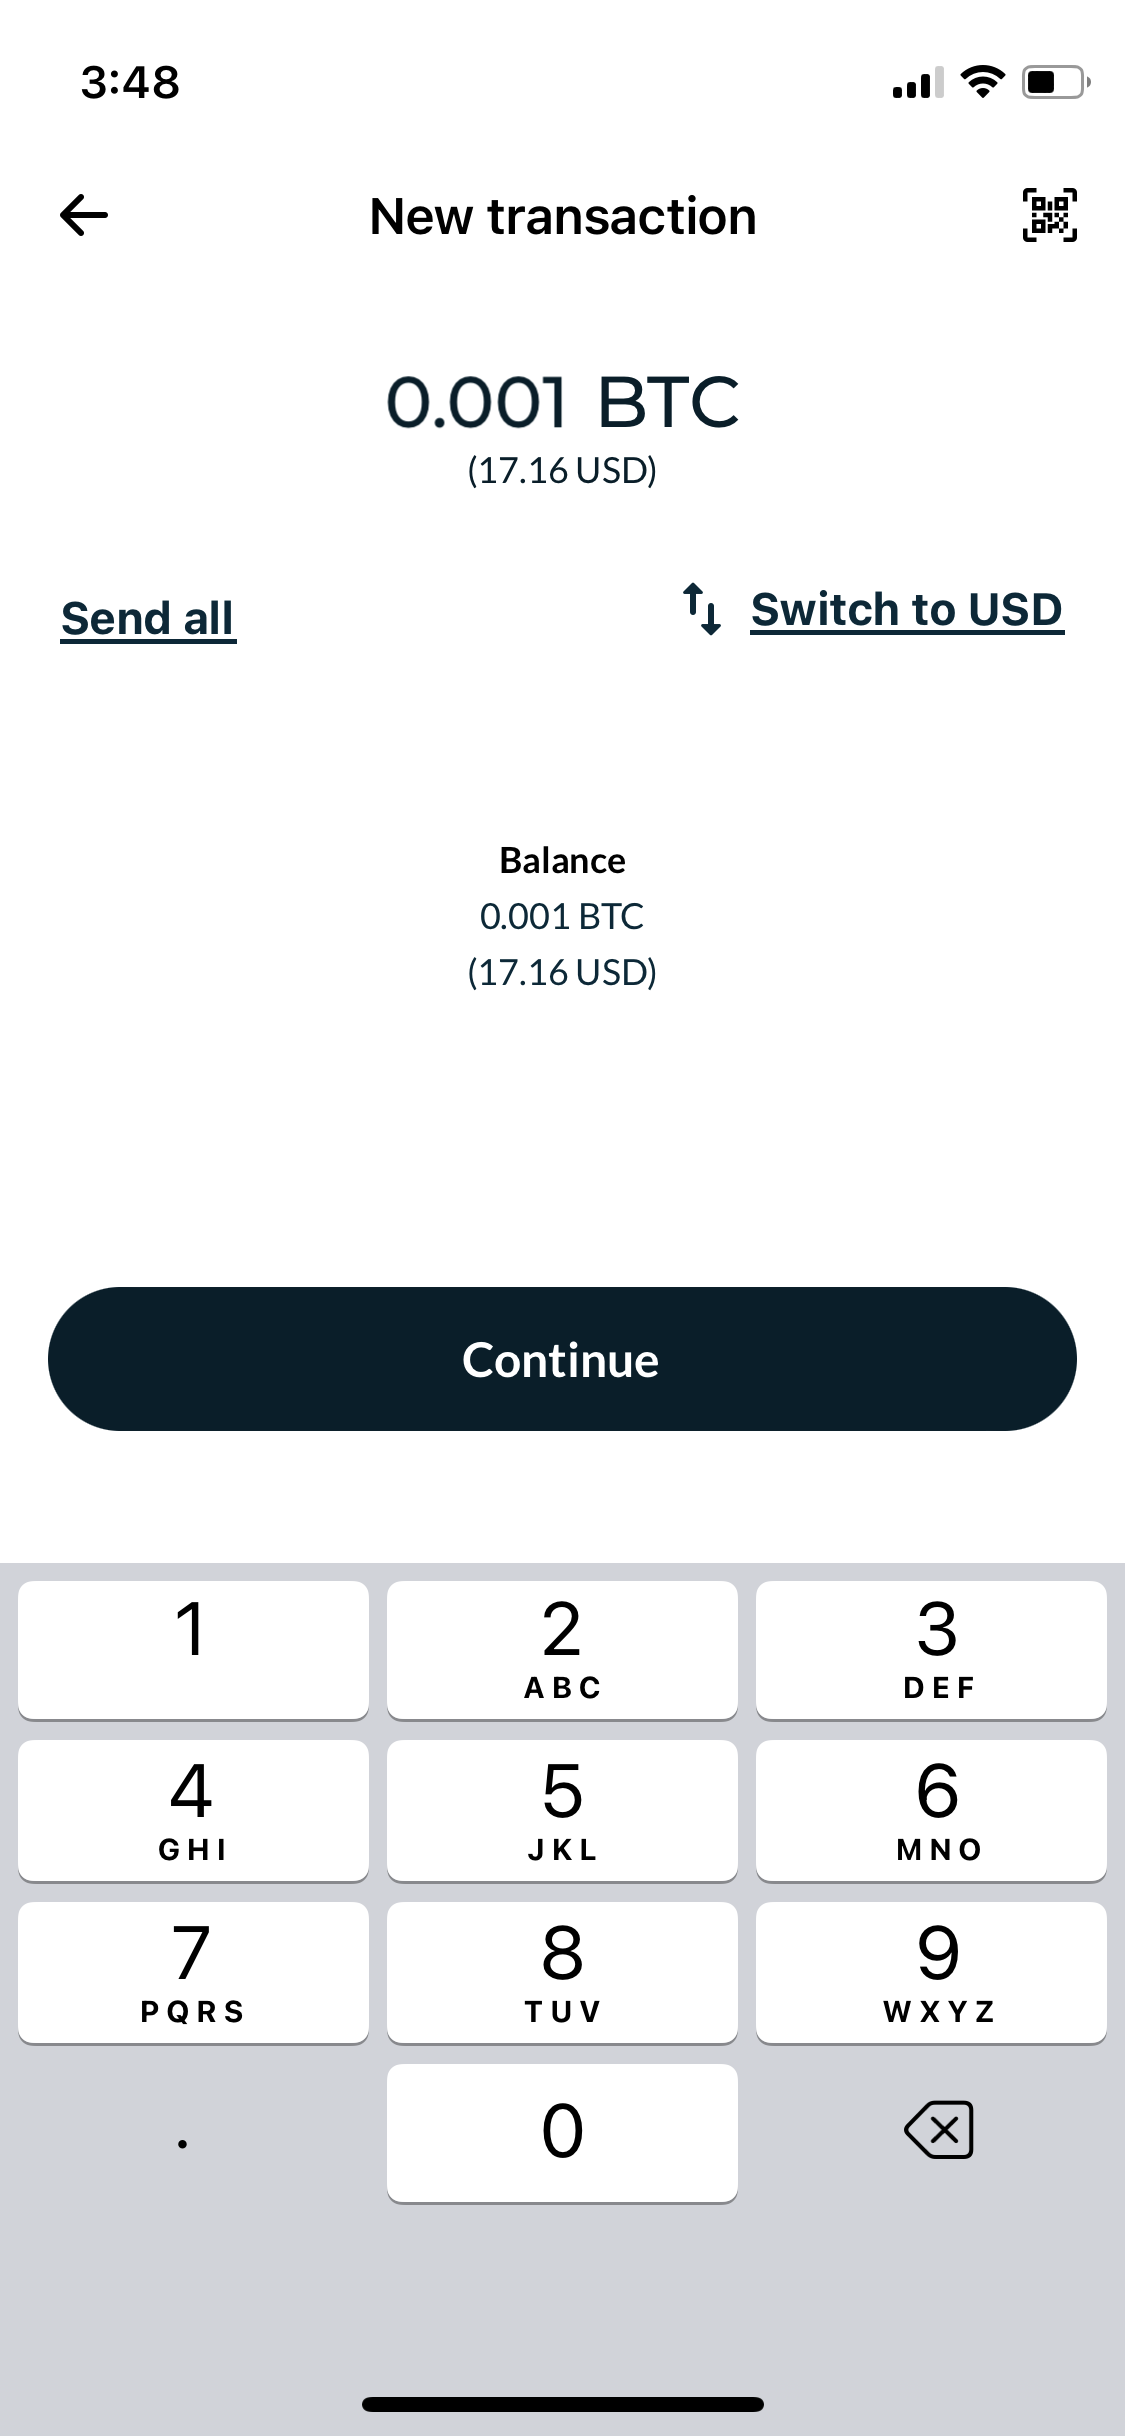

The transaction has been created, but you first need to sign it in order to broadcast it on the network.
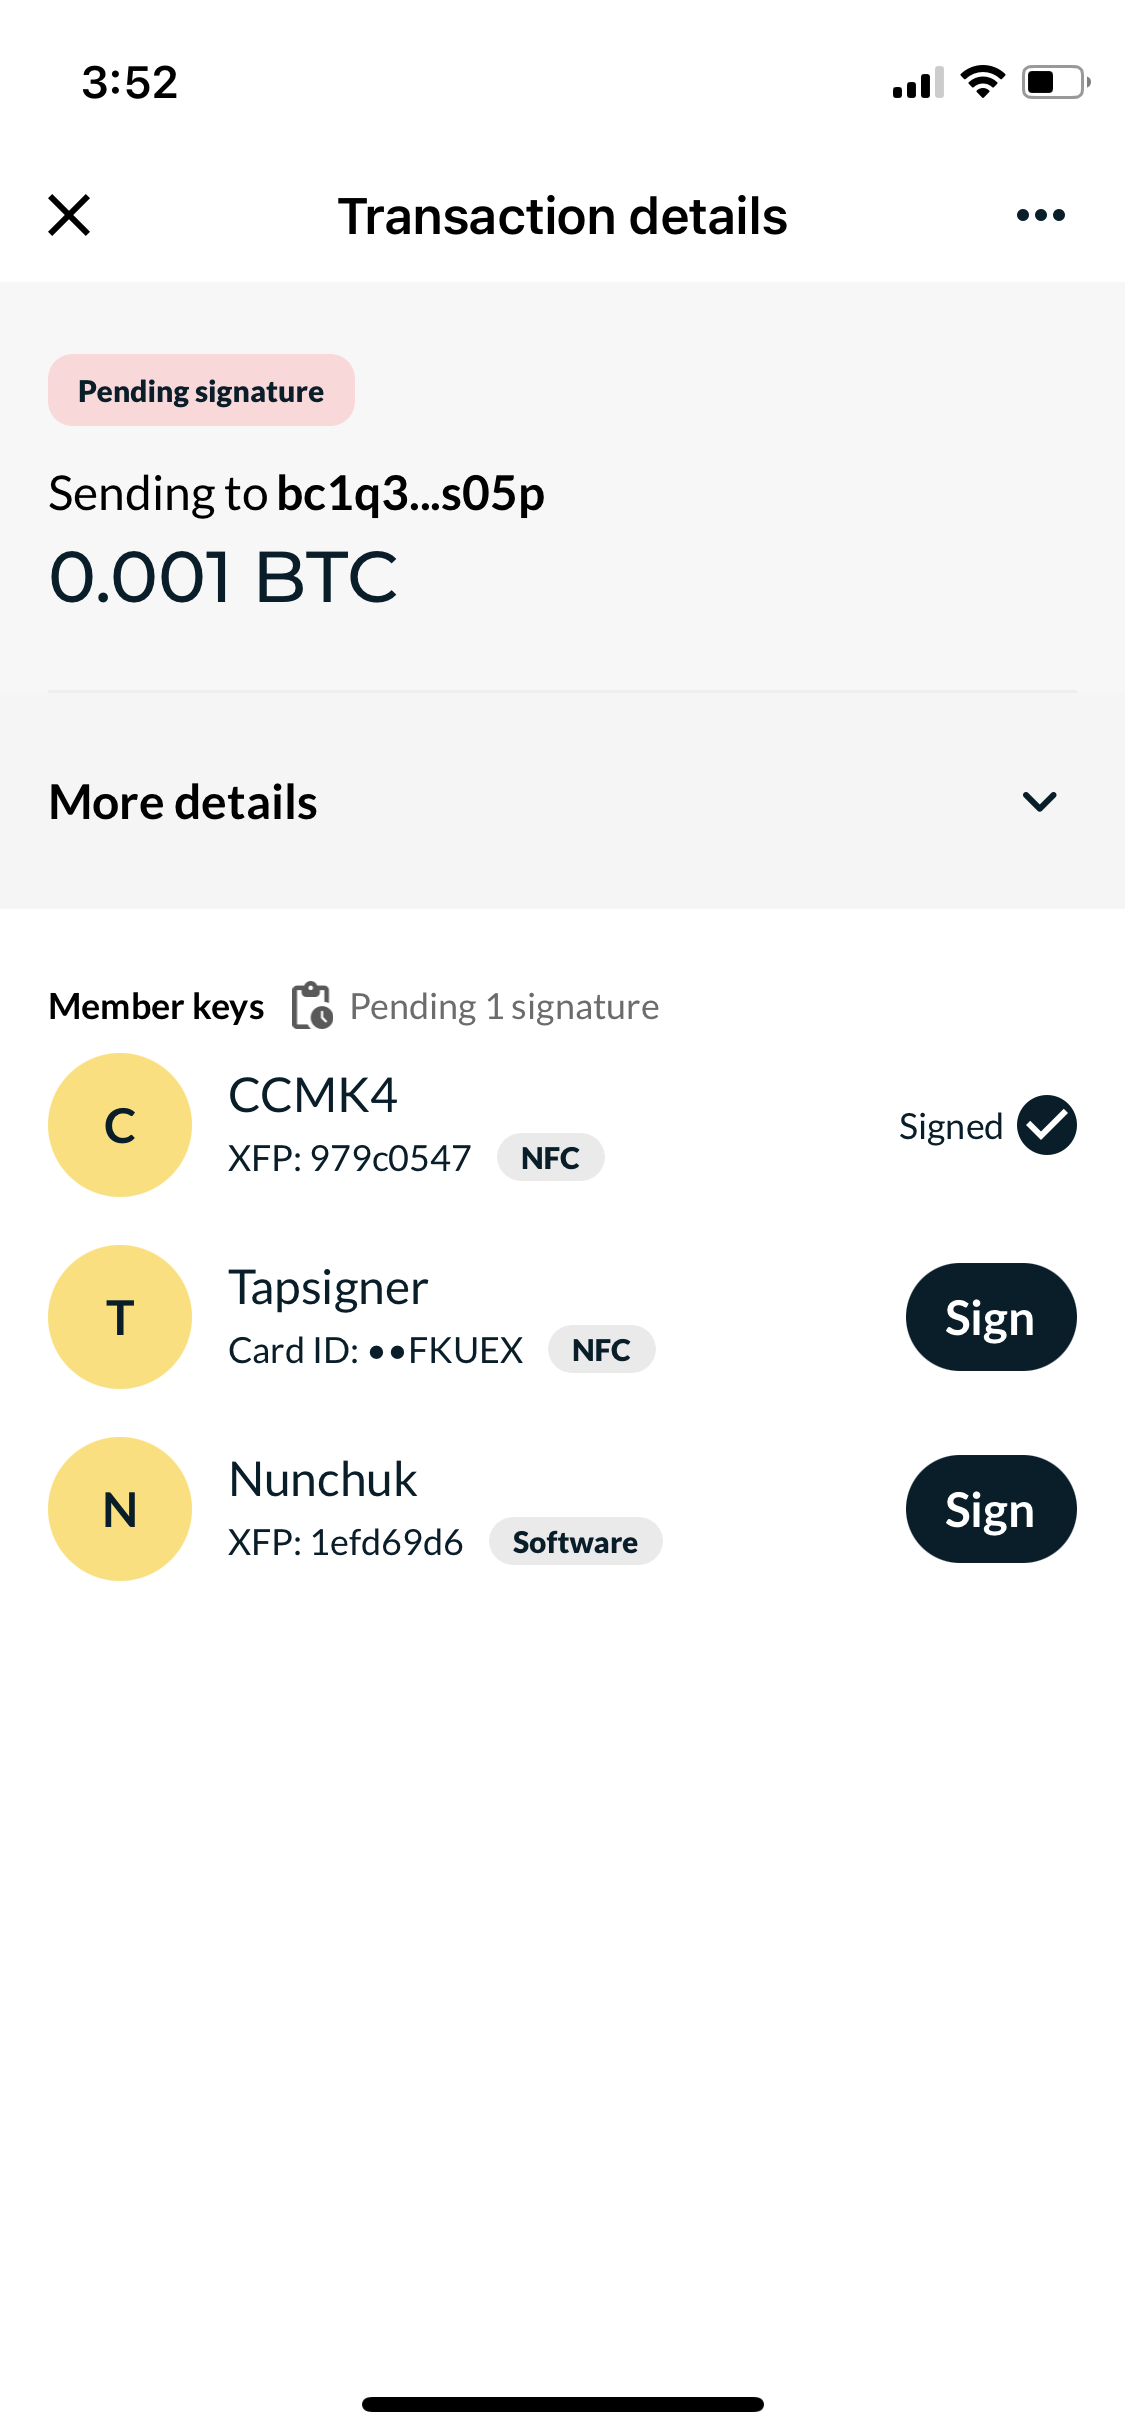
#1 Sign with Coldcard
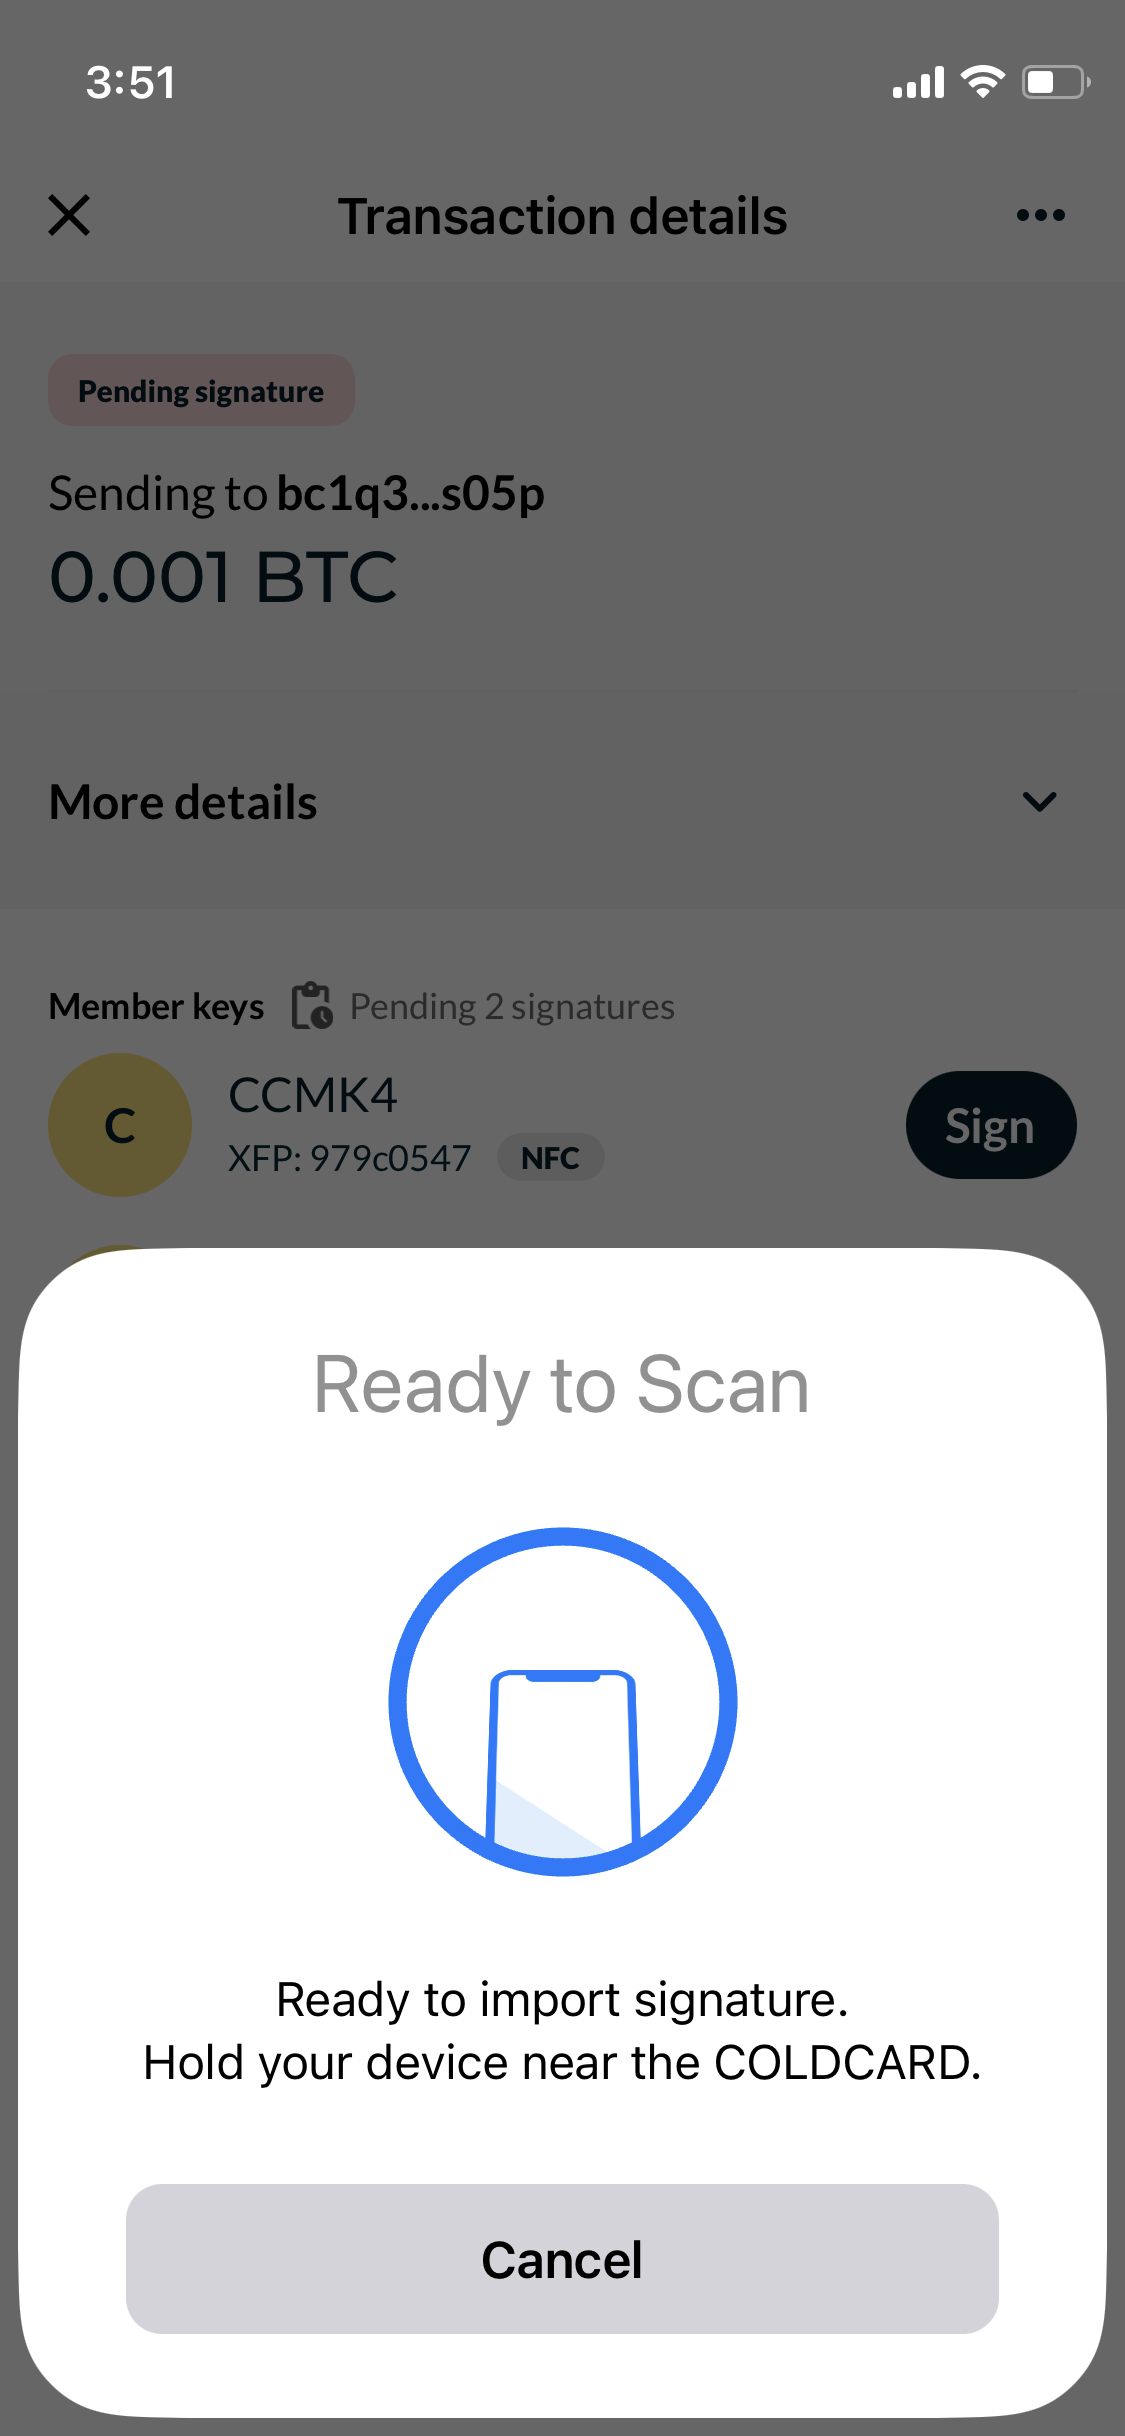
Let's sign with Coldcard first. In Nunchuk, tap Sign -> Export transaction next to Coldcard.
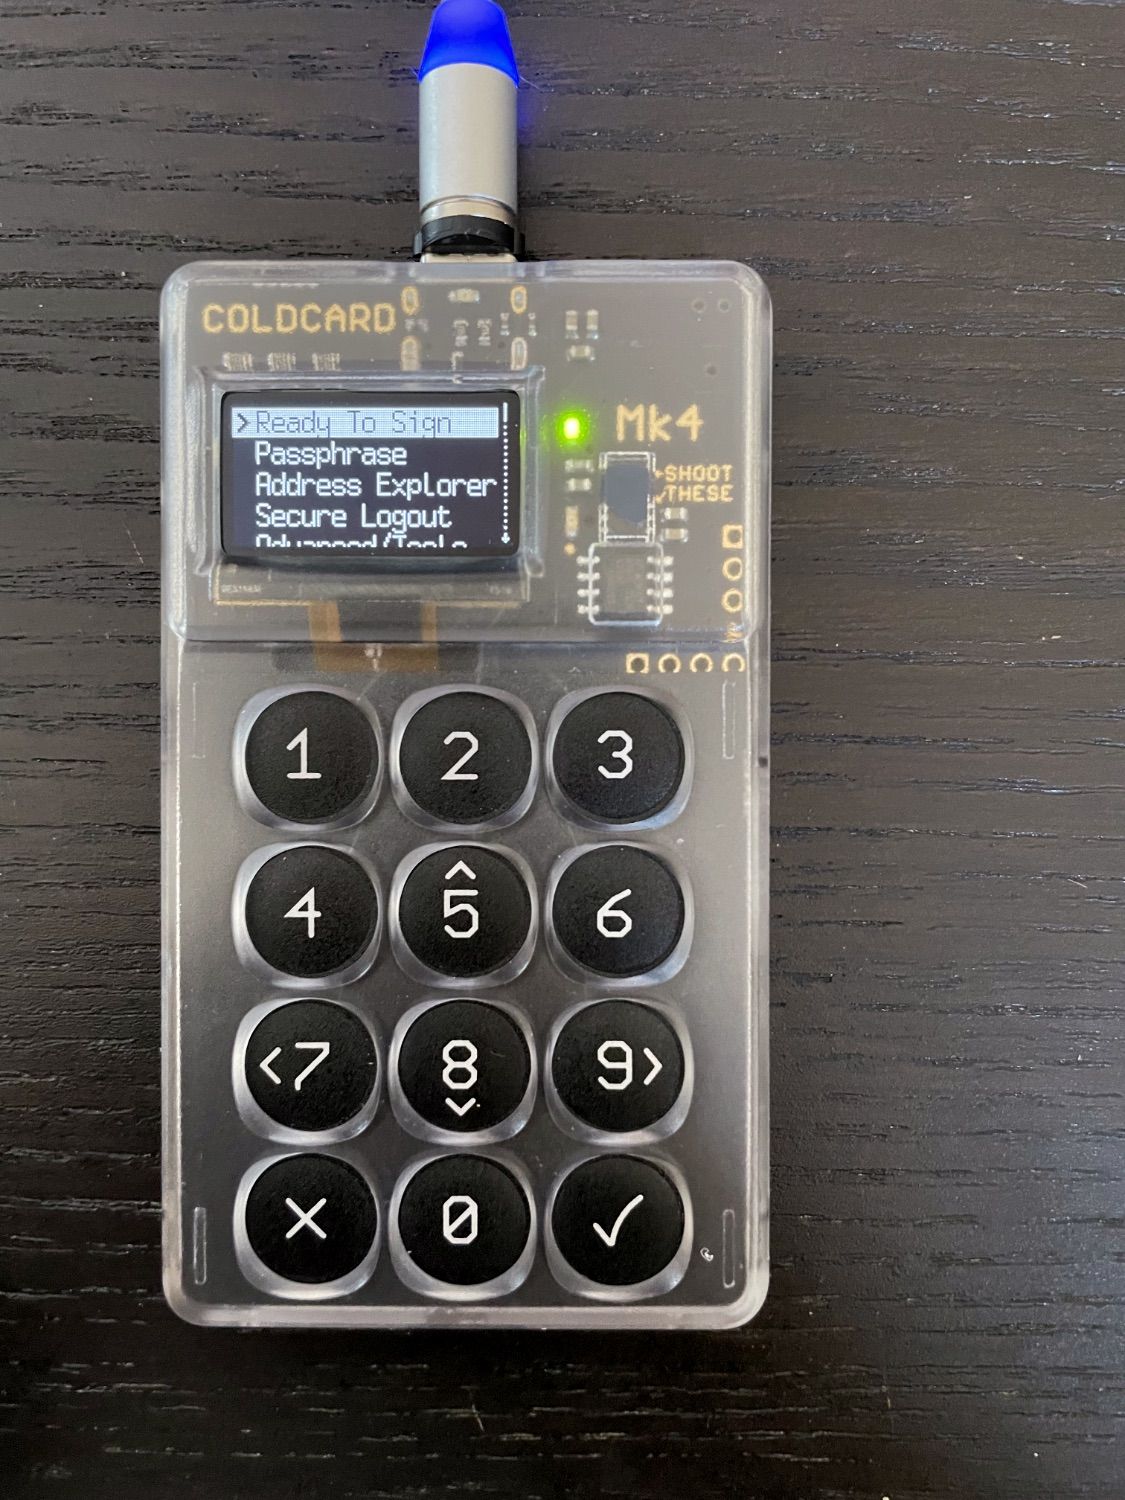
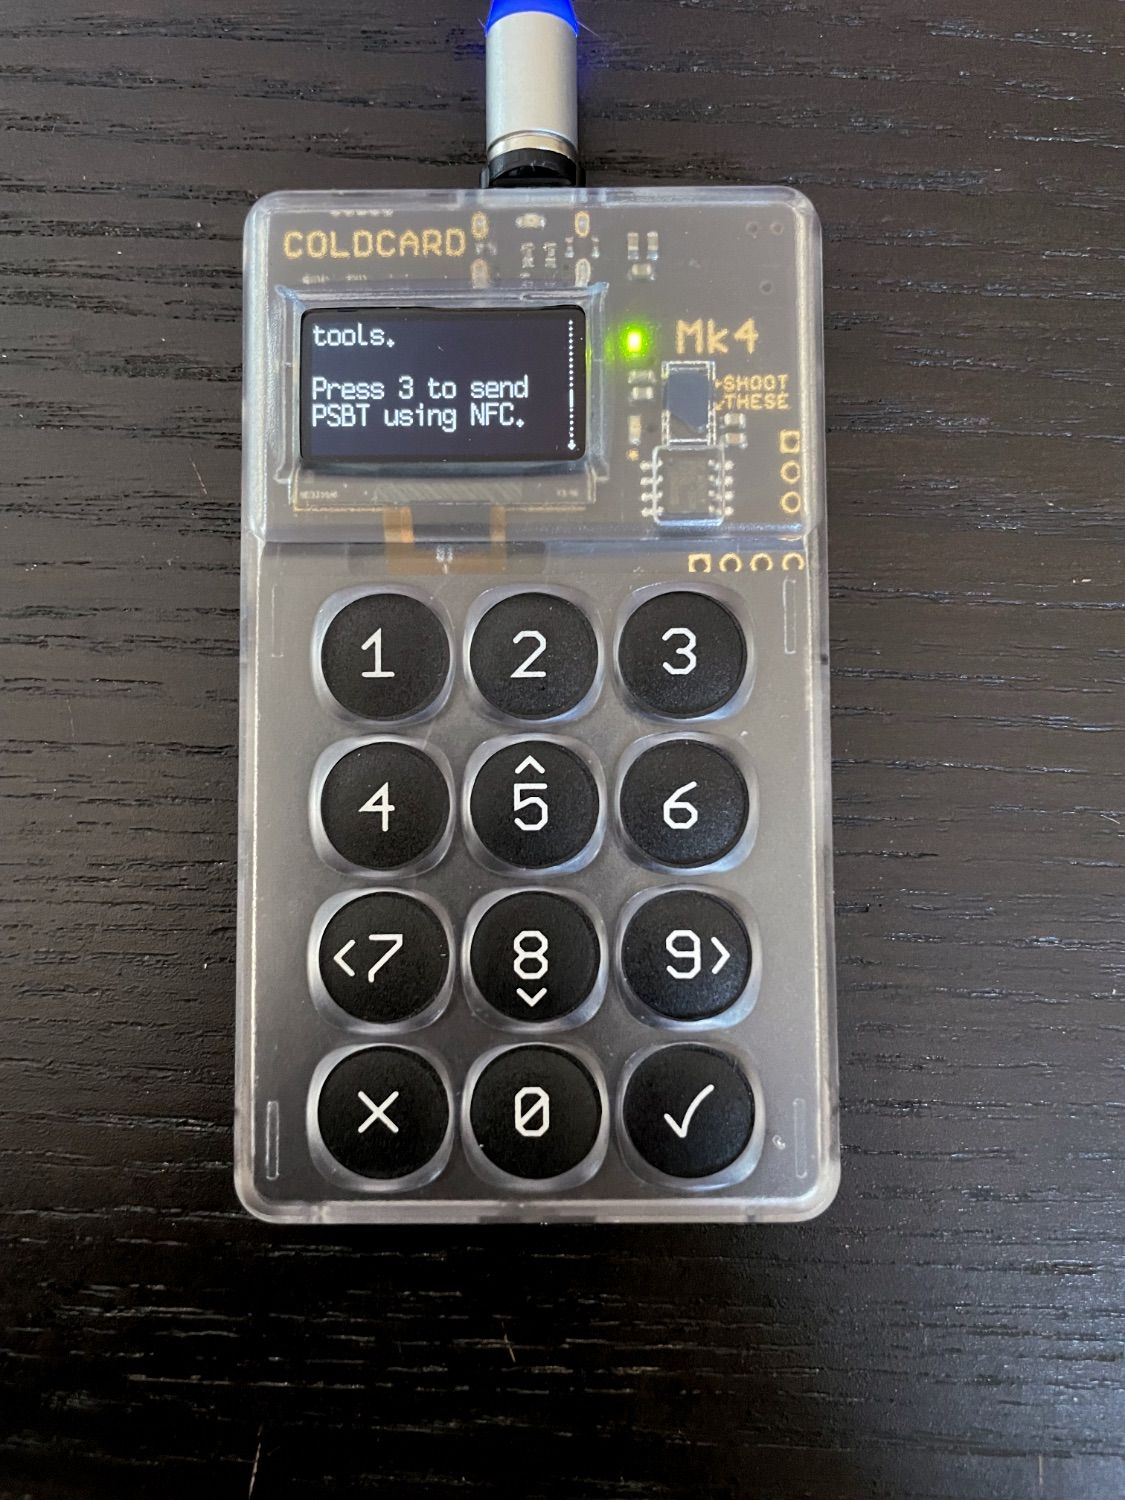
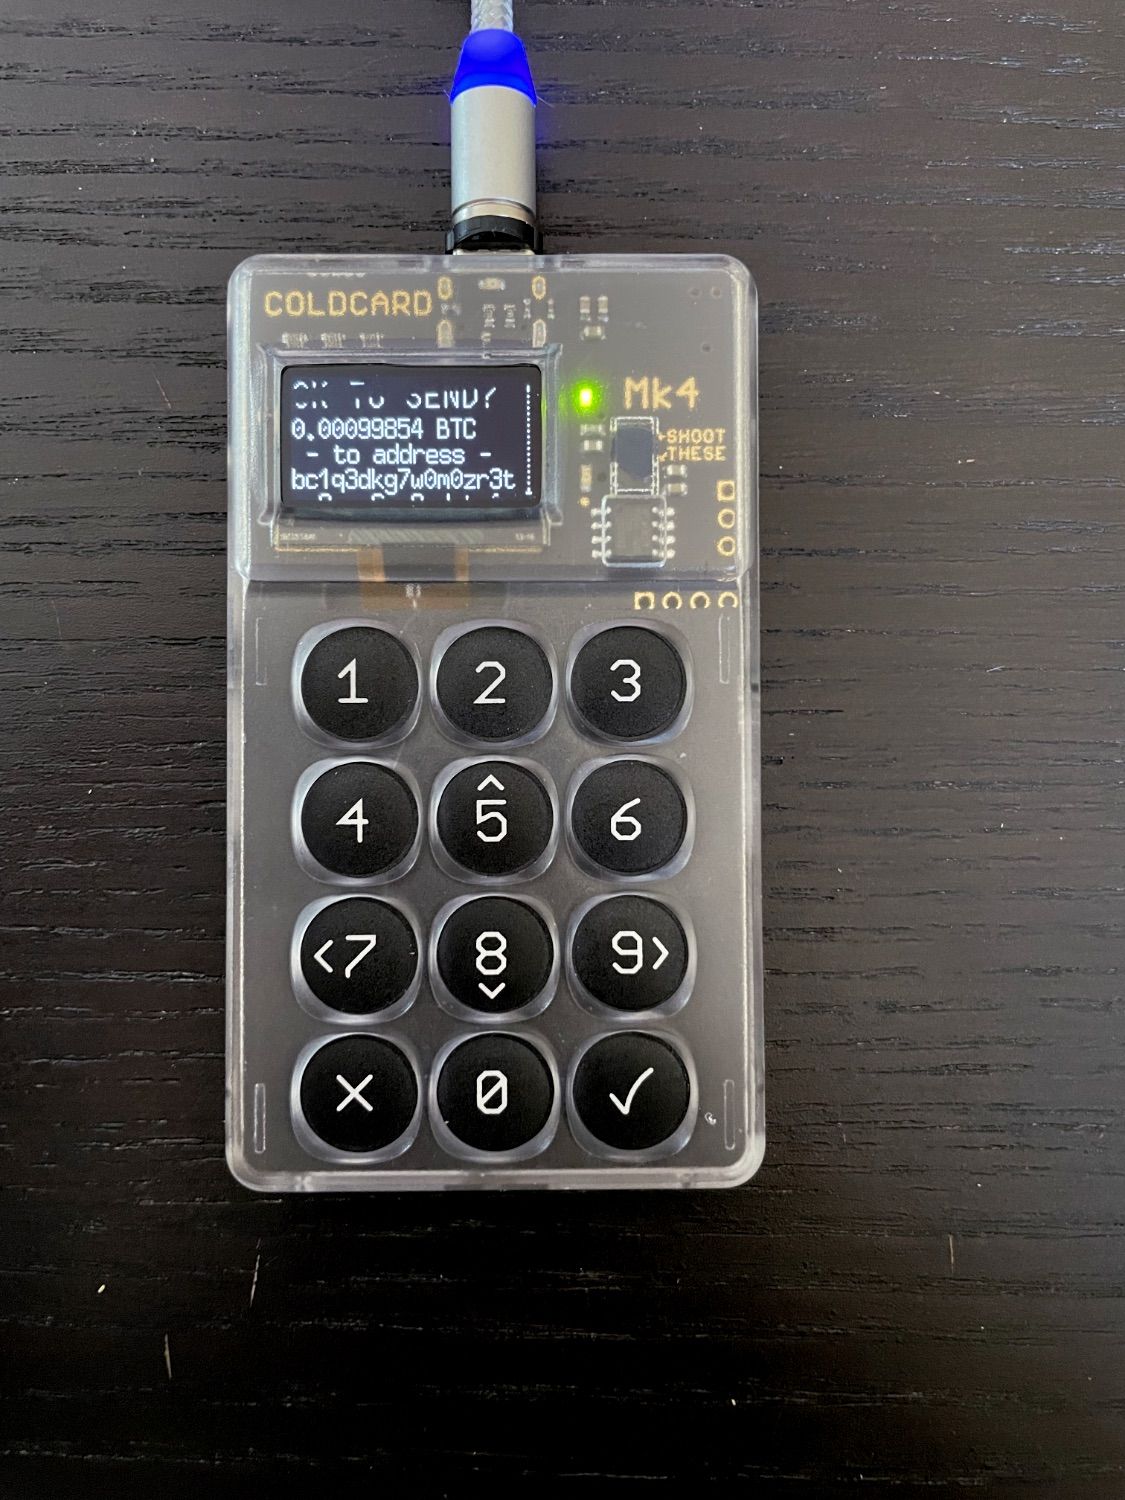
Now, go to Coldcard and click Ready To Sign to review the details of the transaction. Ensure that the address and the amount are correct, and then press number 3. Lastly, scan Coldcard with your iPhone.
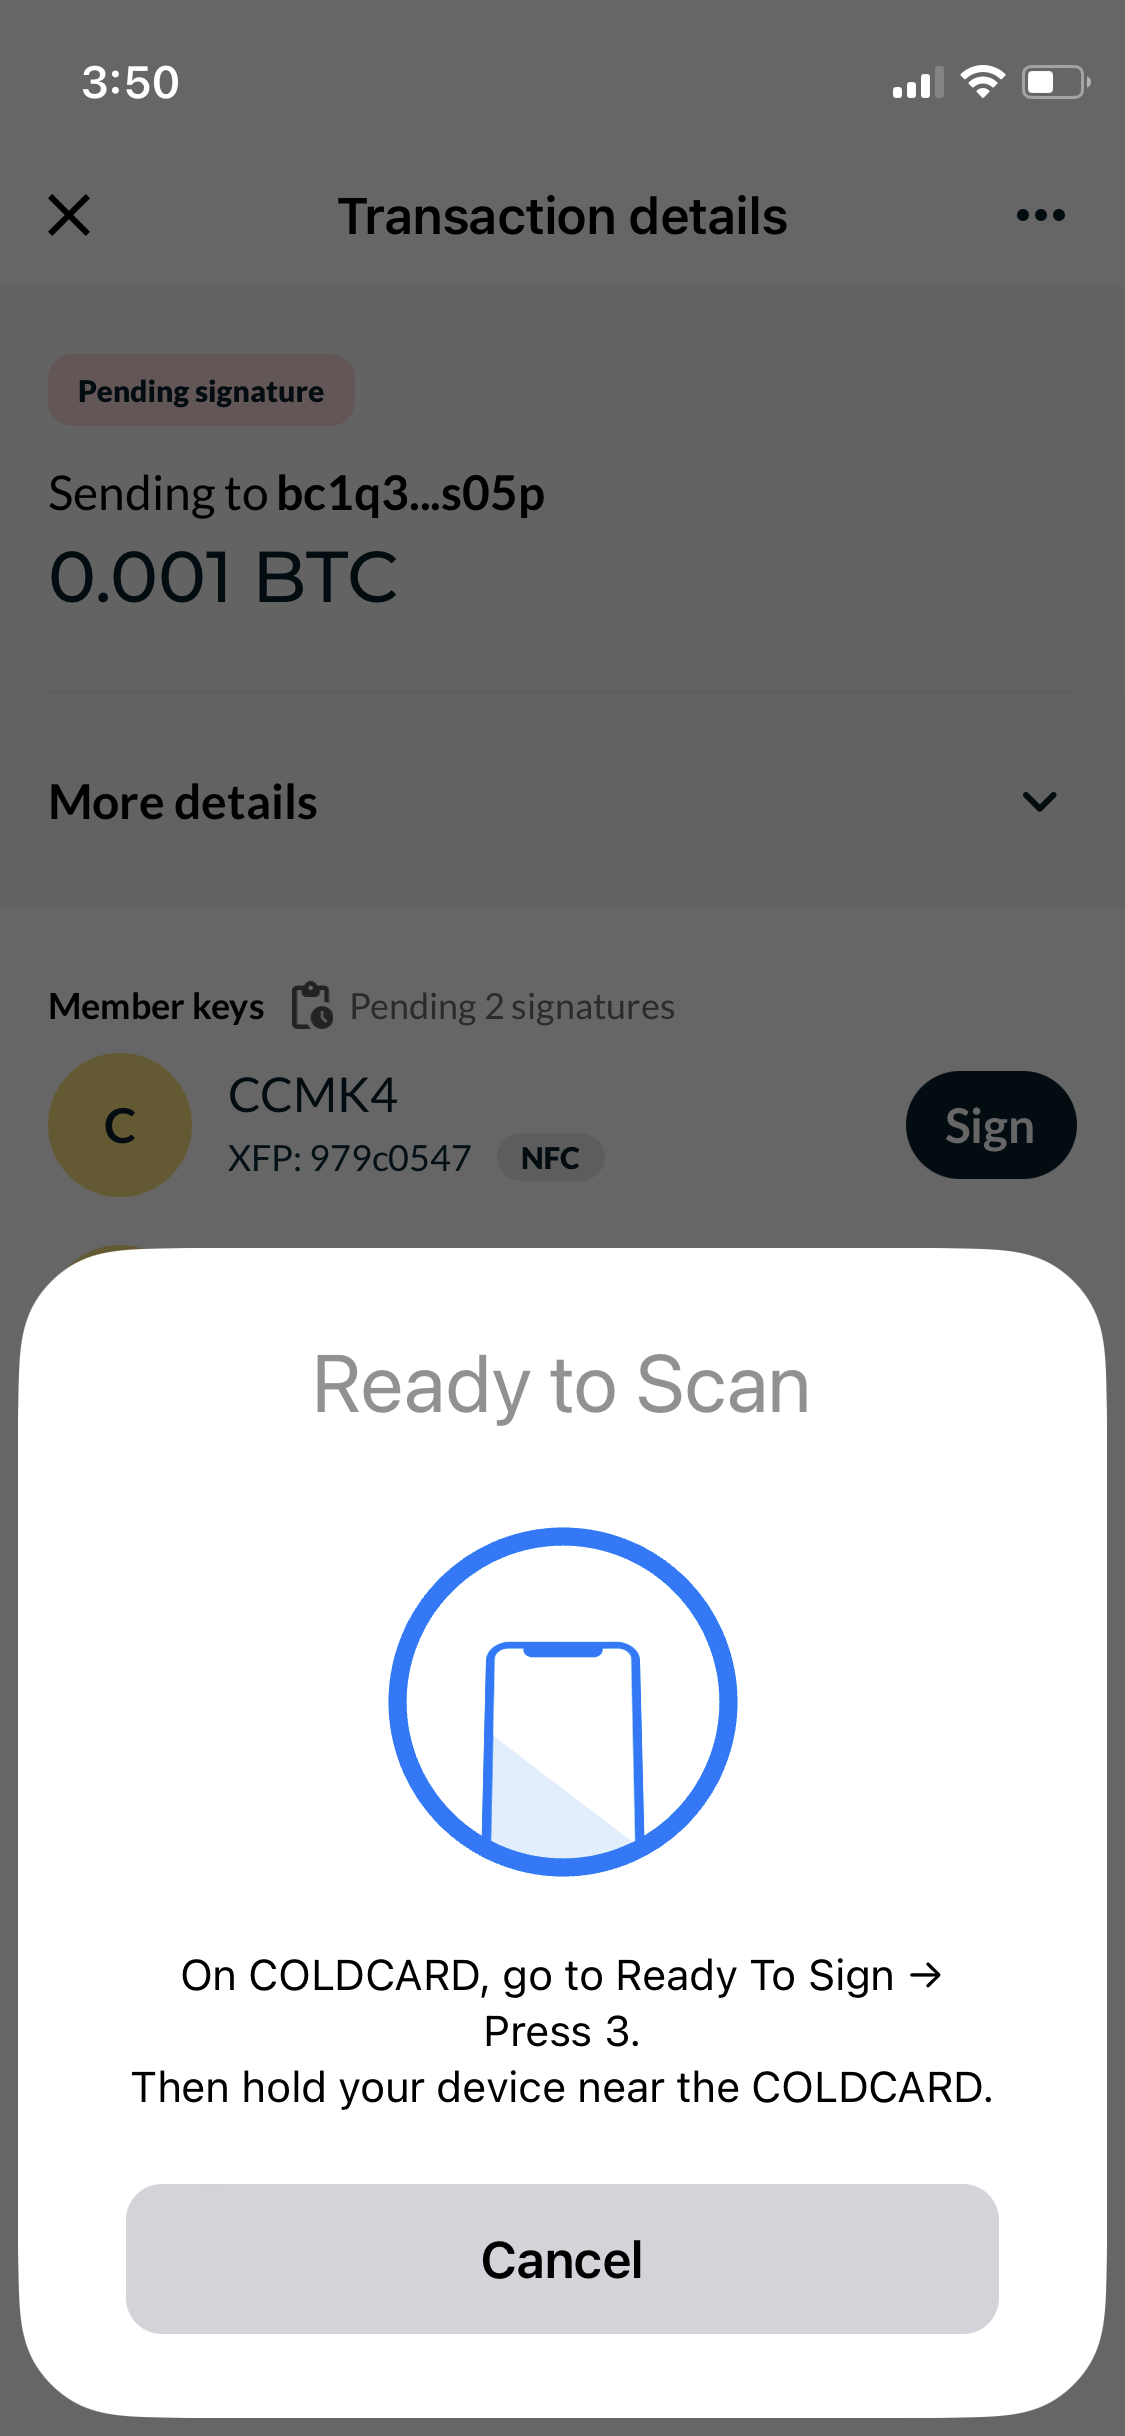
Once you are successful (remember that you may need to adjust the phone placement correctly), Coldcard will display the transaction details once more.
If everything appears to be correct, confirm it by pressing the OK button and scan the device again. This action will transfer a PSBT (partially signed bitcoin transaction) from Coldcard to Nunchuk.
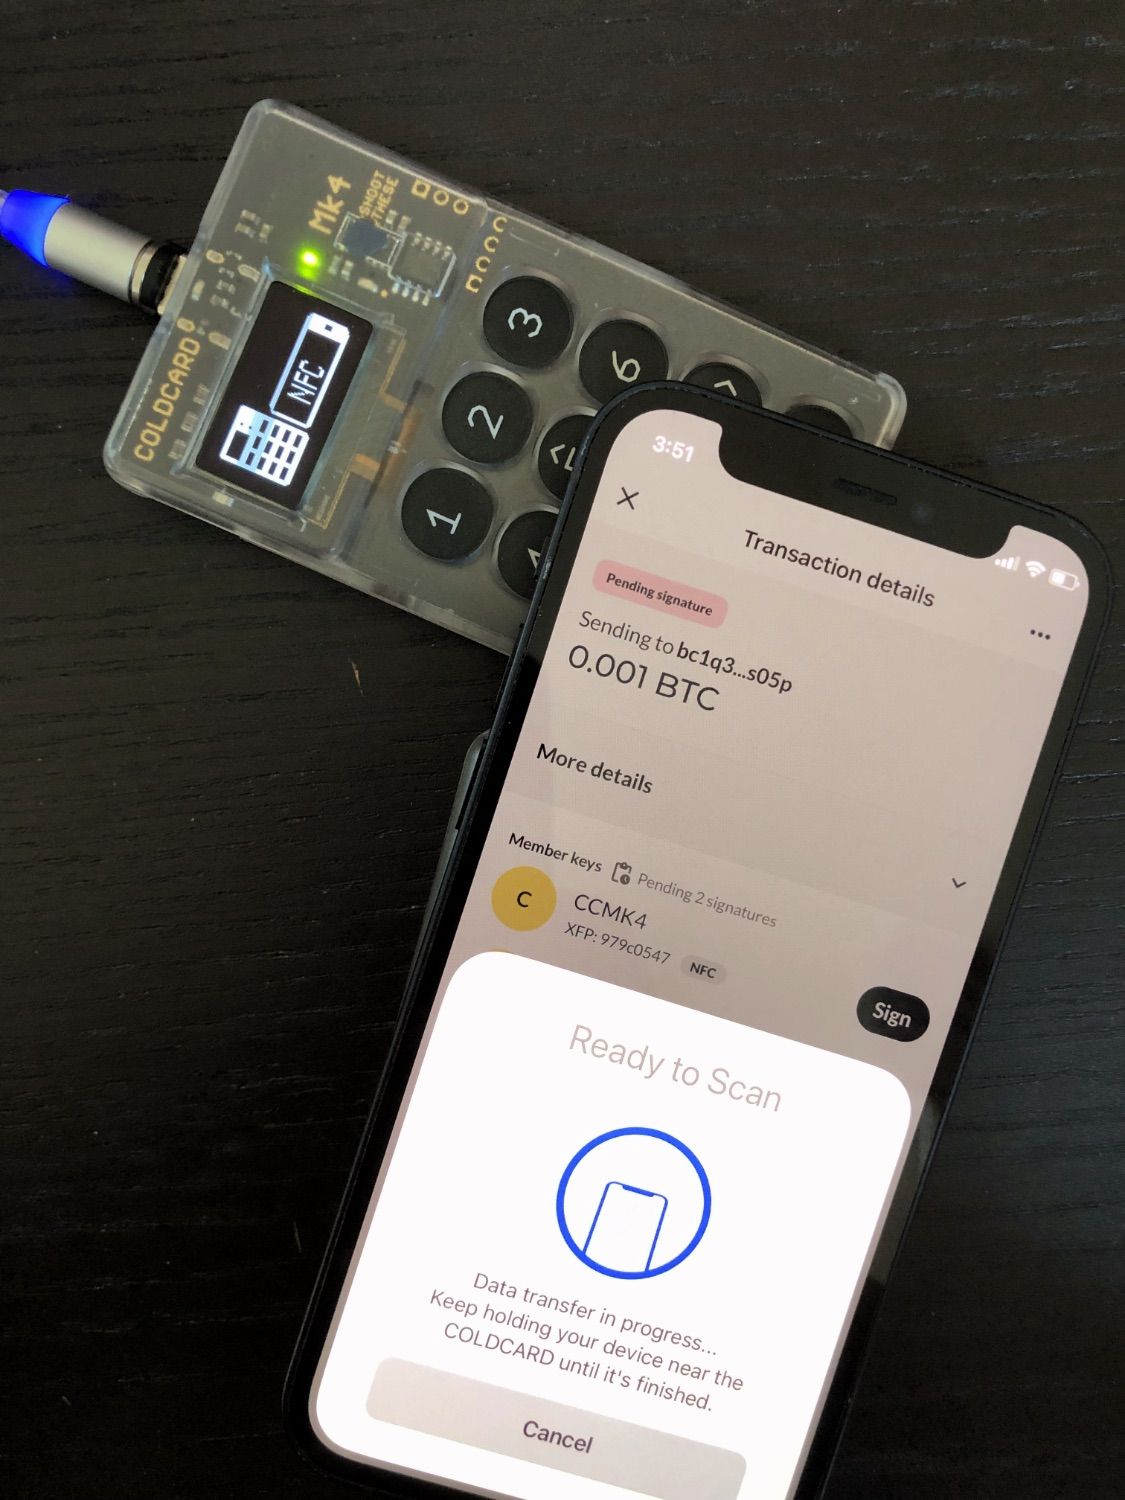
As mentioned earlier, you may experience issues when scanning Coldcard with your iPhone. I have found that signing a transaction requires a different placement of the iPhone. Please refer to the following photo for reference.
#2 Sign with Tapsigner
To complete the signing process with Tapsigner, first tap on Sign next to Tapsigner in Nunchuk. Then enter the card's PIN. Finally, scan the card using your iPhone to provide the second signature.
Once the transaction has been fully signed, tap Broadcast transaction to send it to miners and other Bitcoin nodes.
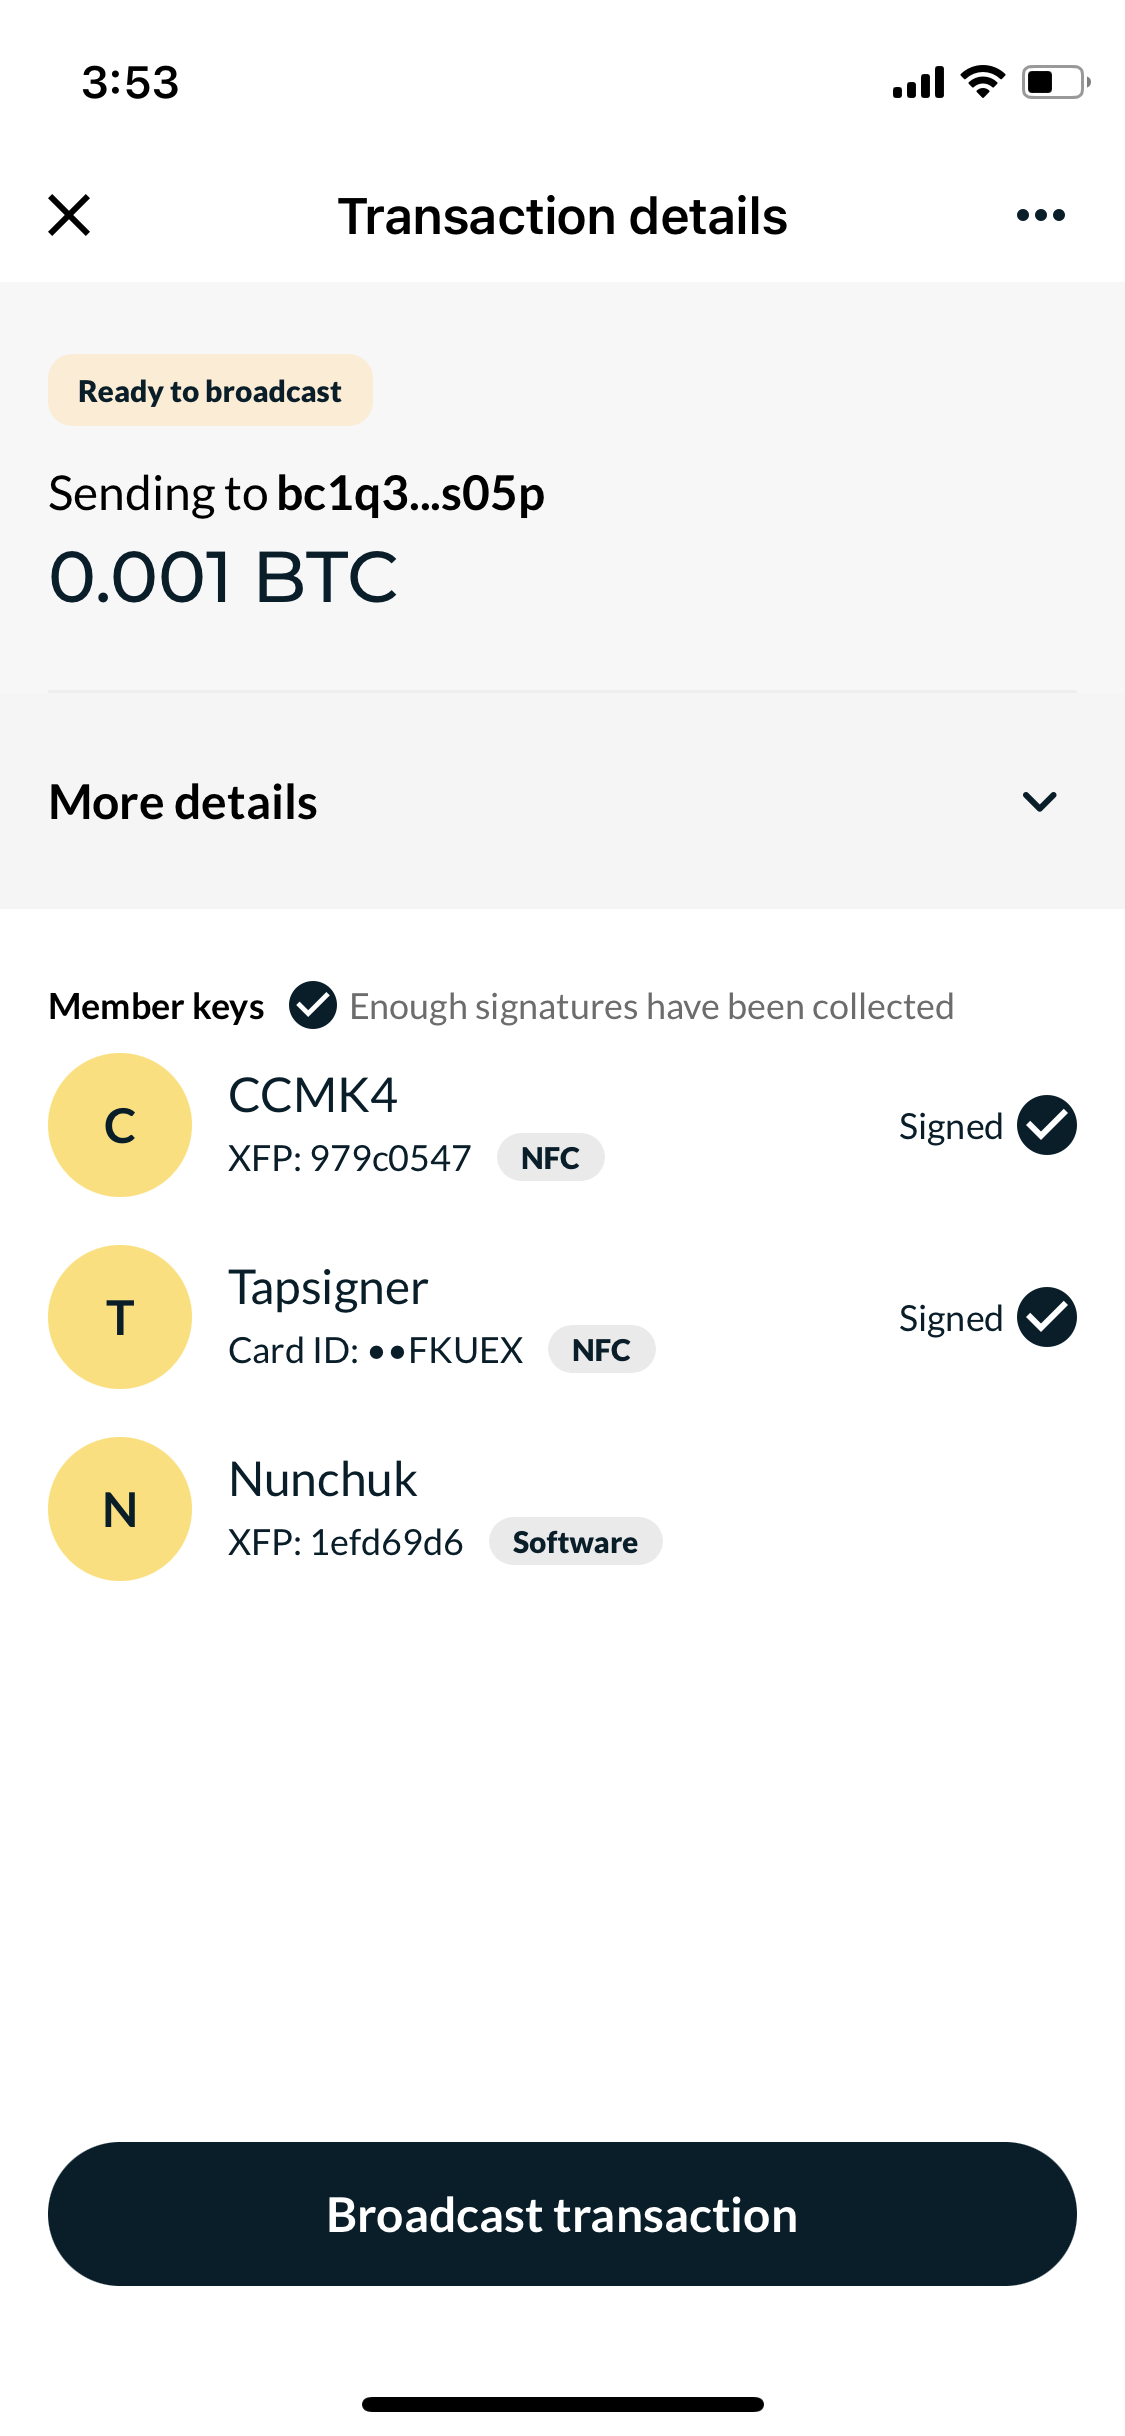
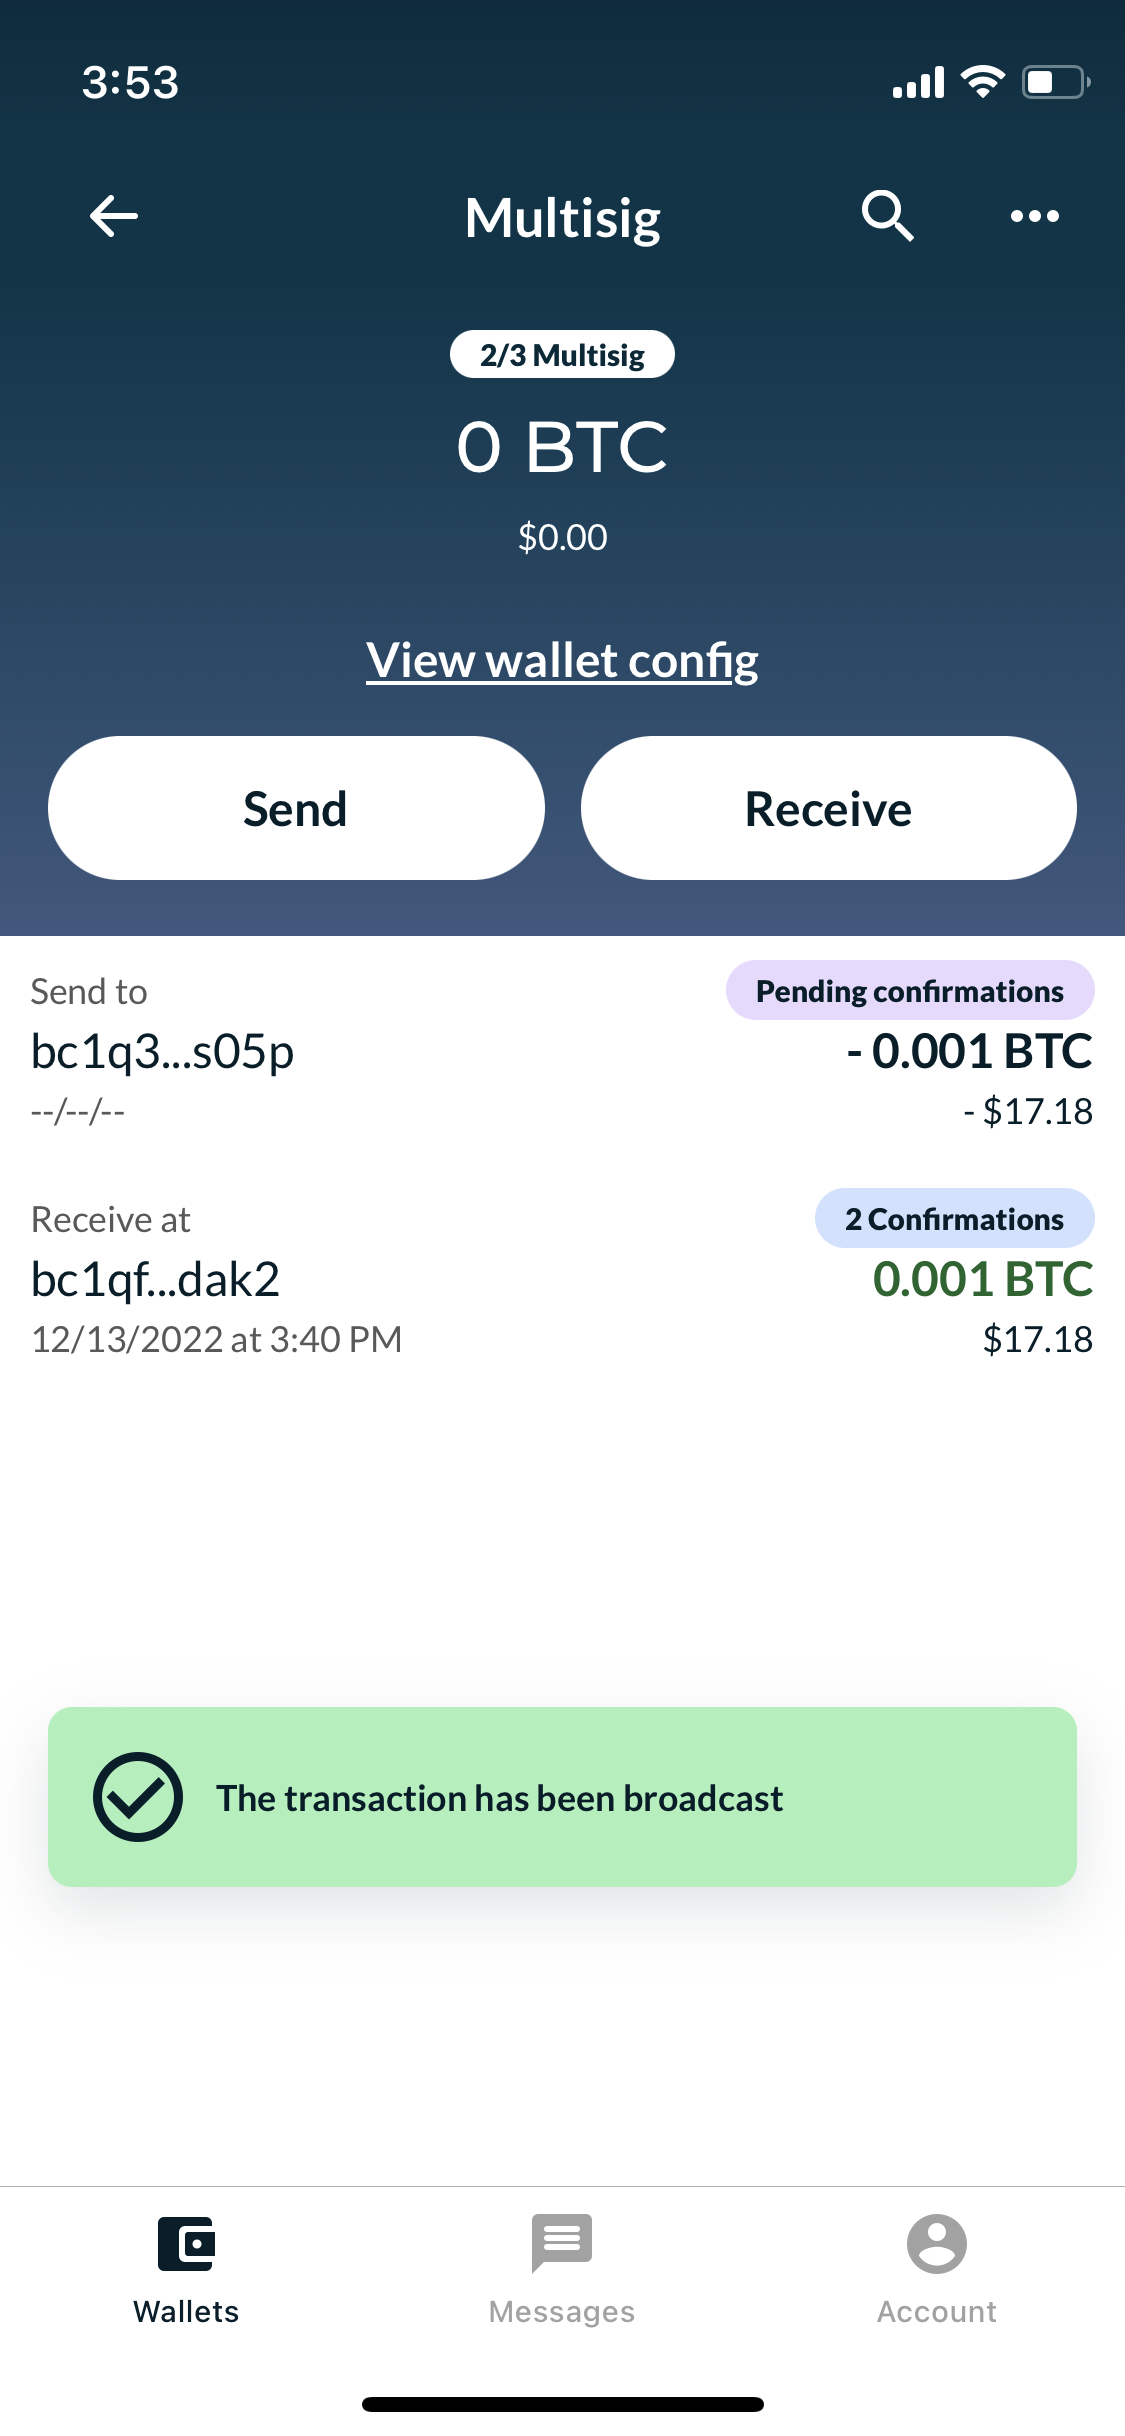
If you are able to see the transaction in your receiving wallet, it indicates that the 2-of-3 multisignature wallet has been set up correctly. Congratulations! You can now use a hardware wallet on an iPhone with the combination of Coldcard and Tapsigner.
COLDCARD MK4
Coldcard is the most trusted and secure Bitcoin-only hardware wallet now with NFC support!
Get extra 5% discount by using the code "CKBTC" and purchasing with bitcoin.
Bonus
You may have noticed that I purposely shared 21 out of 24 seed words of the Nunchuk wallet in one of the photos above.
At the time of writing, the wallet contains approximately $20 worth of bitcoin, which was sent from the example multisig wallet. Anyone who can figure out the three missing words is welcome to claim the coins!
P.S. The coins are stored in the single signature wallet that was created with Nunchuk, in case that was not clear.
Update (2022/12/15): The coins have been claimed by a Czech Bitcoiner who used a python script he created!
I accidentally made the challenge easier by making two mistakes:
- Since the 24th word is a checksum, you only really needed to find two words instead of three. There were only eight possible words for the checksum instead of the full list of 2,048 words. That's a maximum of 2,048 x 2,048 x 8 combinations.
- I disclosed the wallet's master fingerprint in one of the photos. The only thing necessary to do was to go through the missing words, generating a master pub key from each valid seed, and checking it against the fingerprint. Had I not disclosed the fingerprint (nor the wallet address where the coins were sitting), he would have had to check the balance (with his node or a public block explorer) on the first generated address with each valid seed. This would have taken a lot more time.
Great job regardless, and congratulations!