

I2P: Protect Your Online Privacy with an Anonymous Encrypted Network

Because the Internet is quite centralized and your ISP or the government is able to monitor your online presence, privacy should be your utmost priority.
If you're an activist, journalist, whistleblower, you live under a fucked up regime or you're just looking to sell some goods and services online, you should always protect your privacy.
One of the greatest anonymization and privacy tools that cater to a diverse group of users is I2P.
I2P is an anonymous overlay network that "sits" on top of the Internet. It offers a wide range of applications and hidden services.
Examples of such services include: email providers, web hosting, blogs, real-time chat, torrents, git, exchange markets, dark markets, forums, file sharing and so one.

Applications communicate anonymously and securely because all the communication is end-to-end encrypted.
You can read more about the project here.
Unlike Tor, one thing that I2P isn't, is a proxy to the Internet (also called "clearnet"). If you're browsing a regular website, I2P will not hide your IP address unless you use a Tor outproxy (similiar to an exit node in Tor).
Unfortunately, I haven't had luck finding any nor setting up my own. Thus, if you need anonymity on the clearnet, you should use Tor instead.
Have a look at the comparison between I2P and Tor to get an idea of the more suitable tool for your use case.

Proton VPN
Protect your digital life with Proton VPN, the leading provider of secure and private internet connections. Whether you're browsing, streaming, or working remotely, our advanced encrypted network ensures your online activities are shielded from prying eyes.
Back to I2P.
For the purpose of the tutorial, I'll be using the latest Mac OS X Sierra and Safari. In the real use, it's better to use an open source browser such as Firefox instead.
Though the tutorial is written for Mac OS X, you should be able to reproduce it on any operating system supported by I2P.
Install dependencies
I2P is developed in Java and requires Java SE Development Kit 8.
Open a console and check that you have the required version of JDK:
java -versionIf the above command gives you an error or the version is lower than 1.8.X_YYY, go to Oracle website and download it.
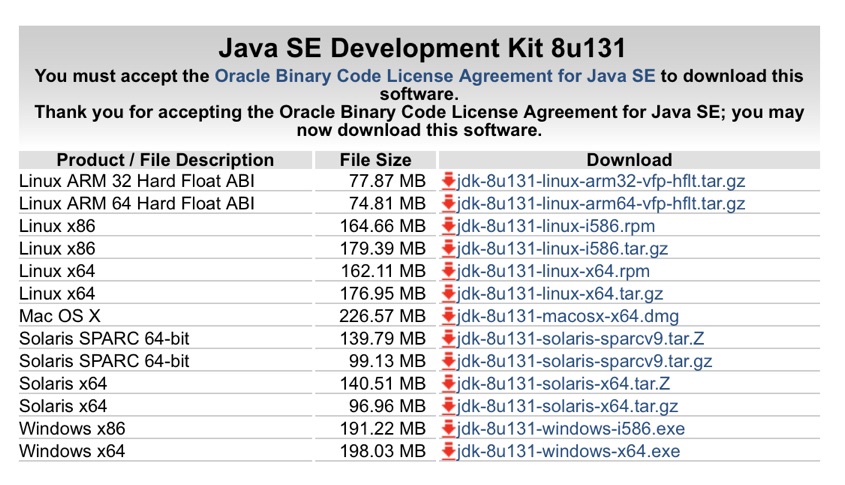
Make sure to choose the right version for your operating system.
After the successful installation, check the version again. It should look like this:
java version "1.8.0_131"
Java(TM) SE Runtime Environment (build 1.8.0_131-b11)
Java HotSpot(TM) 64-Bit Server VM (build 25.131-b11, mixed mode)
Install I2P
Go to I2P website and download the latest version for your operating system.
Run the installer and go through the installation process.
I'm not sure about other operating systems, but on Mac OS X you just have to go through a standard Windows-style procedure.
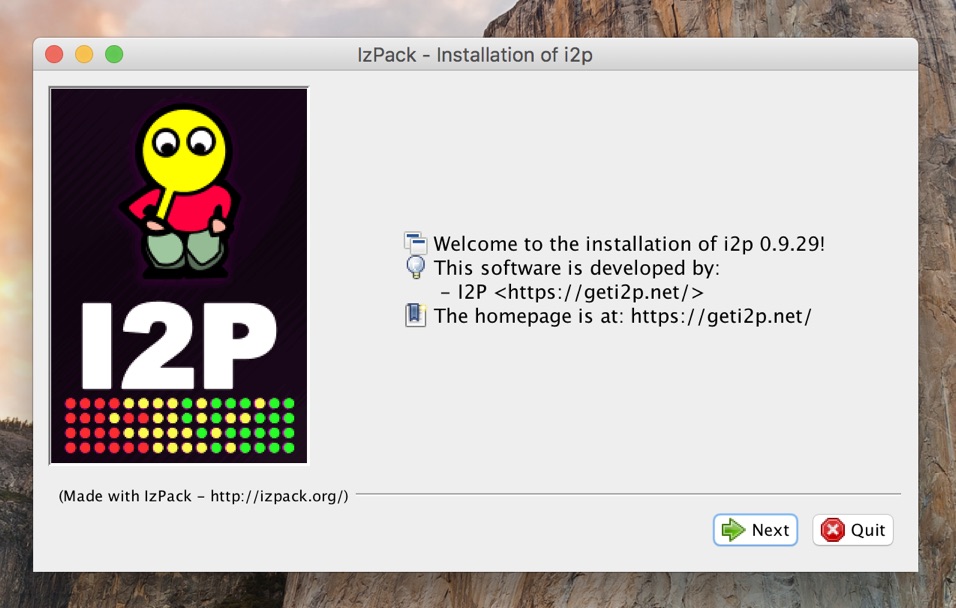
Just click "Next" bunch of times until it's done.
Run I2P Router
When the installation is finished, you have to run I2P Router that handles traffic through your node.
You can either run it by double-clicking /Application/i2p/Start I2P Router.app or by running the following command:
/Applications/i2p/i2prouter startRegardless of the method, the startup process is a bit confusing.
The app doesn't show you any tray icon and the app looks like it quit (using both methods).
Just wait around 10 seconds and the process should open a new browser tab/window with the "I2P Router Console".
If it doesn't, open it manually http://127.0.0.1:7657.
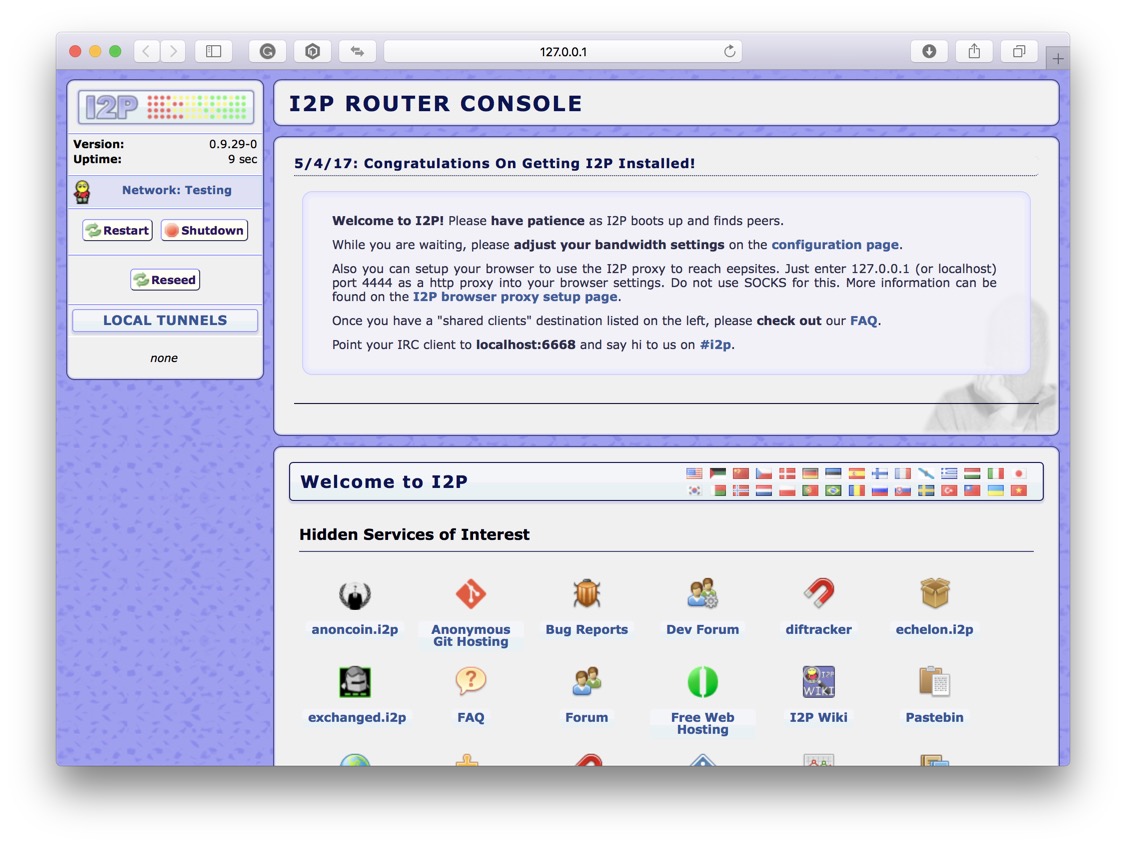
Here, you have a complete overview of I2P Router, its settings, and services.
One thing that I like about I2P is that it lets you configure every bit of the node. That's also its biggest weakness as it makes it very difficult to setup for non-tech savvy people.
Set up I2P Router Console
Before you can start browsing the network you'll have to change some settings.
First, go to Bandwidth Configuration and change download and upload speeds based on your Internet connection.
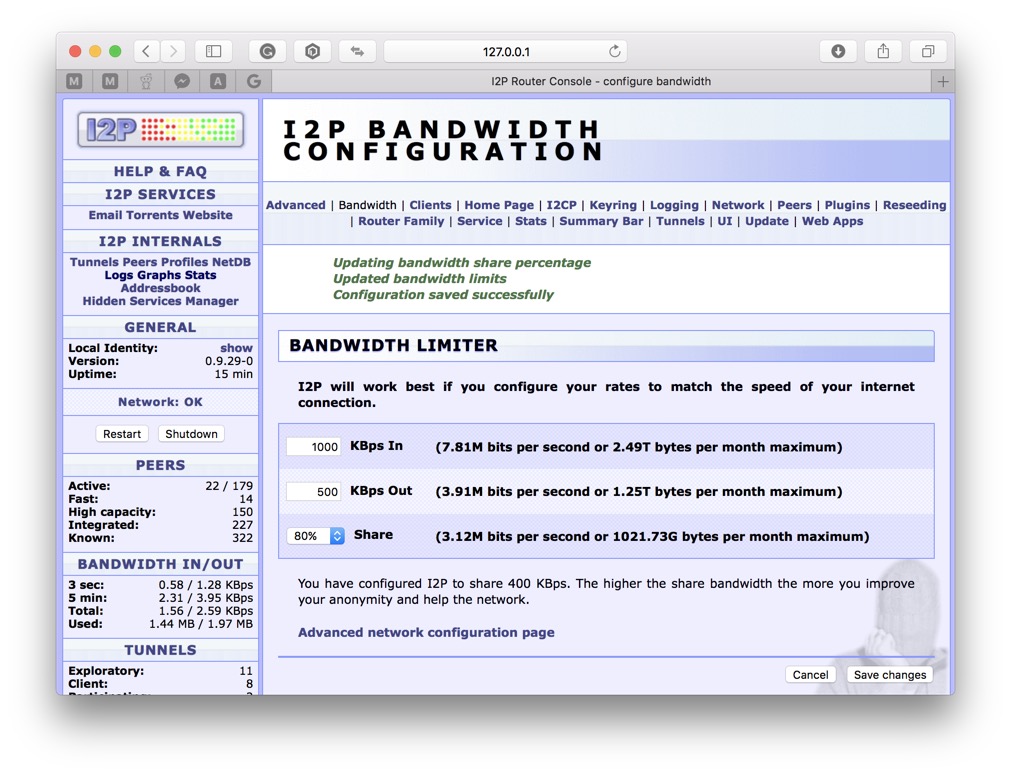
Use SpeedTest to figure out your speed.
Generally speaking, sharing 50% of your bandwidth with the network should work well both for you and peers as well.
Next, set up the Internet connection to go through the I2P proxy.
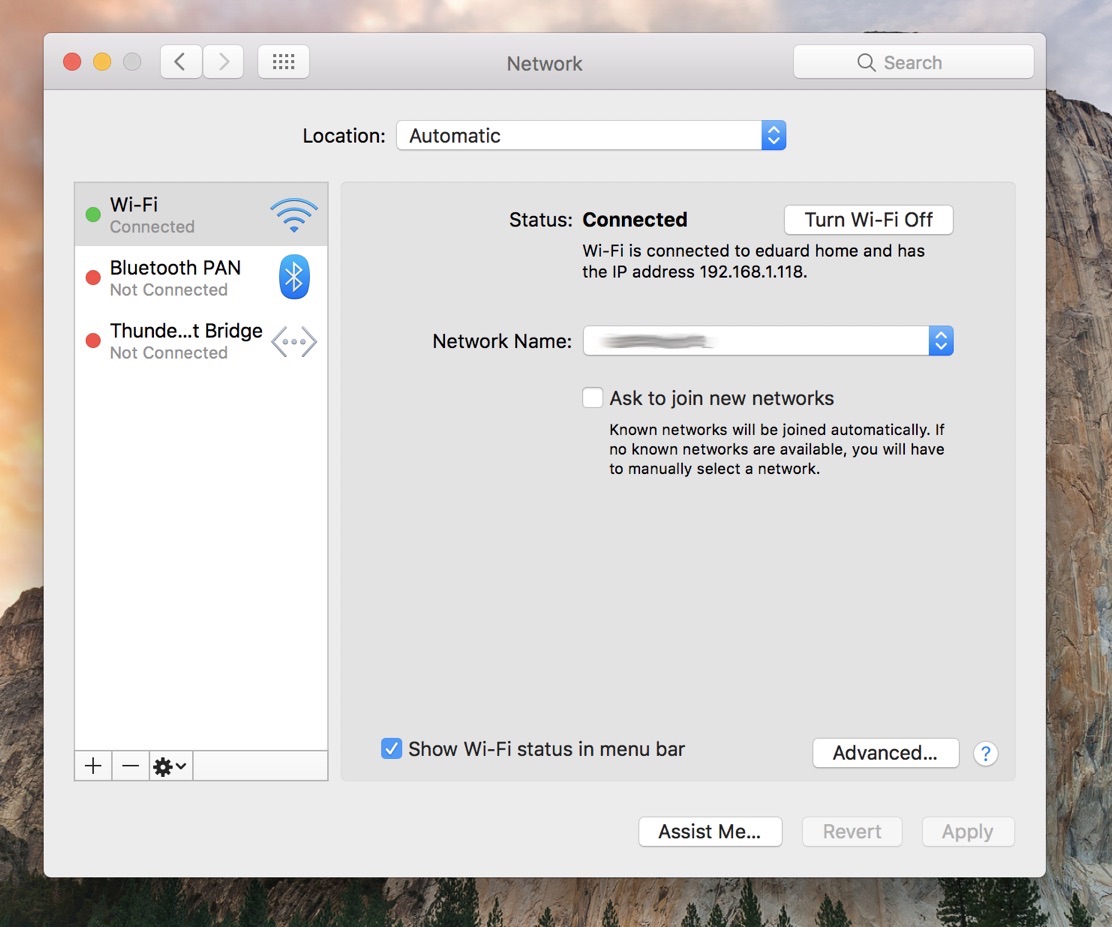
Go to System Preferences -> Network -> Advanced -> Proxies and choose "Web Proxy (HTTP)" (make sure it's ticked).
Set 127.0.0.1 as "Web Proxy Server" running on port 4444 and click "OK".
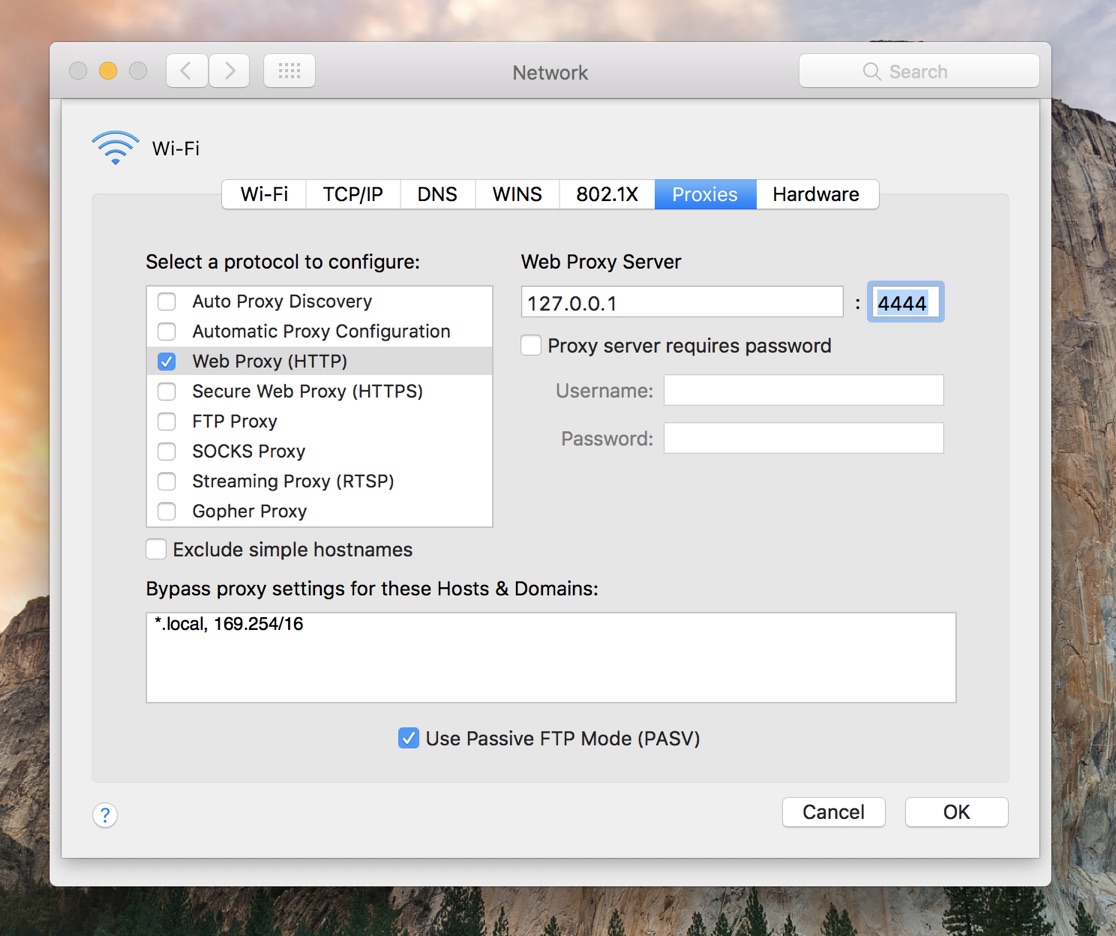
In the Network window click "Apply" and go back to your browser to test the connection.
Open a page of let's say a privacy-oriented cryptocurrency anoncoin.i2p.

Congratulations, you may now start using I2P.
Allow incoming connections
If the page doesn't load it might be down but more likely your computer is hidden behind a firewall.
Go back to I2Prouter and check the network status in the sidebar. The chances are it's "Network: Firewalled".
To fix it, you'll have to open the port in your firewall that I2P node listens on.
Open I2P Network Configuration and look for "UDP port" which is randomly selected for every peer. Let's say it's 25137 in our case.
I can't go into details because there are thousands of different firewalls. But, you will want to allow incoming TCP and UDP connections on the given port.
If your computer is behind a router, you will also have to forward traffic to your internal IP.
Find the IP first:
ifconfig -a | grep broadcast | awk '{print $2}'Open your router administration which is usually located at http://192.168.1.1 or http://192.168.0.1.
Look for "Virtual Server" or "NAT Forwarding".
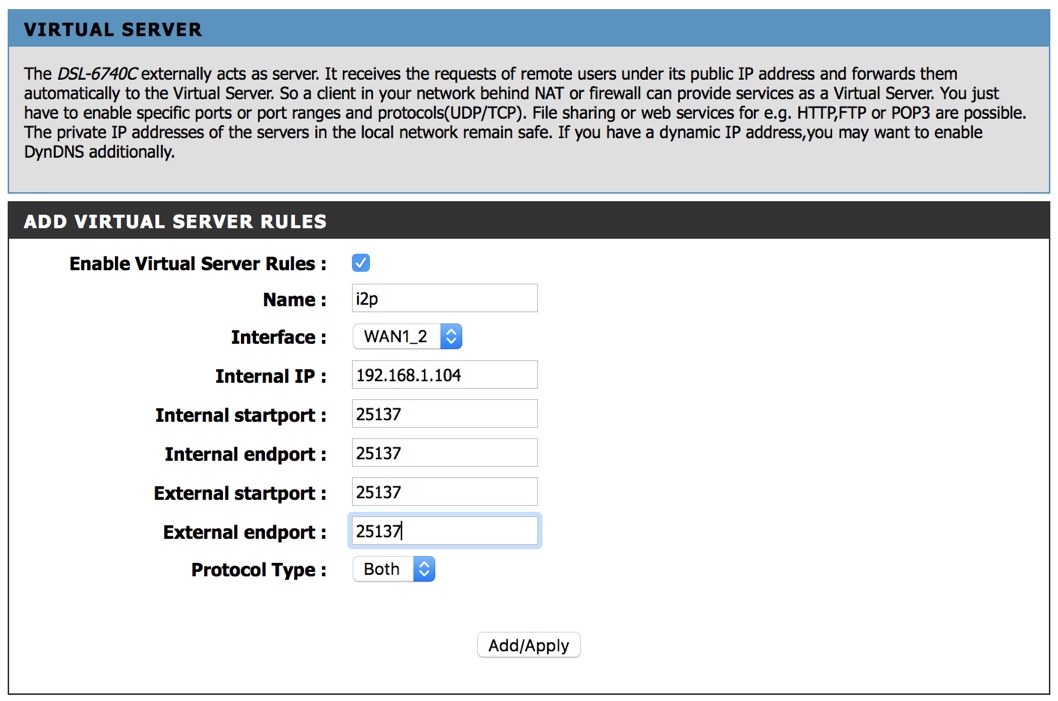
Create a new rule based on the above image and restart the router (if necessary).
Go back to the I2P Router Console and click "Restart".
You may close the console and wait for the new one to be opened automatically (it takes a while).
If you did everything correctly, you should be able to browse the I2P network now.
In the next article, we'll have a look at creating hidden I2P services such as a web server. Please let me know if you're interested in setting up other services too.
Hope you found this tutorial useful and if you have any questions let me know in the comments below.