

How to Secure your Website with a Free SSL Certificate from Let's Encrypt
HTTP has massive privacy issues designed into the protocol that allows attackers to eavesdropand hijack your content.
Implications of these attacks may go from none to very serious like stealing your identity and even money.
In an effort to encrypt the Web, EFF (Electronic Frontier Foundation) and a certificate authority Let's Encrypt have published free tools to allow web owners easily implement HTTPS by default.
In this tutorial, we'll be setting up a certificate for Apache running on Linux over SSH.
The setup process is very easy so I'll include installation steps for most favorite Linux distributions. However, you shouldn't have any problems following these steps on any UNIX-like operating system.
Install Apache Plugin
First, we need to install the apache plugin.
Find the right commands for your Linux distribution.
Ubuntu:
sudo apt-get update && sudo apt-get upgrade
sudo apt-get install python-certbot-apache
Debian Jessy:
Gentoo:
emerge --sync
emerge --update --deep --with-bdeps=y @world
emerge -av app-crypt/certbot-apache
Updating Gentoo takes a lot of time because new packages need to be built from source. If you don't want to update your whole system avoid running first 2 commands.
Fedora:
sudo dnf upgrade
sudo dnf install python-certbot-apache
RHEL/Cent OS:
sudo yum update && sudo yum upgrade
sudo yum install python-certbot-apache
Other UNIX-like systems (let's call this method "alternative"):
mkdir ~/certbot
cd ~/certbot
wget https://dl.eff.org/certbot-autochmod a+x certbot-auto
sudo ./certbot-auto
In a case of using the alternative method, later on, make sure to run certbot-auto with an absolute path.
Find the path:
Possible paths could be:
/usr/bin/certbot-auto
/usr/local/bin/certbot-auto
We'll be using /usr/bin/certbot-auto in this tutorial.
Setup Apache Plugin
Depending on your operating system you will have to use one of 3 commands: letsencrypt, certbotor certbot-auto
For the purpose of this tutorial, we will use letsencrypt.
Since parameters are the same for each of the command, simply change letsencrypt to certbot or /usr/bin/certbot-auto when applicable.
Automatic Setup (Method 1)
The apache plugin automates all of the tasks of setting up SSL for your websites.
If you feel like setting it up manually, please skip this step and move to the method 2 instead.
sudo letsencrypt --apacheManual Setup (Method 2)
Let's say our web server runs 3 websites for which we want to setup SSL: freedomnode.com, mariodian.com, segwit.freedomnode.com
We will need to obtain and install certificates for each of them separately.
sudo letsencrypt --apache -d freedomnode.com -d mariodian.com -d segwit.freedomnode.comTest
After installing certificates for your website using either method, open your browser, go to https://yourdomain.com and click the lock icon next to the URL.
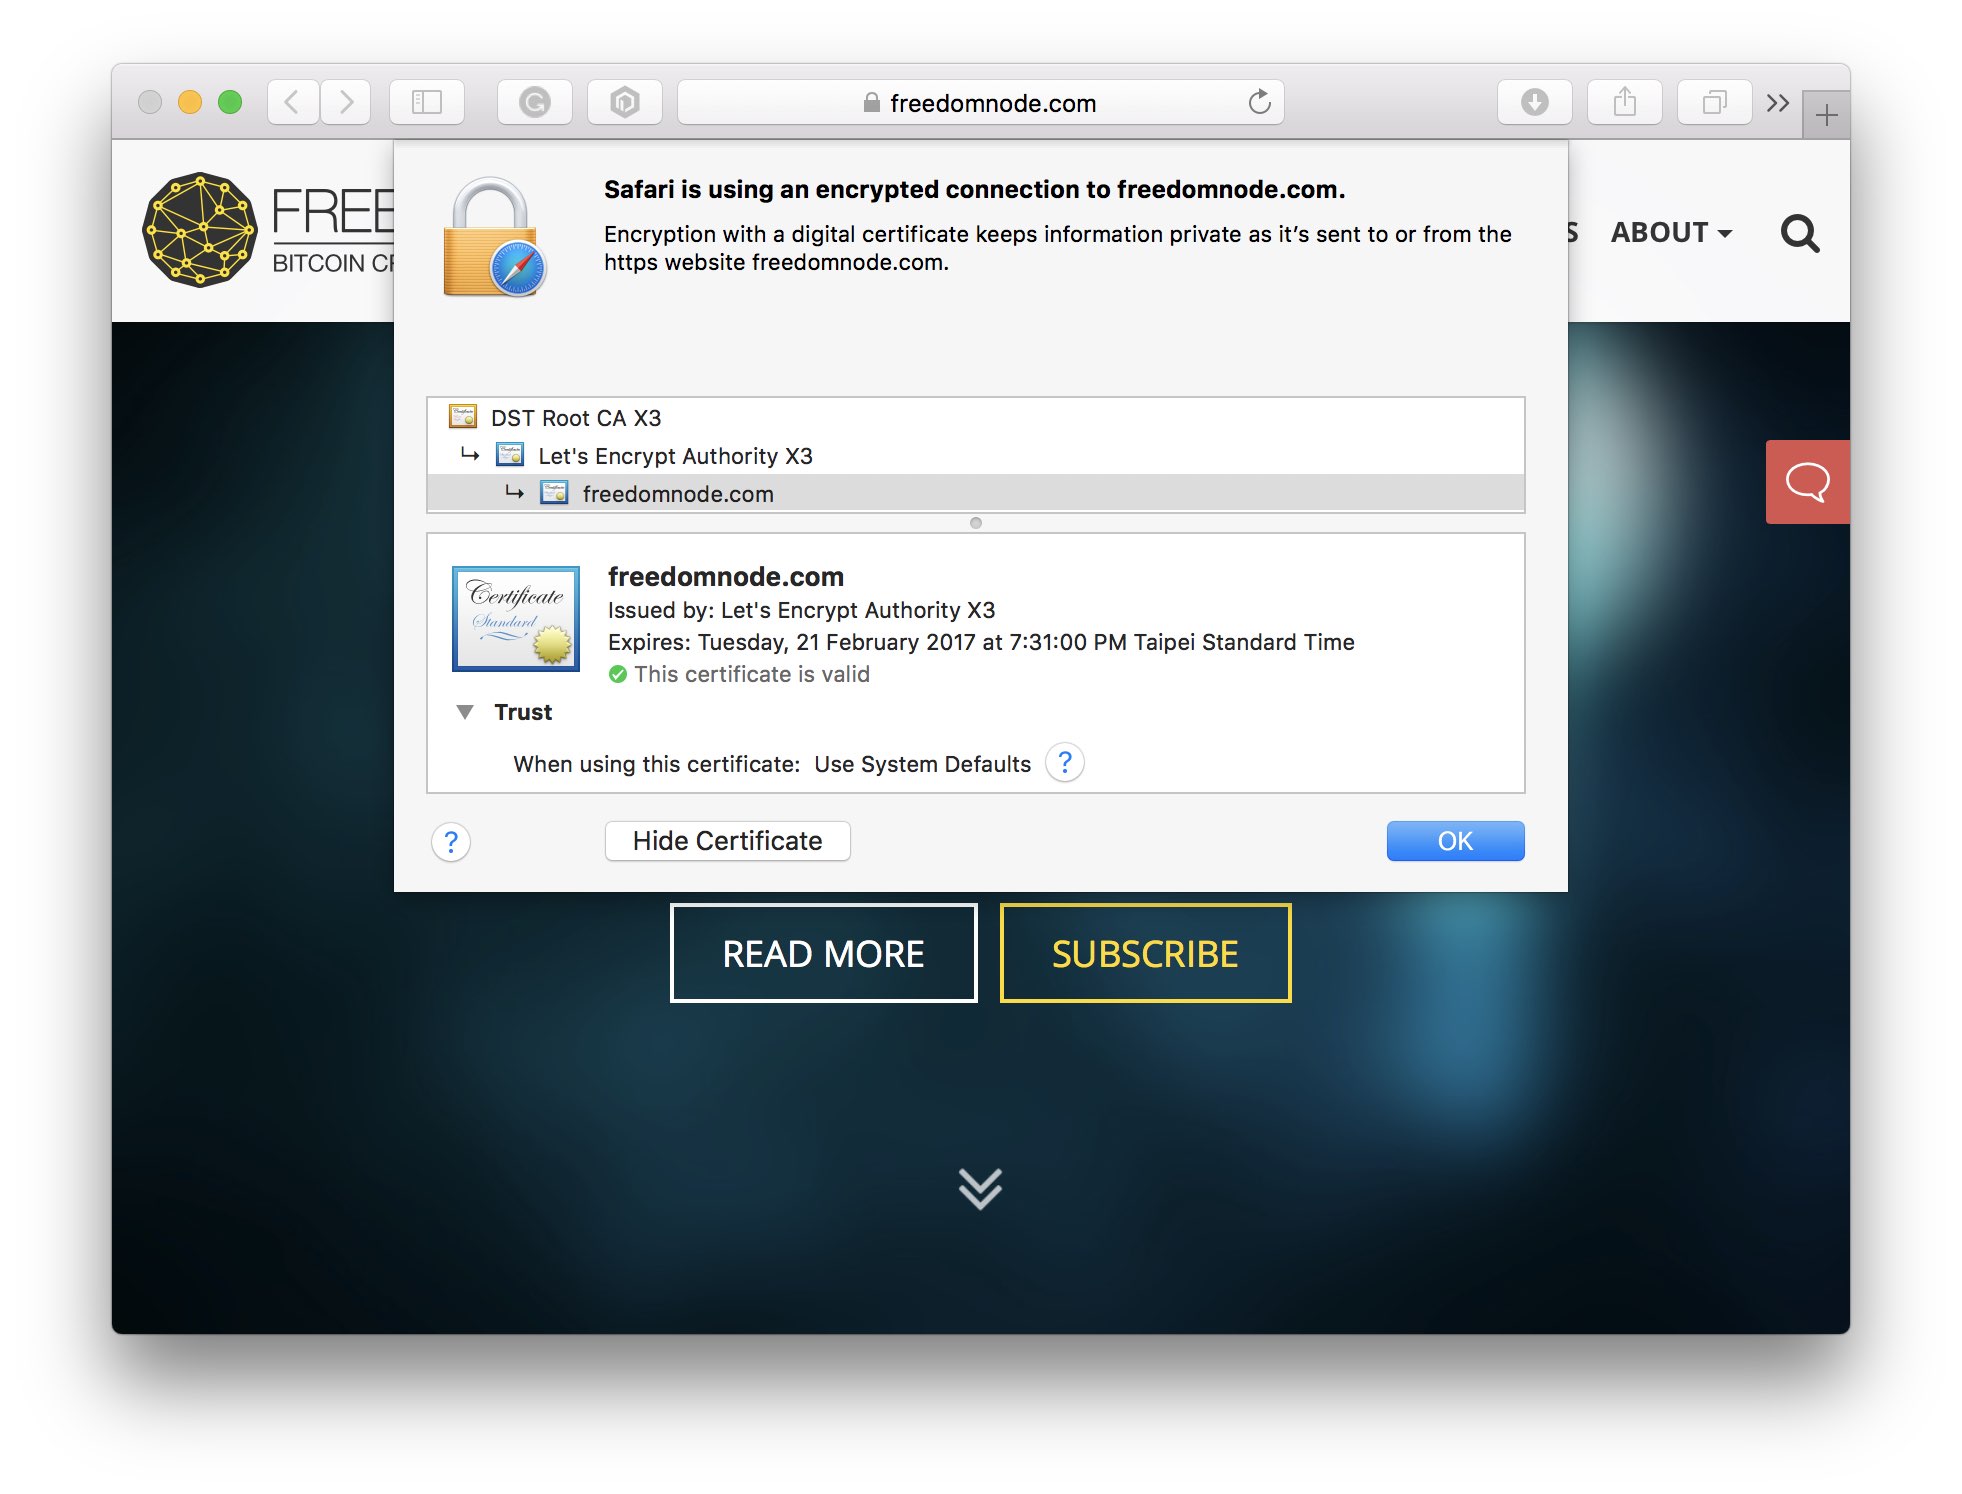
You'll be shown details of the certificate such as its issuing authority (Lets' Encrypt) and expiry date.
If you can't load the website or your browser gives you a "can't verify identity" error you may need to restart your web server.
On most Linux distributions running the following should do the trick:
sudo service apache2 restartIf the above command doesn't work, try running:
sudo /etc/init.d/apache2 restartIf an error occurs you may need to change apache2 to httpd for above commands.
As a last resort, run:
uname -aand copy and paste it to the comments section below. I'll send you the right commands based on your Linux distribution.
Automatic SSL Renewal
Let's Encrypt issues SSL certificates for 90 days only.
They need to be renewed before the expiry date otherwise our websites will stop being accessible via https.
Let's test whether our certificates can automatically be renewed first:
sudo letsencrypt renew --dry-run --agree-tos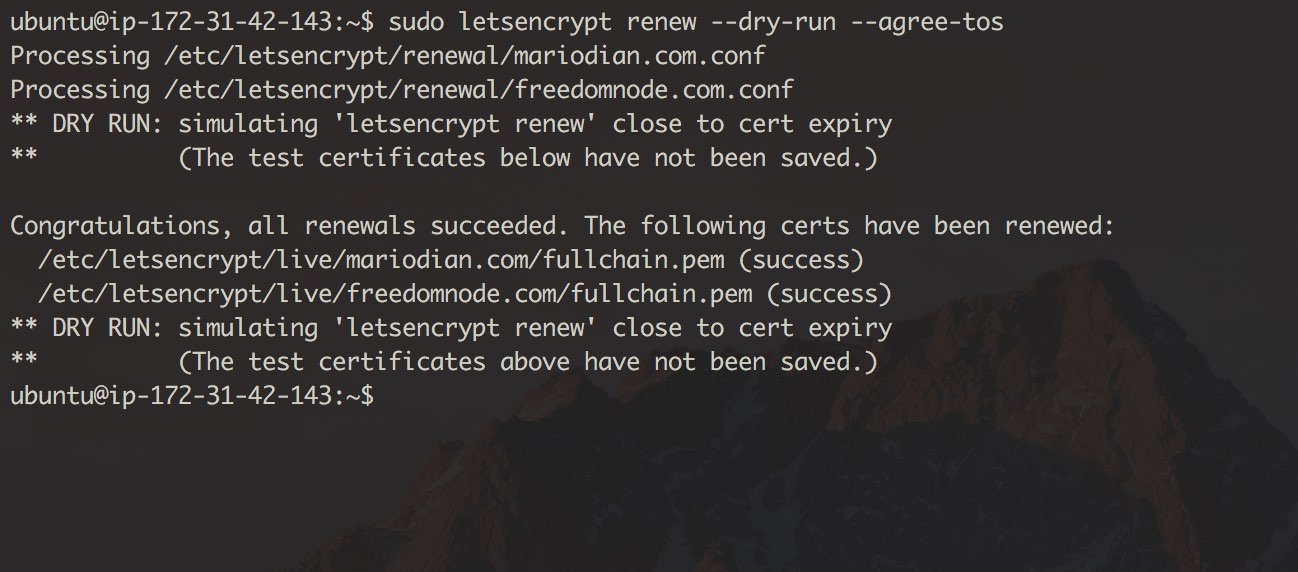
If you get "Registering without email!" error your certificates can still be automatically renewed. Simply ignore the message and move on to the next step.
Open crontab (as root) for editing:
sudo crontab -eadd the following command:
30 2 * * * . /root/.profile; /usr/bin/letsencrypt renew >> /var/log/letsencrypt/letsencrypt.logsave your changes and exit the editor.
The above line tells cron to execute our command every morning at 2:30am. However, it will only renew our certificates when they are about to expire.
Following the EEFs recommendation, you may want to run it twice a day instead. Let's run at 6:30am and 6:30pm then:
30 6,18 * * *You could enhance the Cron job by telling the script to restart apache after certificates were renewed by adding --post-hook "service apache2 restart":
30 6,18 * * * . /root/.profile; /usr/bin/letsencrypt renew --post-hook "service apache2 restart" >> /var/log/letsencrypt/letsencrypt.logCertificate Revocation
In case you made a mistake setting up a certificate or you just no longer want to use it, you may revoke it:
sudo letsencrypt revoke -d freedomnode.com --cert-path /etc/letsencrypt/live/freedomnode.com/cert.pemPlease note that the certificate path and name may differ. Edit it according to your environment.
After the certificate is revoked, your website will no longer be accessible via https.
I hope you find this tutorial useful. Please share it with your friends that haven't secured their websites yet. There's no excuse to leave your users unprotected.
In case you run into any problems, shoot me a comment below and I'll get back to you ASAP.